
If you suspect this tutorial will contain phrases like “this weekend my hubby and I” or “first I had someone install the” – you are mistaken. Don’t worry, though, I’m going to walk you through every single step to build a giant kick-ass pegboard for your craft room or office. And the best part? You can do it all by yourself and (prepare to love me) for less than $50. Because this is a woman’s guide to building a pegboard.
Because that’s exactly what I did. With no help from anyone but my new personal shopper guy at Home Depot. While my husband watched football… and my sons went rock climbing… and my pug (well, does moral support count?)
I am woman.

Let’s get started, shall we? I researched tons of articles and videos on how to do this, and I even flirted with the idea of buying expensive kits online. In the end, however, going to Home Depot with a basic understanding of the process was the best approach. And Scott in the orange apron (my new best friend) helped me select all the materials I needed at the best prices.
(Affiliate links included for your convenience. As an Amazon associate I earn from qualifying purchases. See disclosure here.)
supplies
- one piece of white 4 x 8 pegboard – $18.35
- three 1 x 3 wood strips, 3/4″ thick – $1.52 each
- stud finder – $10.97
- small package of 1/2″ wood screws – $1.94
- various screws (2 1/2″) and drill bits for attaching strips to wall (types of screws needed depend on type of wall studs – I’ll explain more later) – approx. $14
step 1 – furring strips
First of all, just being able to toss that word into a conversation with men will gain you a new level of respect. “Yeah, I installed my furring strips horizontally this time.” What are they? Long strips of wood attached to the wall studs. Once installed, you screw the pegboard onto them. This makes the pegboard more secure and gives you space behind it for inserting hooks and accessories.
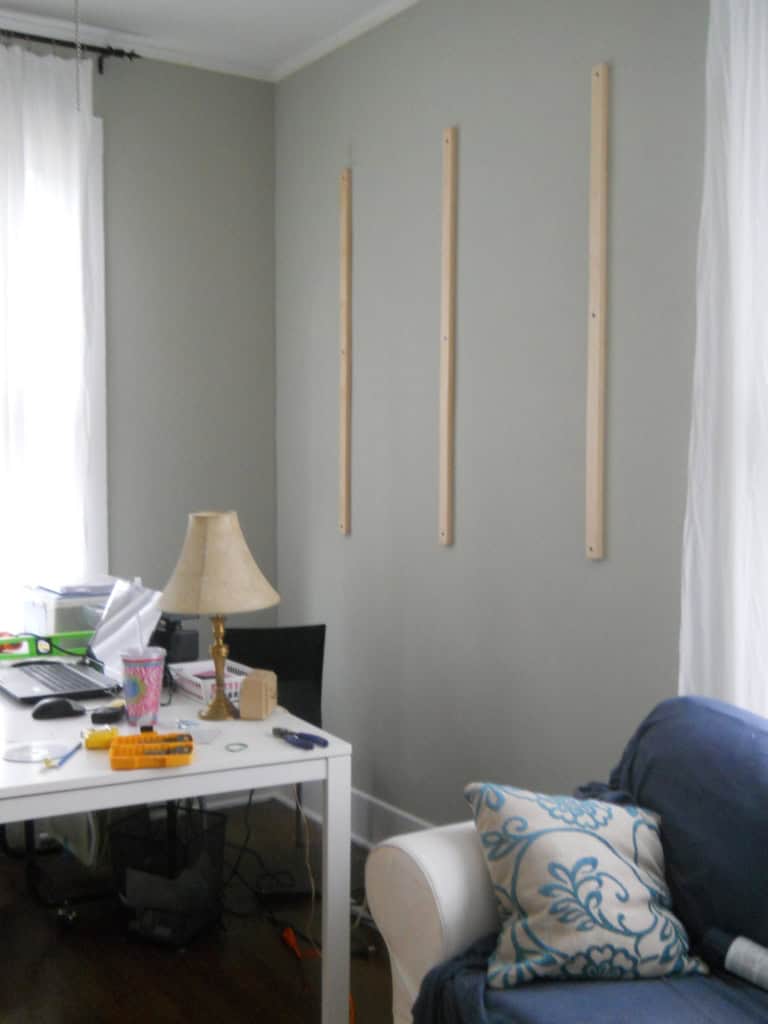
You can place your furring strips in a variety of ways. You can hang them vertically, as shown below:
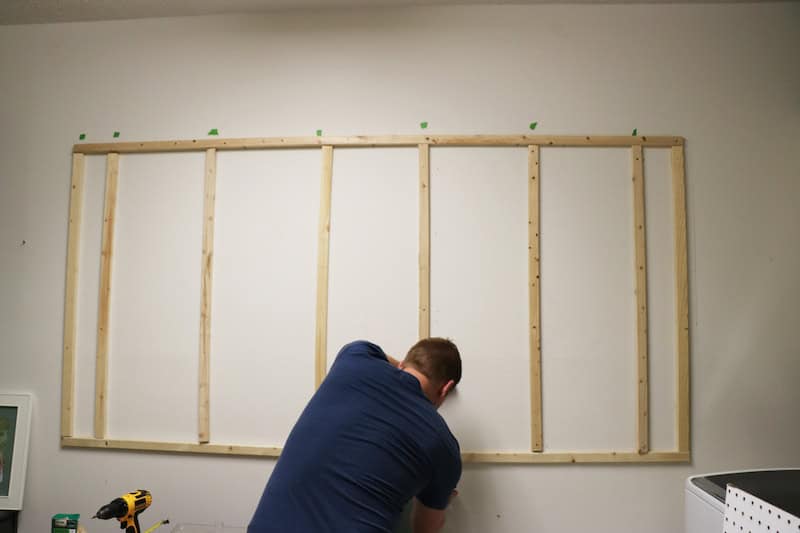
You can use both vertical and horizontal furring strips to create a frame for your pegboard, as shown below. (Don’t be distracted by the male in the photo. He’ll be golfing when you need him.)
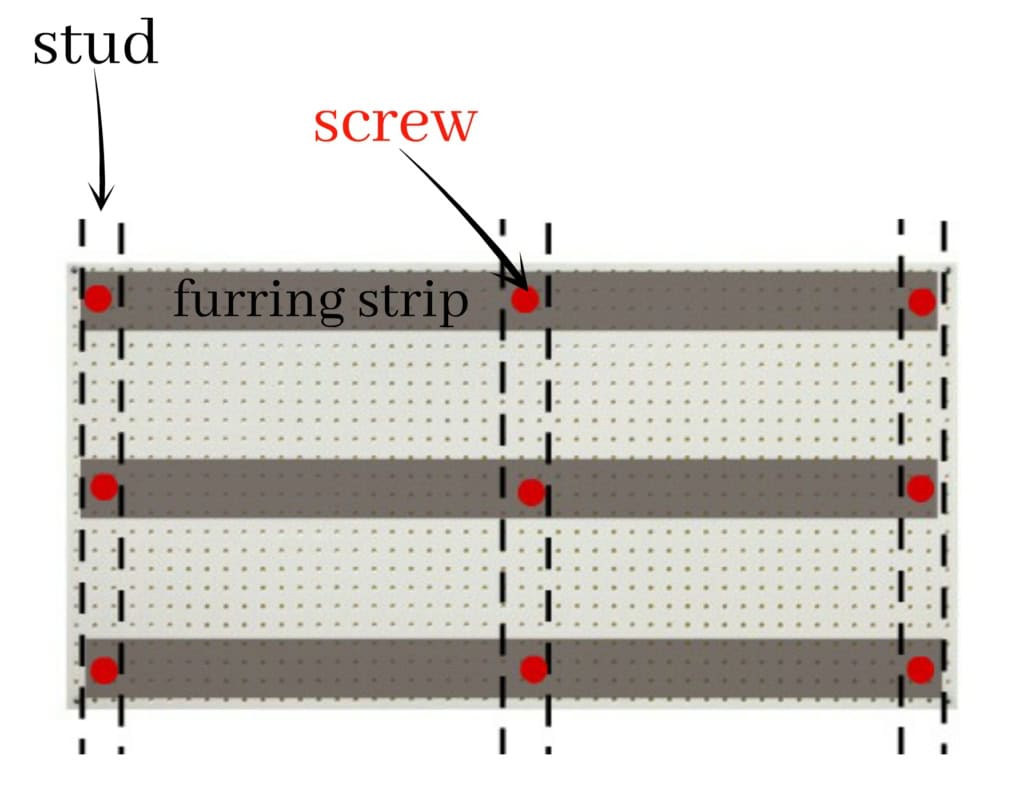
I decided to only use horizontal furring strips, and only three were needed for a 4′ x 8′ pegboard.

Here’s how to do it:
- First of all, a 4′ x 8′ pegboard is a great size, because not only are pegboard sheets sold in that exact size but wood (furring) strips often come in 8 foot lengths. No cutting!
- Next, use a stud finder to locate the studs, then mark them off with pencil.
- Decide where you want to hang your pegboard. Then measure and mark the side, top and bottom placements with pencil. (It’s easier to make a lot of marks, then touch up with paint once finished!)
- Place one furring strip across the top of your pegboard area, one across the bottom, and one in the middle. Make sure they are level, then screw them into the studs closest to the left side, right side, and middle.
The down and dirty inside scoop:
It’s best to have a friend or husband help hold the boards while you attach them, but if your experience has been that men are not dependable (oops, did I just say that), then improvise. I first held each furring strip up and used the level app on my phone to make sure it was even. Then I made a placement line with a pencil.
Using anything available to help prop the board up (I used a large fabric roll!), align it with the placement lines and screw it into a stud. If a 2 1/2″ wood screw attaches to the stud properly, you’re in business. Continue until all three strips are attached.
Whoa. What if the screw just won’t go into the stud? Then you need to determine what type of studs you have. (I’m not even touching that last sentence.) I installed my pegboard in my art studio, which is in an old, factory building. I had no idea what type of studs lay beneath that drywall. I ended up buying 2 1/2″ long screws for metal, as well as Tapcon screws for concrete, and a masonry drill bit (with a tungsten carbide tip) designed for concrete. This is important to note: if you hit a snag with regular wood screws, then put the furring strip aside and simply practice drilling into the studs with different screws and drill bits until you find one that works. The pegboard will cover any practice holes you make.
First, I discovered the metal screws would not drill through the studs. Secondly, I tried the Tapcon screws (after making a pilot hole with the masonry drill bit.) This worked, but it took a few minutes for the drill bit to pierce the stud. (It turned out that I was actually drilling through a substance called rocklath, but that’s more technical knowledge than I plan to carry around in my pretty little head. Suffice it to say, the concrete screws worked.)
Important tip:
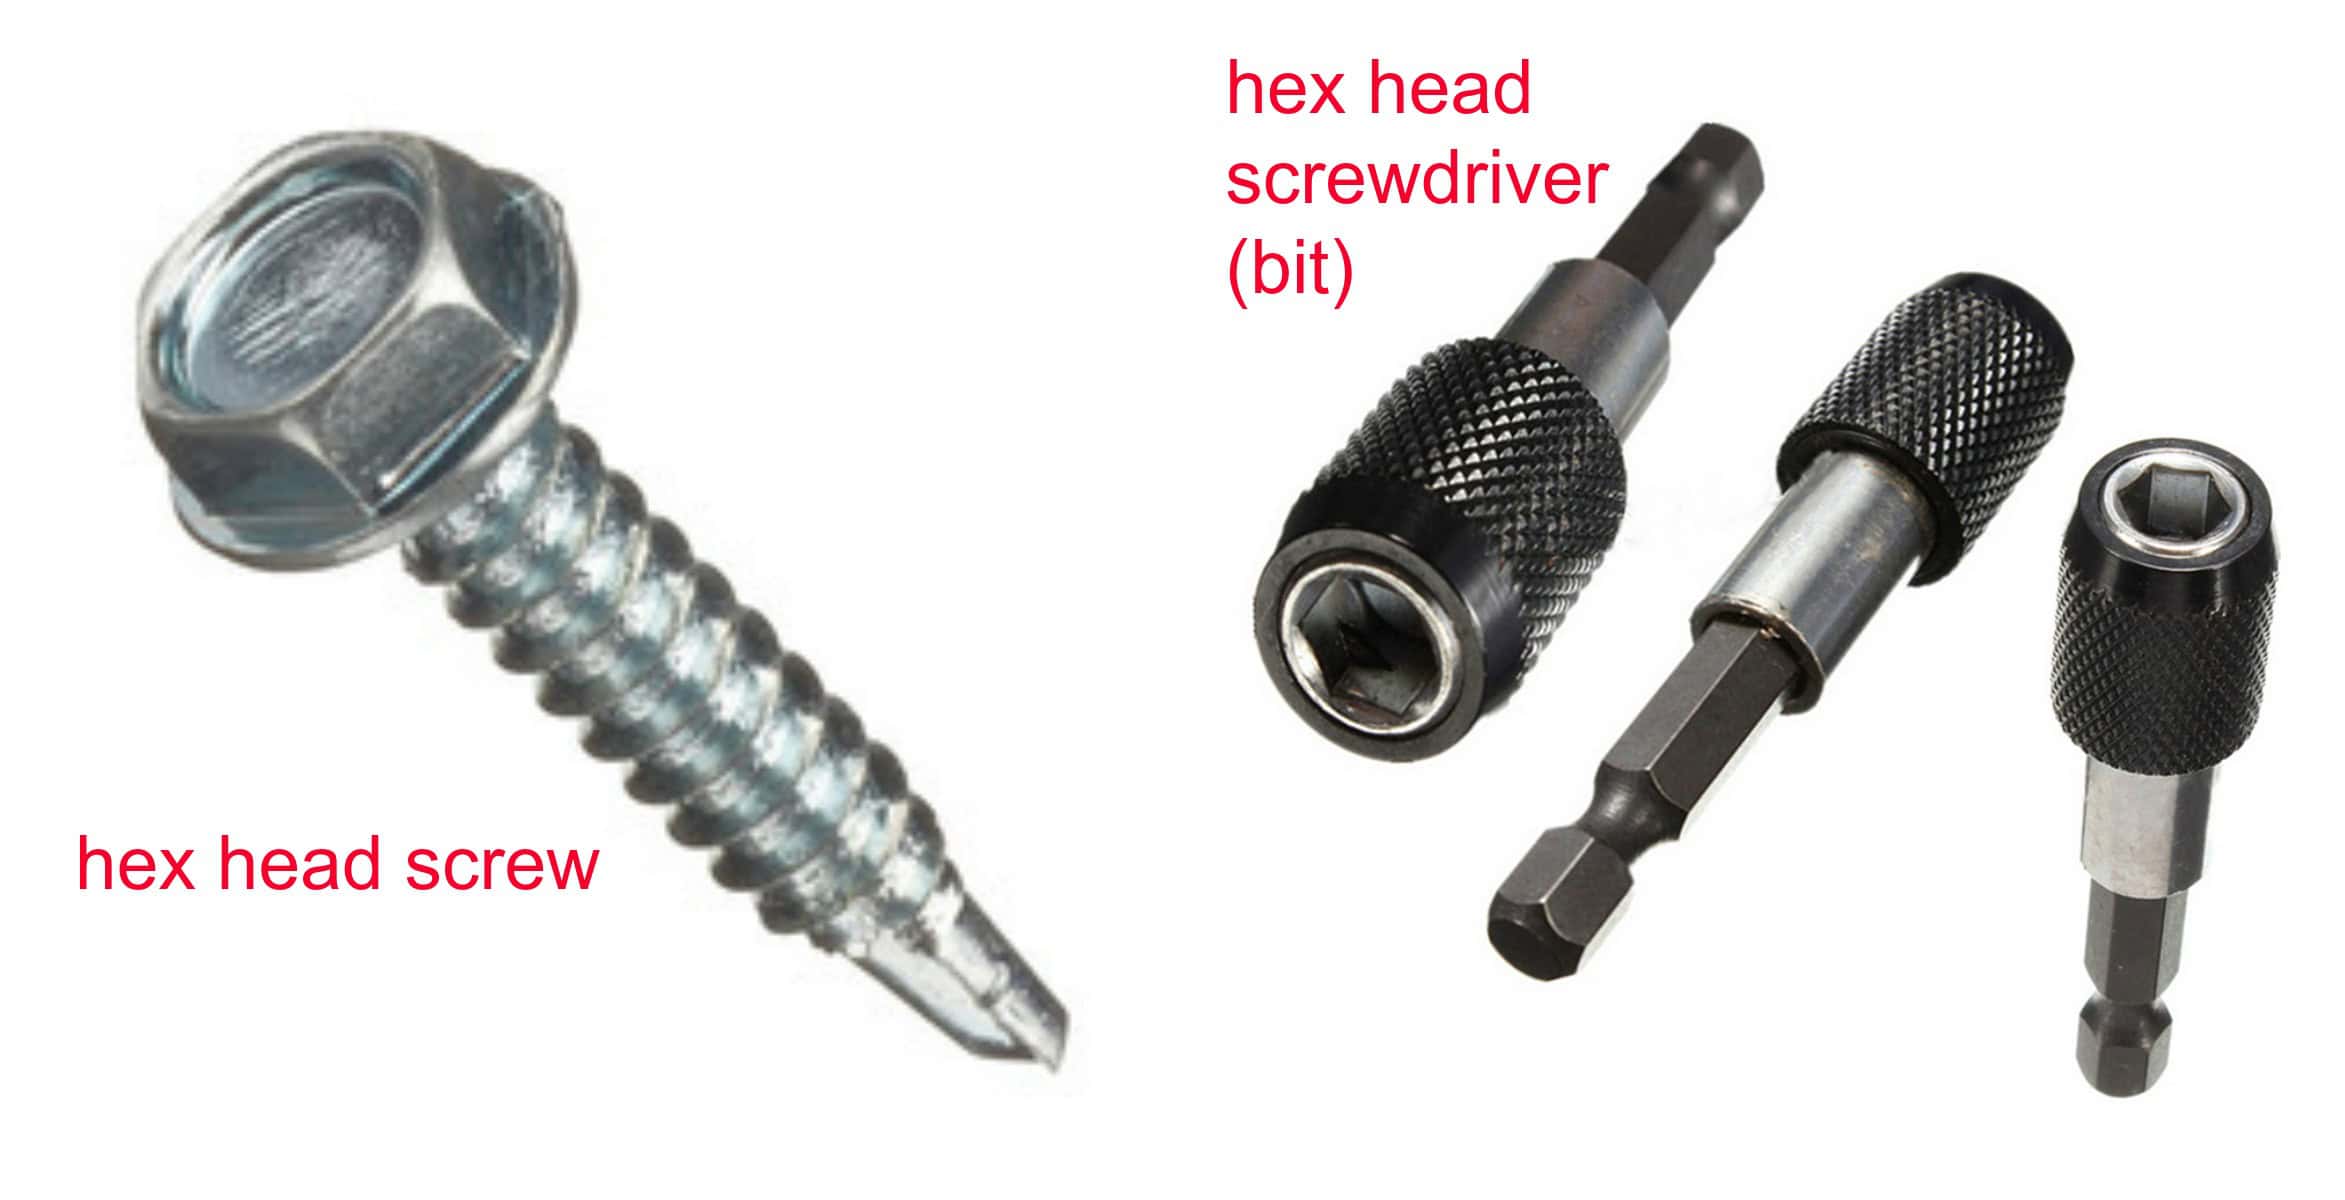
It will make your life much easier if you buy screws that have a 6-headed top, called Hex Head screws (or something like that.) Also purchase a Hex Head screwdriver bit for your power drill. I’m not 100% sure that is the proper name, but I do know these screws will be save you time and several chipped or broken fingernails.
 step 2 – pegboard
After much comparative shopping, I found the best prices for pegboard was at Home Depot. Not to mention, they carry it in white, so I didn’t need to paint. A 4′ x 8′ sheet cost $18.35. Please note: unless you are driving a truck, have them cut it in half. Even then, it was tricky packing the two pieces into my SUV. Best to wear make-up that day, in case you need a male passerby to help. (No shame here.)
You will need a level (just download an app on your smartphone), screwdriver and 1/2″ wood screws for attaching the pegboard to the studs.

step 3 – paint
You can see in the photo above that I made lots of pencil marks on the wall throughout the process. No worries, as it’s easy to touch up the paint. You may also want to paint the entire pegboard a particular color. Need some inspiration?

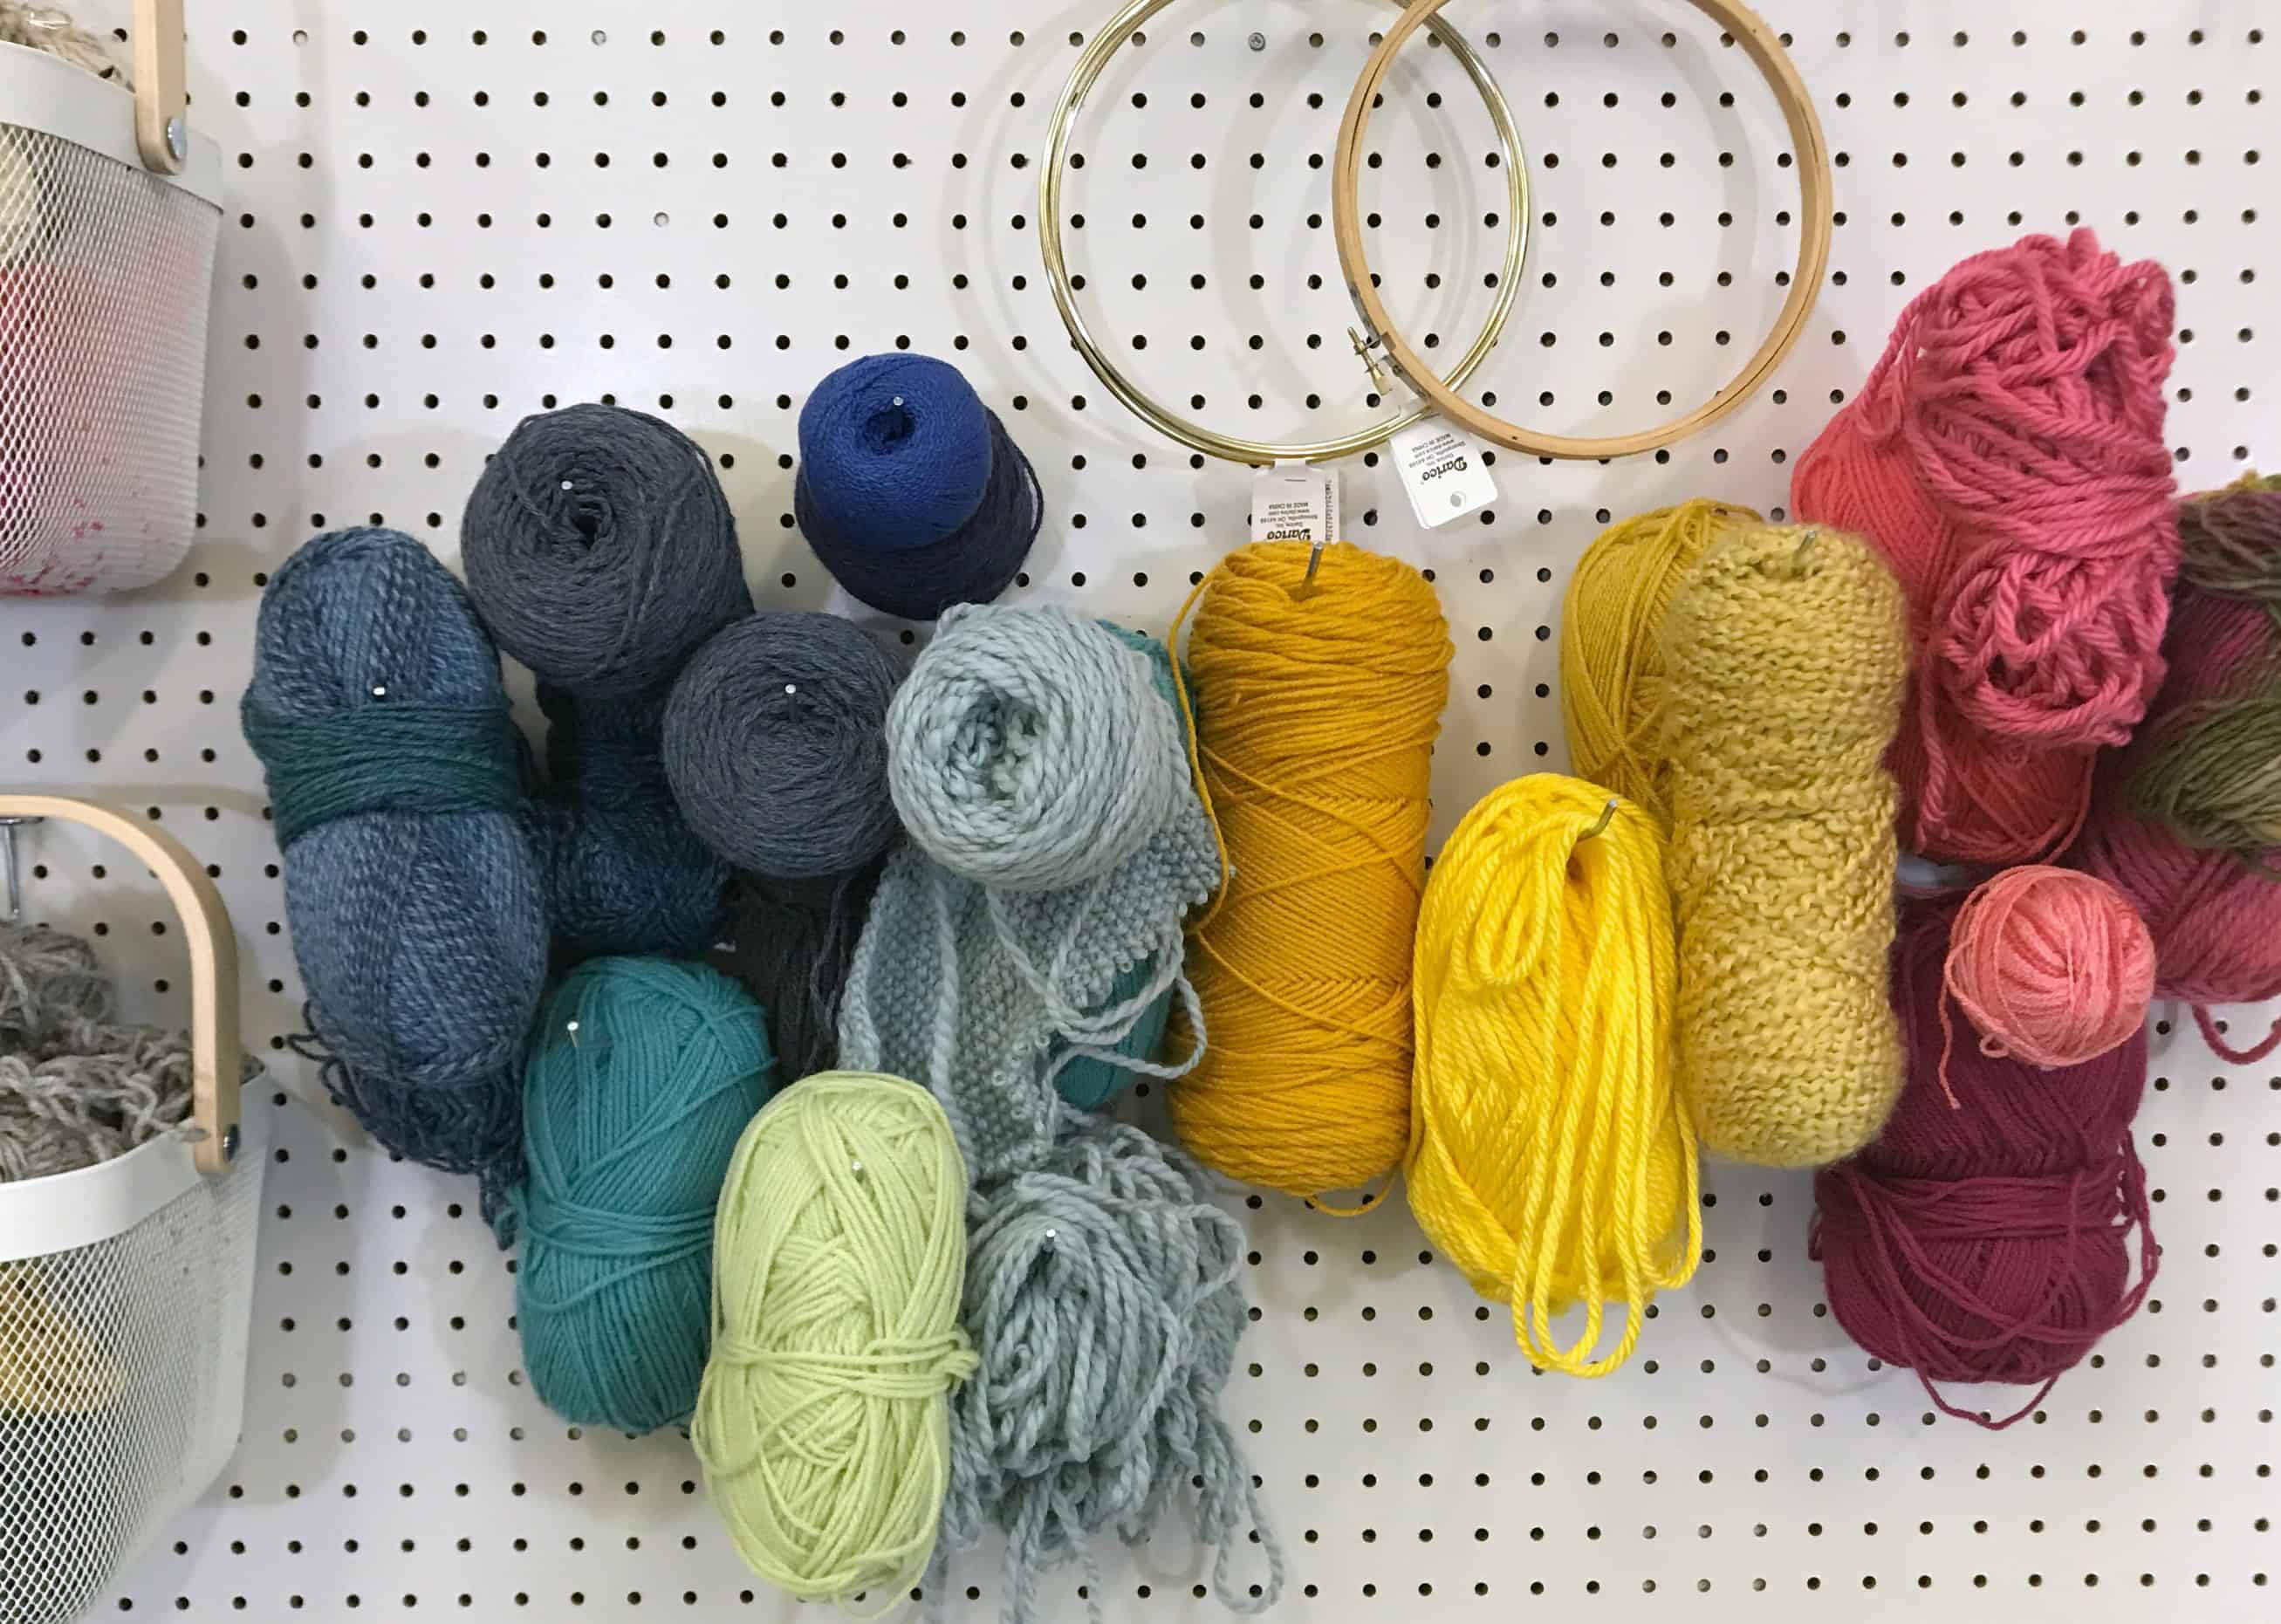
I was torn about which color to use, but the large pegboard above from Oh Happy Day is my absolute favorite. I love the idea of keeping it white and letting bright accessories (thread, yarn) do the talking.
step 4 – accessories
Yay! This is the fun part, and after hanging that baby all by yourself, you deserve to splurge on a few very cool accessories. My suggestion is to buy the Everbilt Pegboard Organizer Kit (43-Piece)![]() at Home Depot and just start hanging your stash. It won’t take long before you have a clear sense of what additional hooks and shelves you’ll need, and then you can really start playing around with arrangement.
at Home Depot and just start hanging your stash. It won’t take long before you have a clear sense of what additional hooks and shelves you’ll need, and then you can really start playing around with arrangement.

It slowly began taking shape…


I’m far from being finished; I still have lots of supplies to unpack in my new studio. However, this is a bad-ass start. A giant 4′ x 8′ pegboard – strong and spacious enough to hold all my art supplies. For $50. That I built myself.

Hello Wendy, your article was great. I’m a 65 yr old artist finally planning a small studio so this was helpful. I did like your jokes as well. Lol
Thanks for this article. It was very helpful. And I love the jokes about men. I felt you were talking about my husband the whole time!
I am curious how you attached the rail that the little white buckets are on in the lower right?
I actually don’t remember and am away from the studio right now. But the rail and buckets were from Ikea, and I probably just easily hung them on there with some pegboard hooks I had on hand. Sorry!
How did you mount the ikea sunnestra rail hanger?
Who is the man putting up the furring strips?
Woah, get you! This is fantastic. (I’m still chuckling about the what kind of studs do you have comment though, I often wonder the same thing!) Hear you roar indeed.
Maybe not the most expensive and glitzy pegboard in the world but I’m pretty proud of it!
Great job! Not to mention it looks very impressive. It’s inspired me to pull out the dresser in my office and hang up a pegboard for easy access to all my supplies.
Thanks! It surprised me how much a pegboard will hold! Great space saver