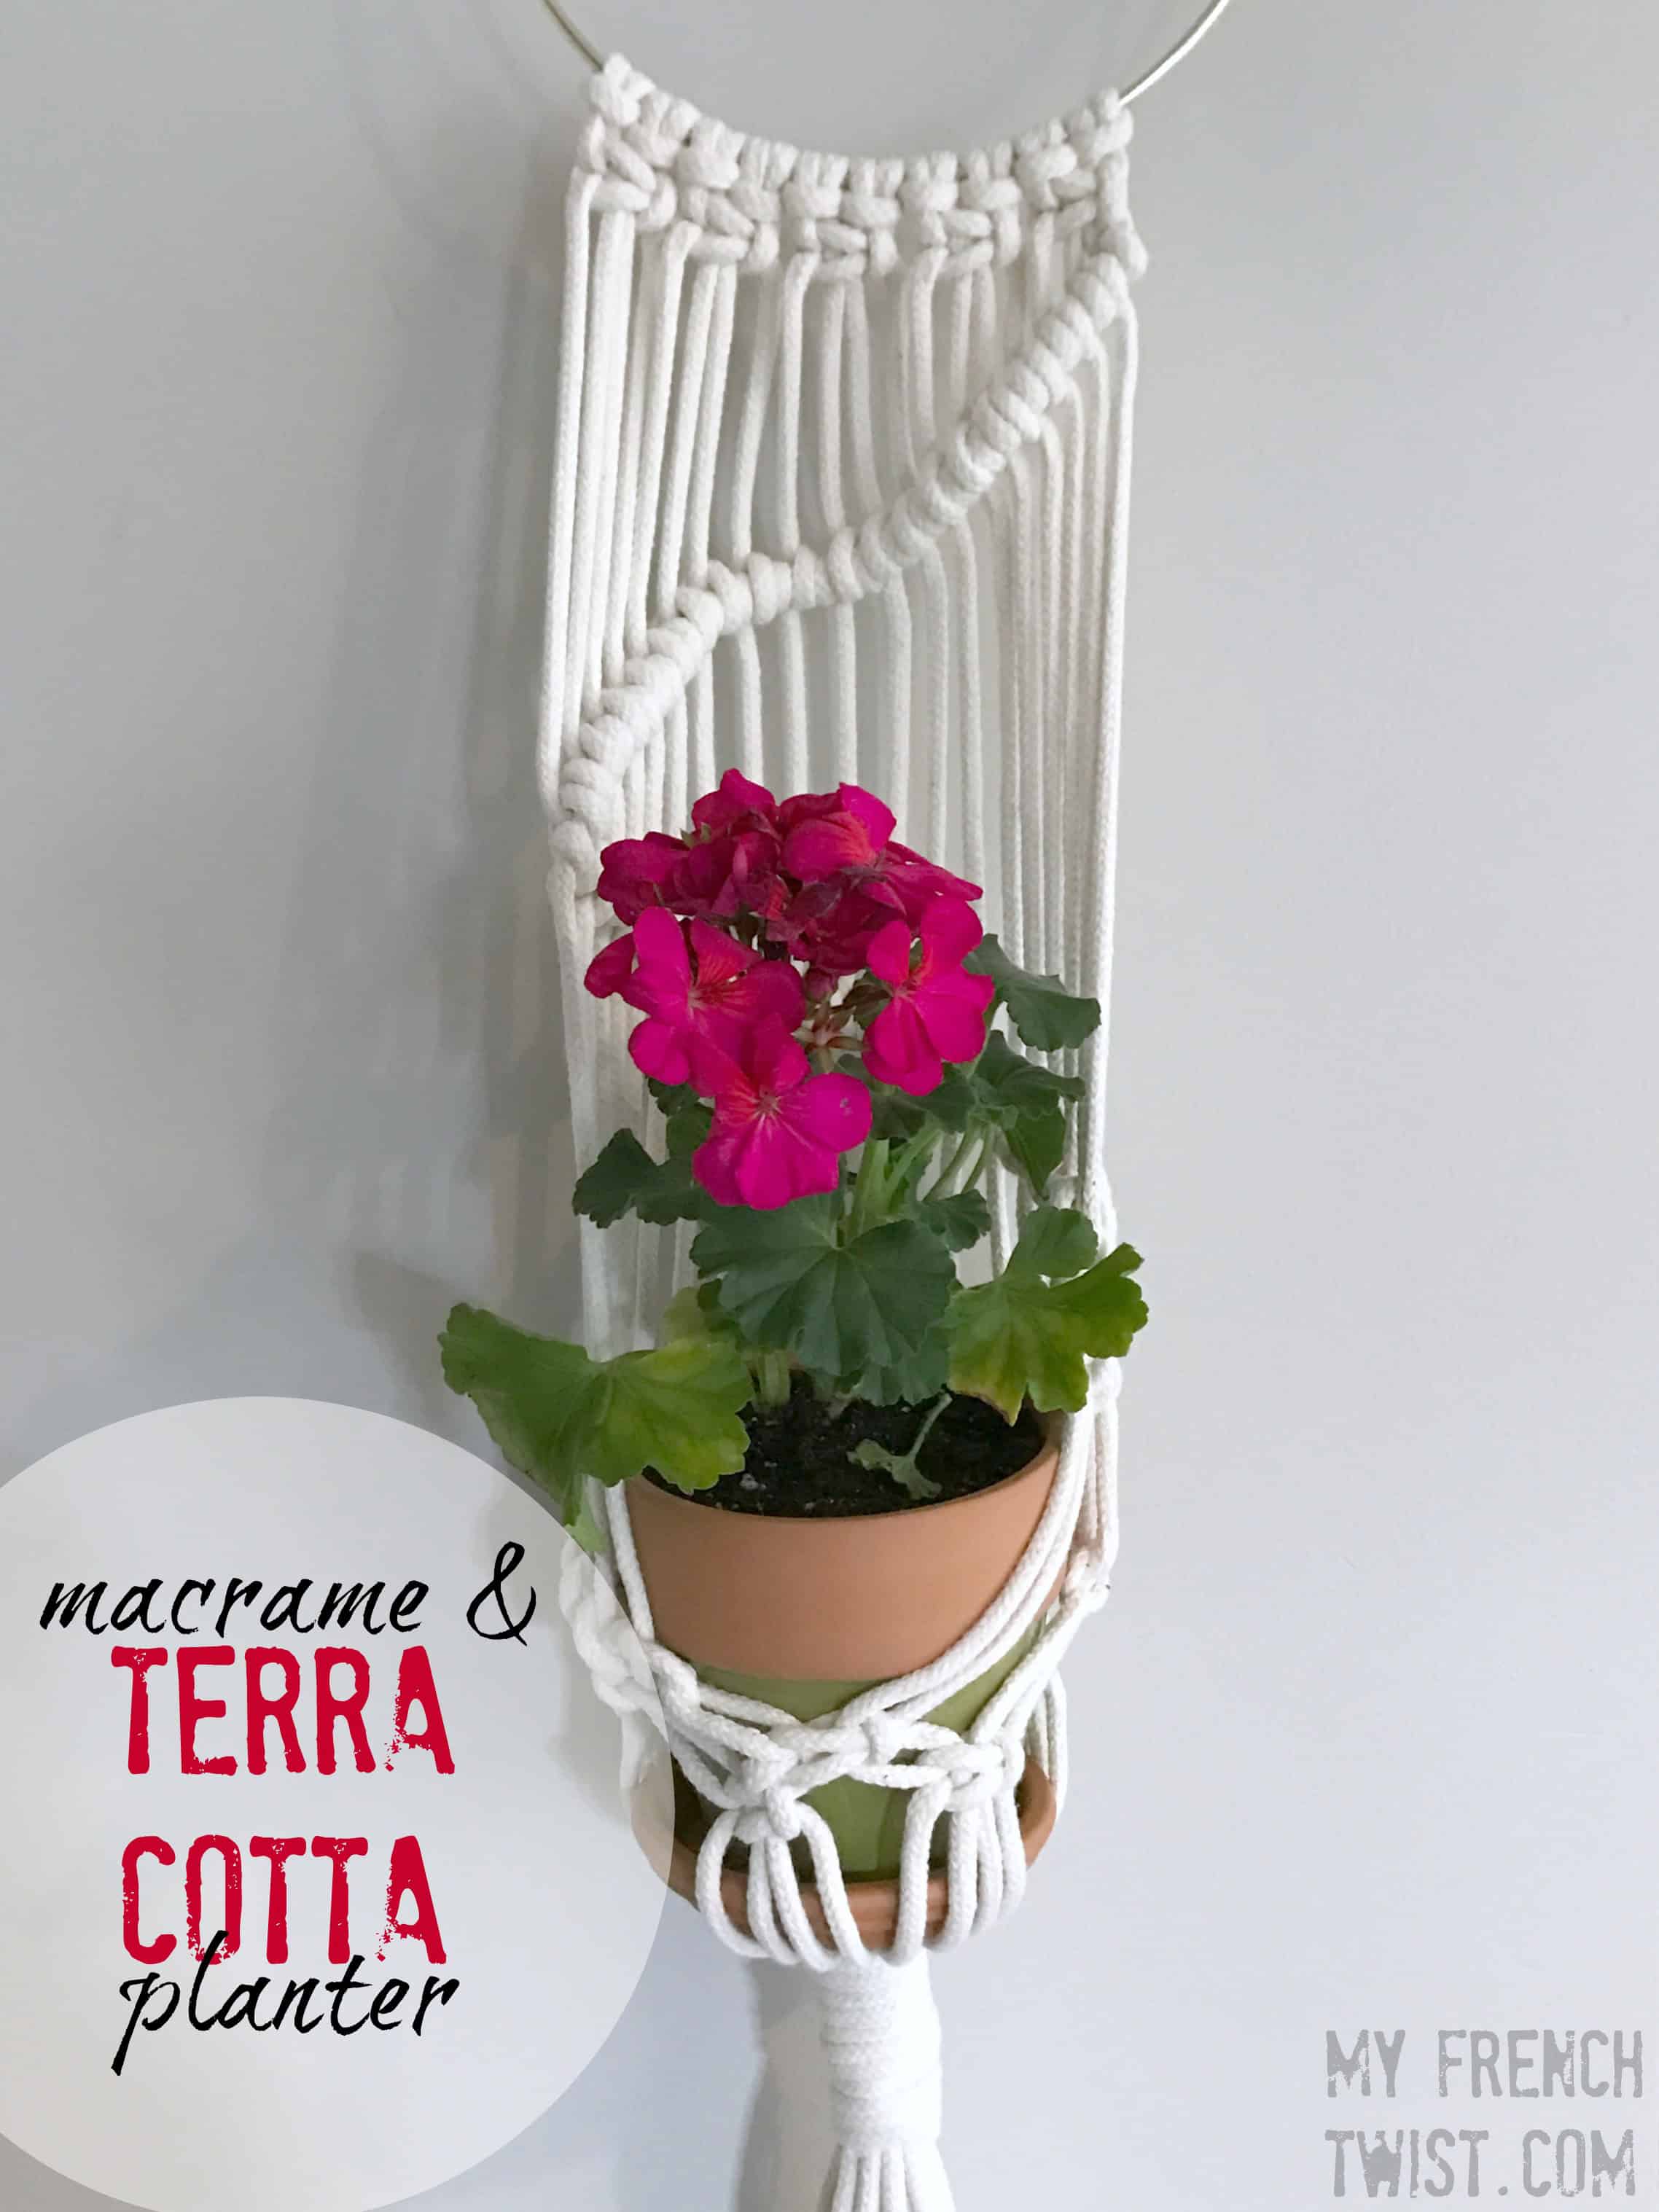

Why a macrame and terra cotta planter? No matter how many beautiful planters appear on store shelves, or how many brightly colored ceramic jars or aged stone urns, the classic terra cotta pot has my heart. There’s nothing more nostalgic than a single geranium in a clay pot.
I’m currently smitten with whimsical macramé planters, so I decided to weave one specifically to hold a single flower pot. And I have to admit, this Let’s Get Hitched planter is my favorite. It’s made with mostly Half Hitch Knots (hence its name), and its simplicity seems a perfect fit for a little garden pot.
(Affiliate links included for your convenience. As an Amazon associate I earn from qualifying purchases. See disclosure here.)
Supplies needed:
- one 8″ gold metal ring
- 10 strands of macrame cord, measuring 10 feet each
- 1 terra cotta pot, no more than 4″ diameter
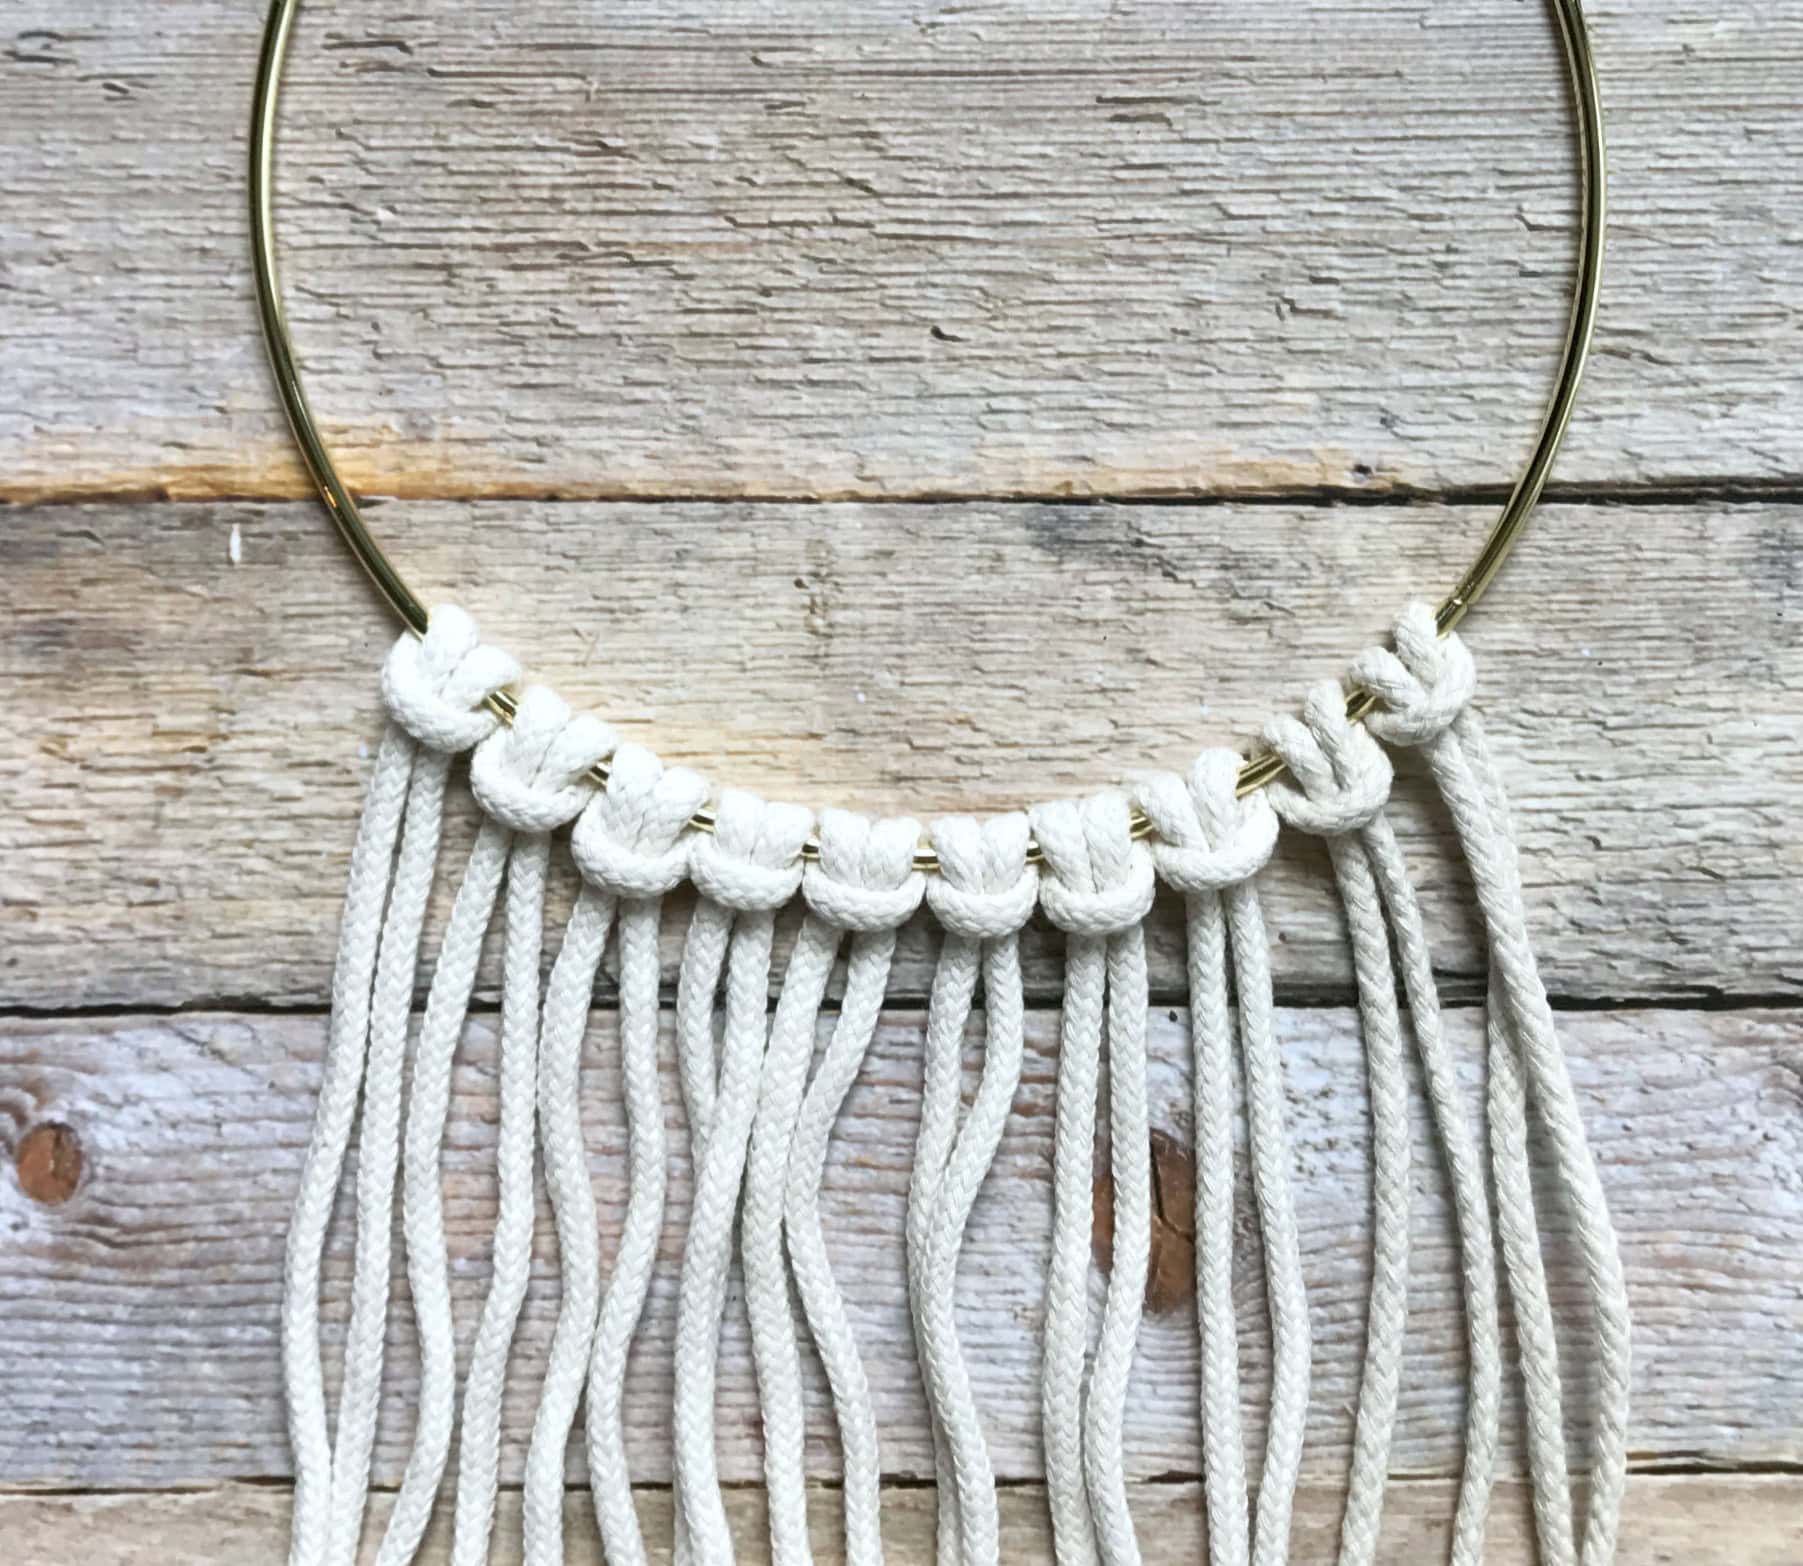
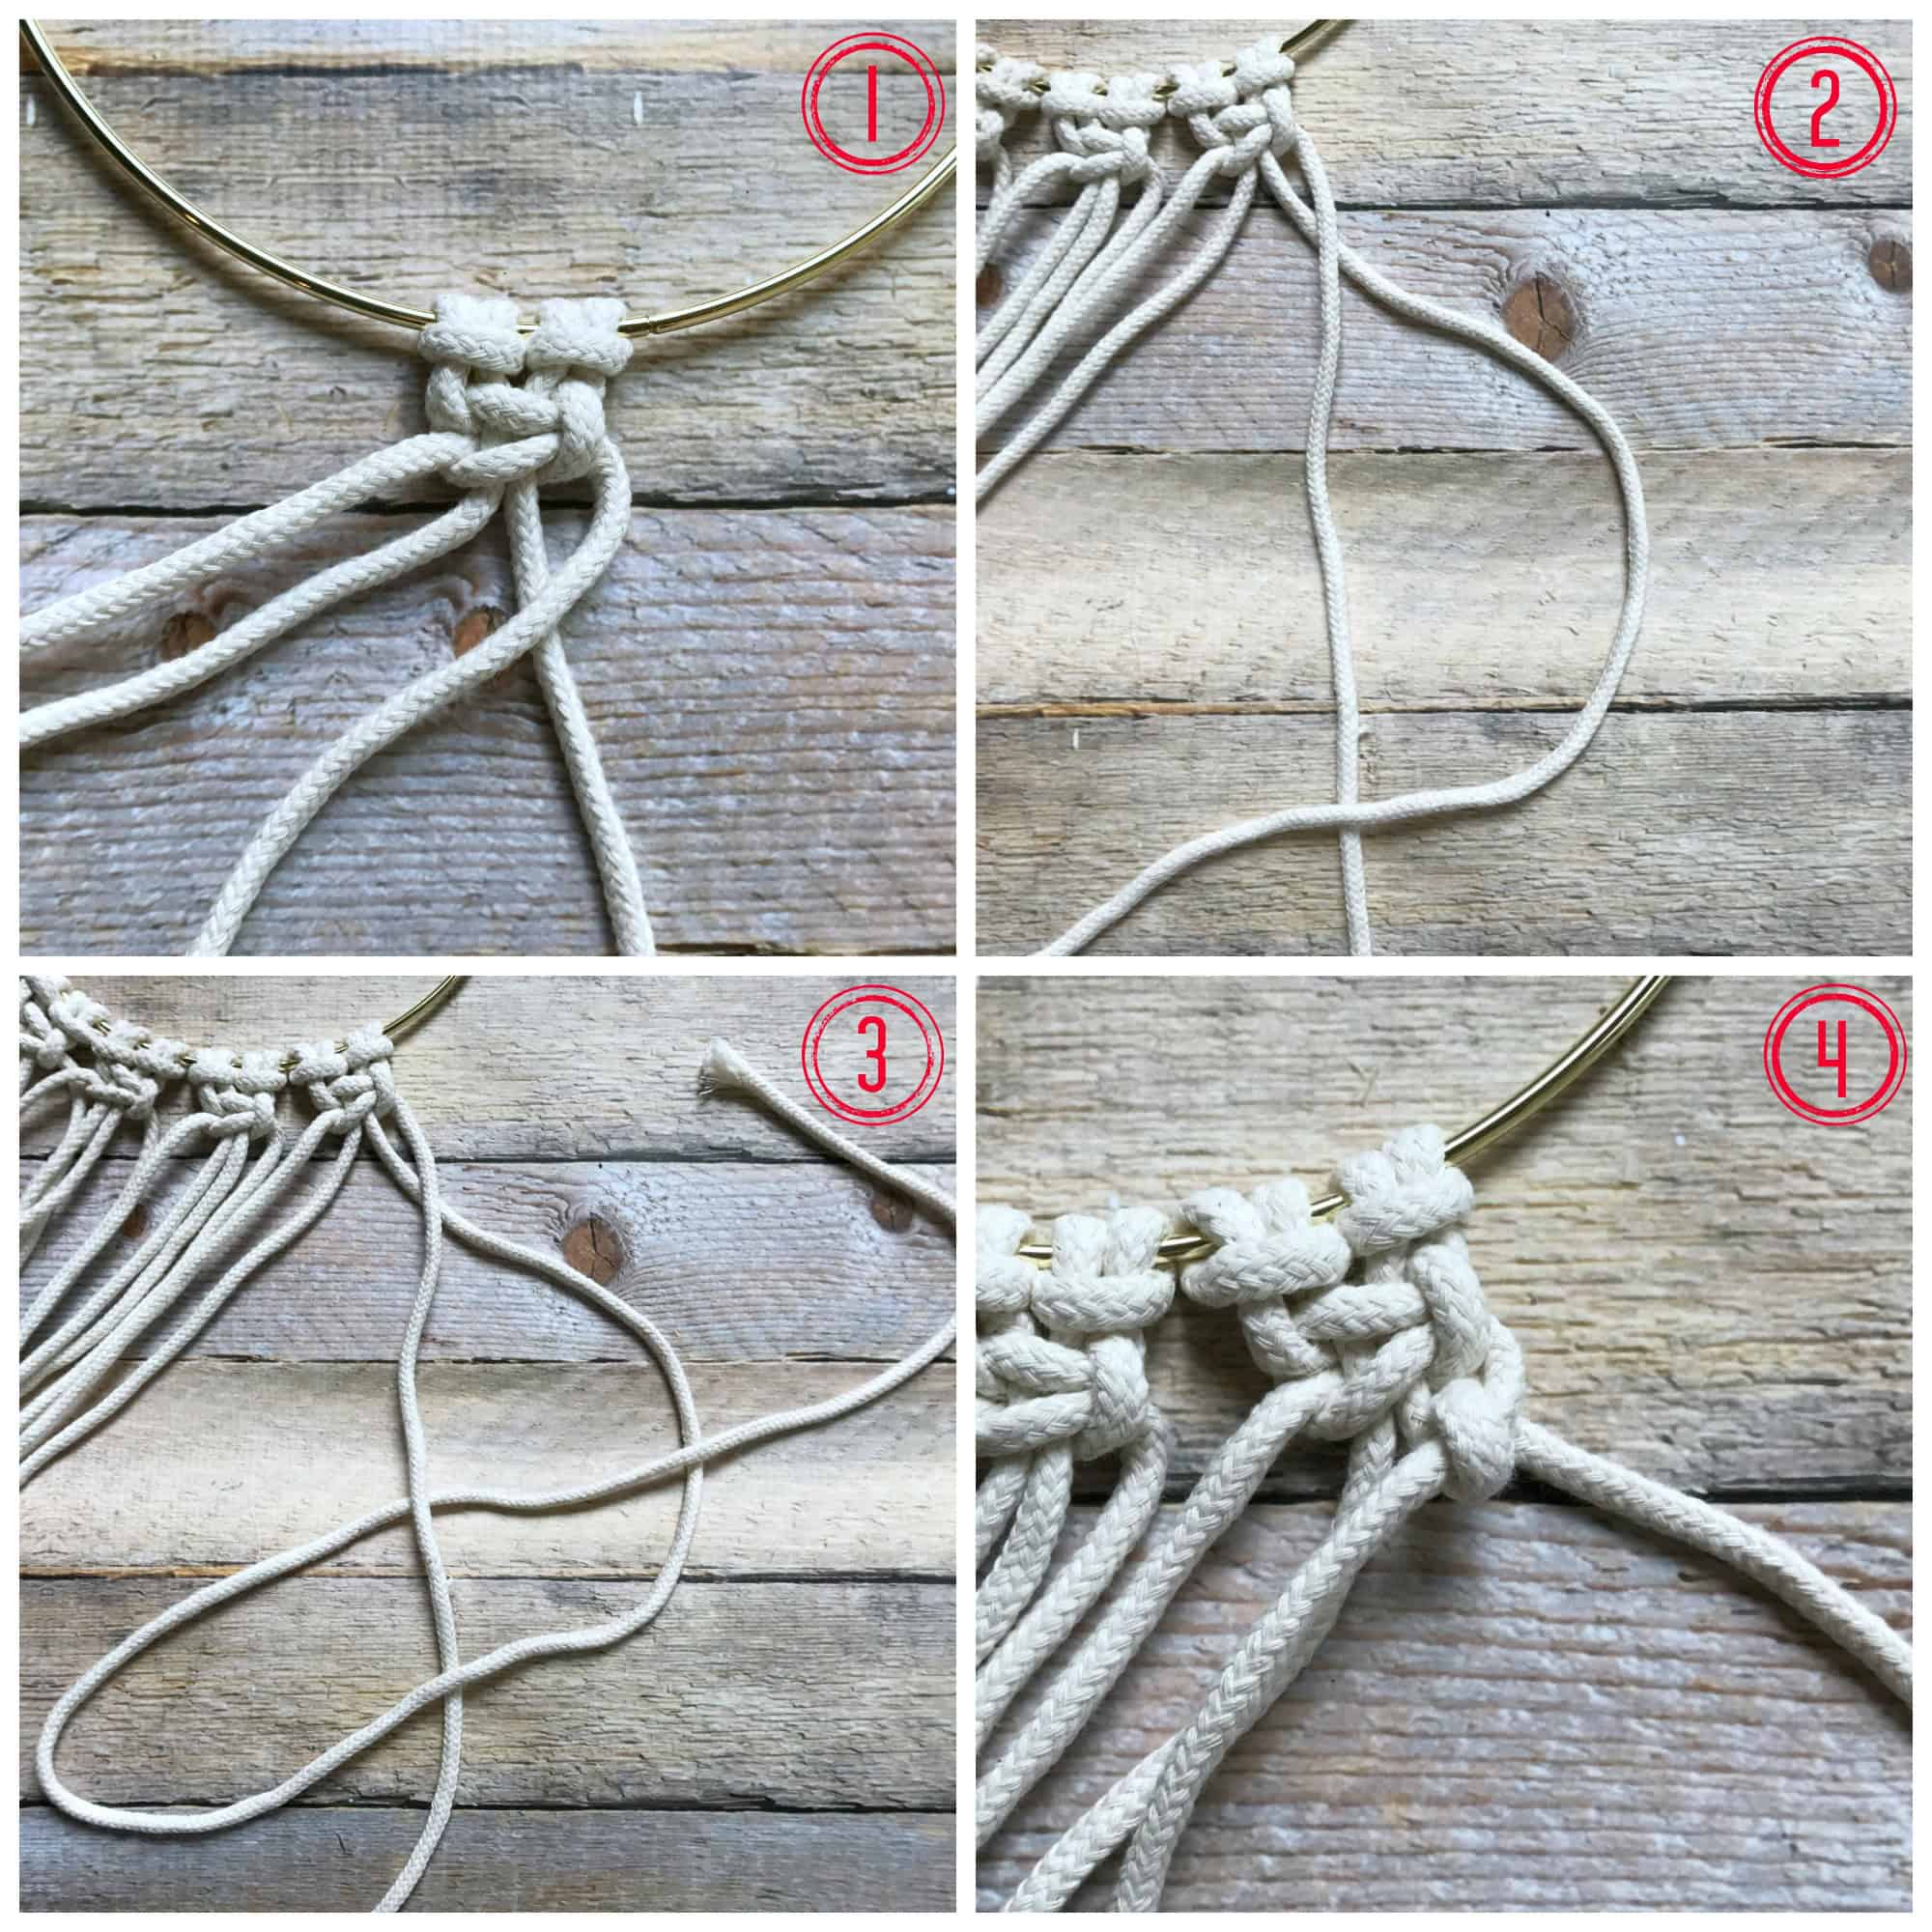
step 1
Cut rope into 10 pieces, each 10 feet long. Tie the cords onto the ring, using the Lark’s Head Knot. (You can follow this tutorial for Lark’s Head Knots.)
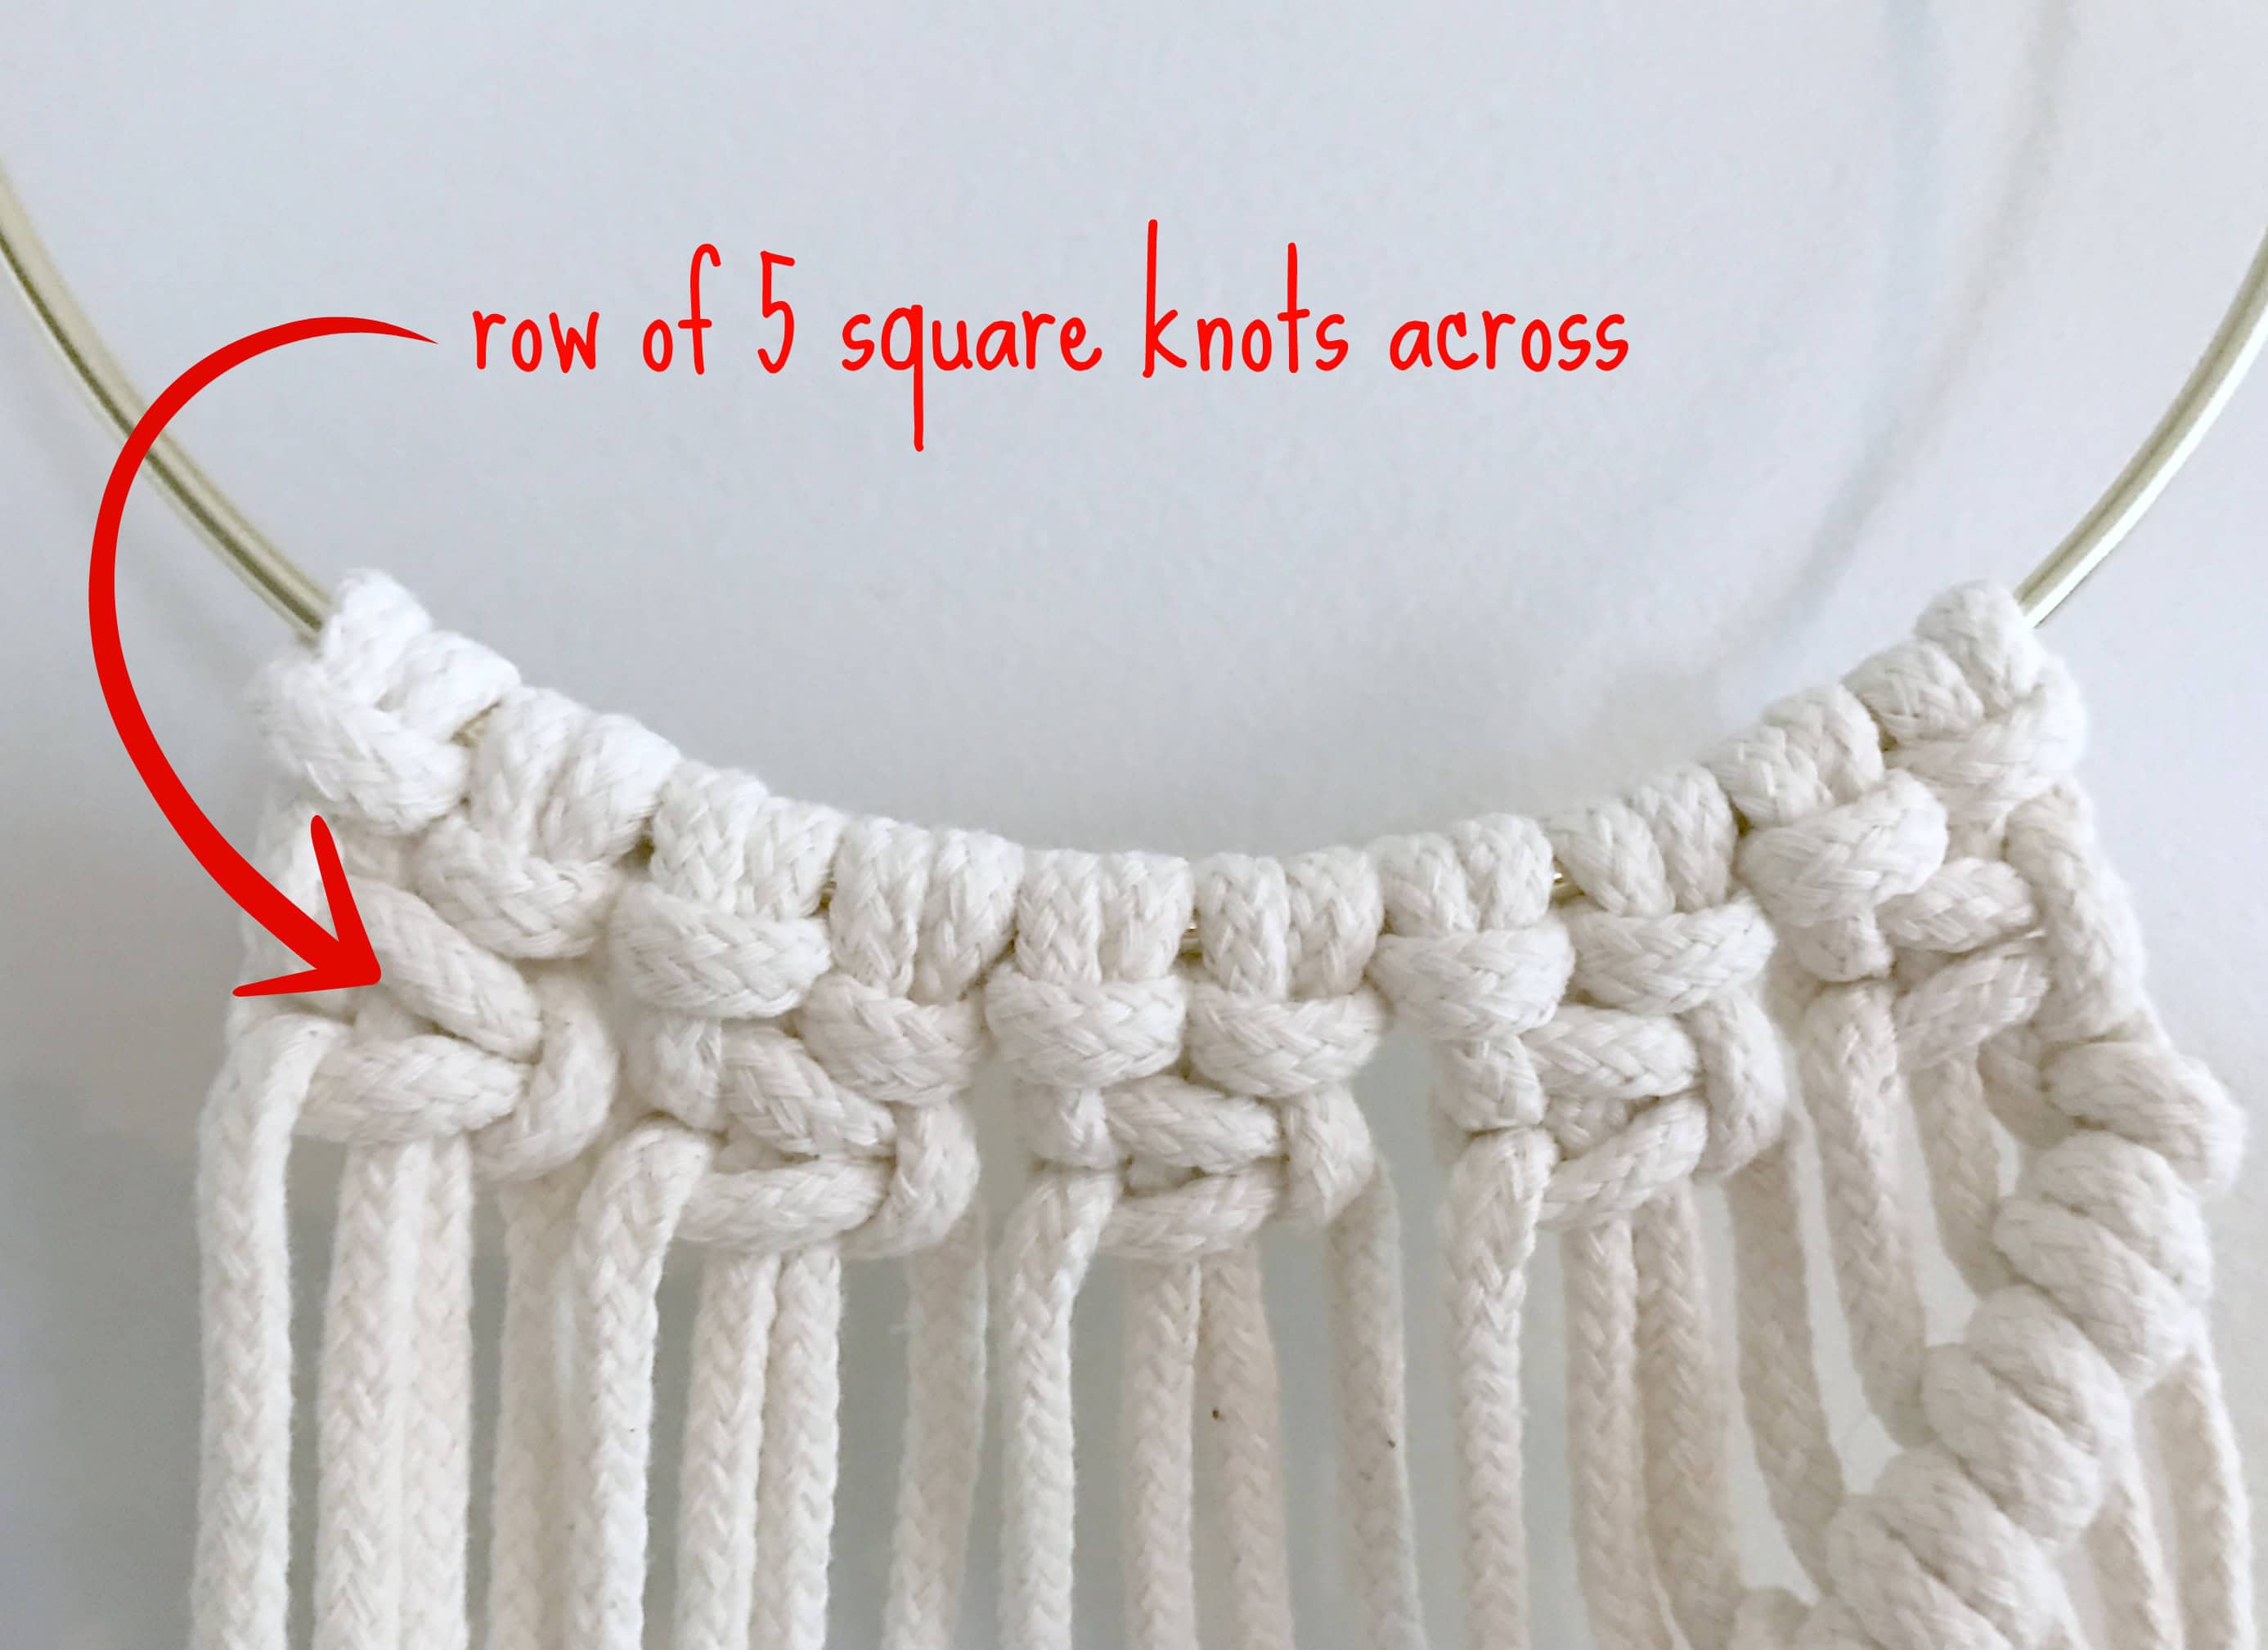
step 2
Now that you have 10 Lark’s Head Knots tied onto the ring, find a place to hang the ring while working. (I used a doorknob and sat on the floor.)
For the first row, start with the 1st cord and create five Square Knots. (You can follow this easy tutorial for Square Knots.)
step 3
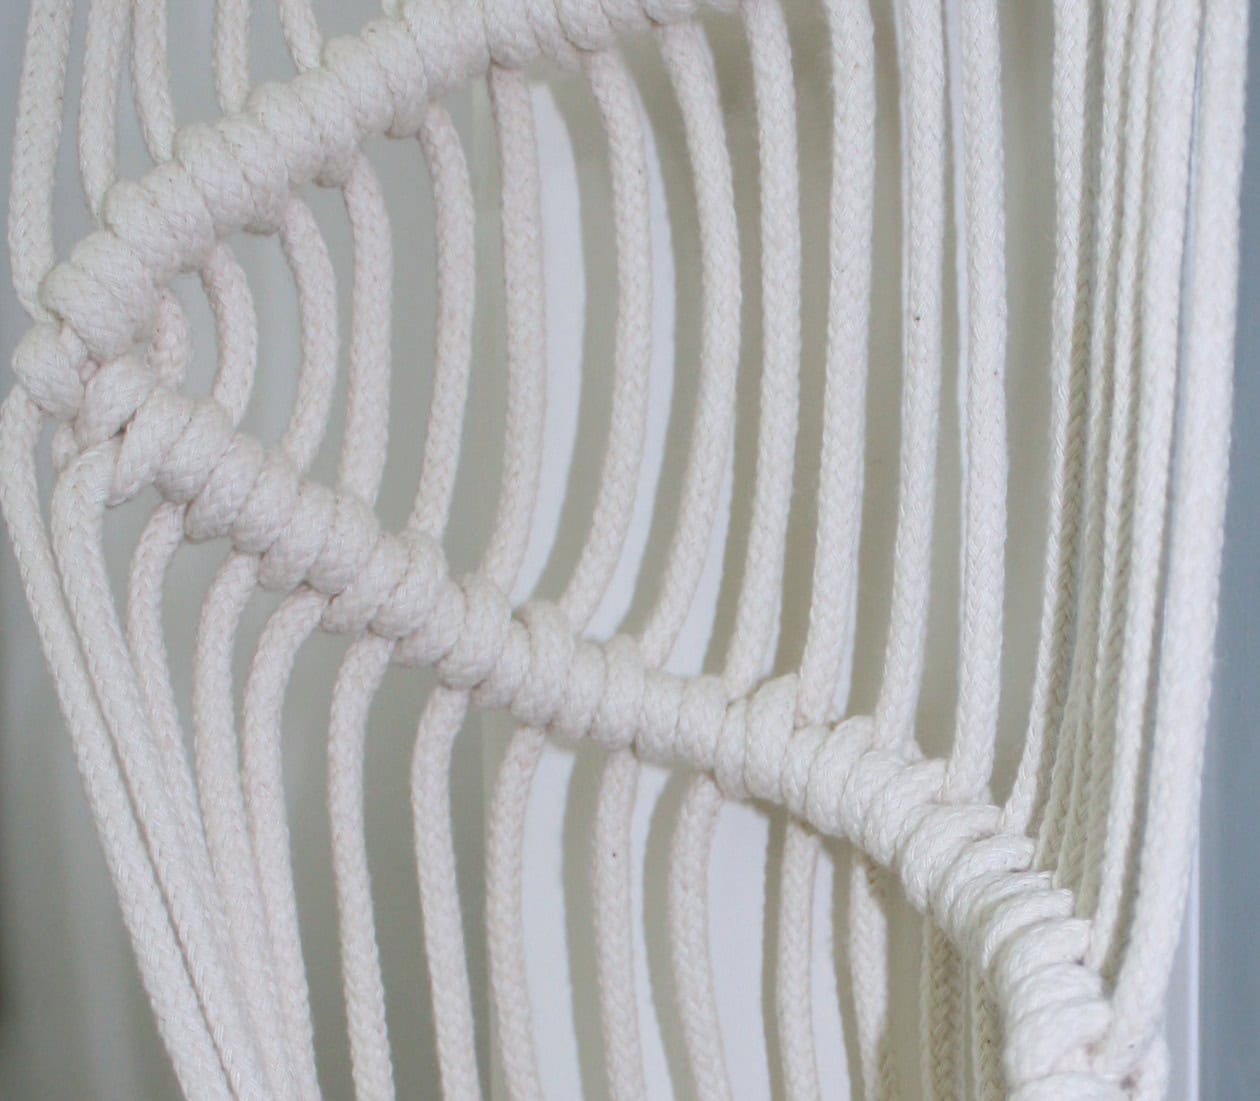
Next, starting from the right side going left, you will begin making Half Hitch Knots. These knots create the wave design in the weaving.
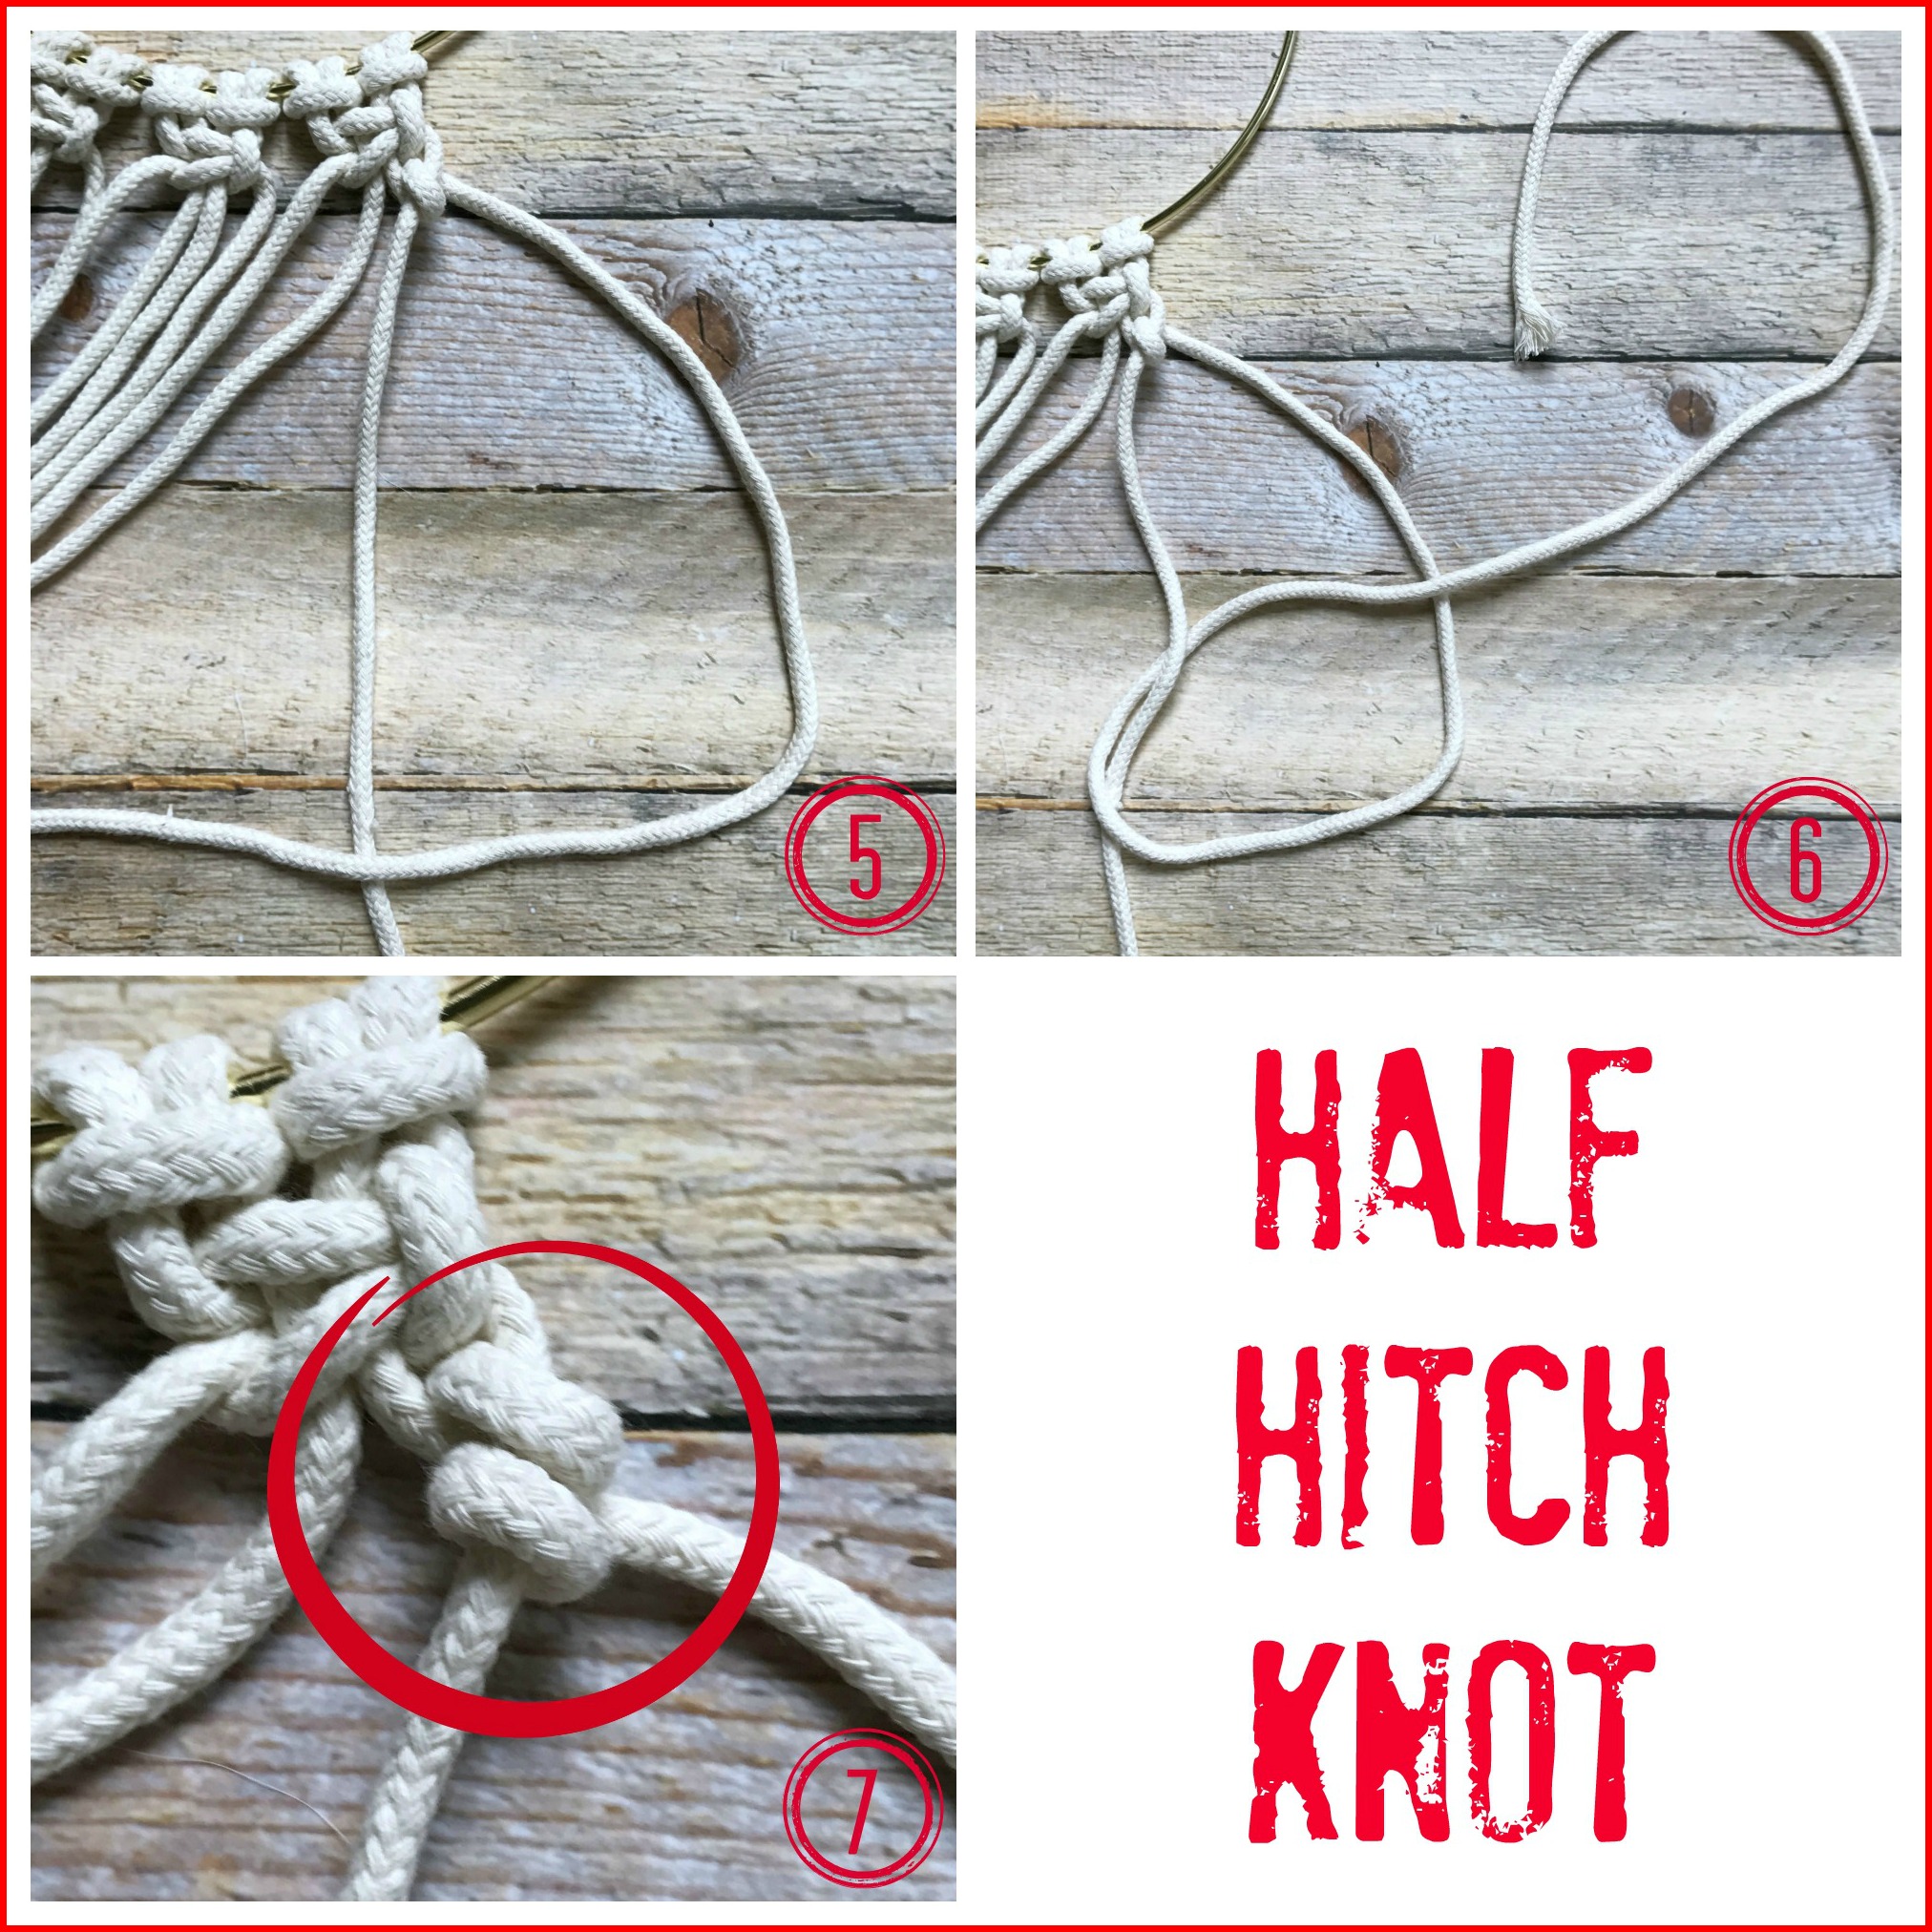
- Starting with the last 2 cords on the far right, cross the right cord over the left.
- Then with the right cord, form a capital “D” shape, with the bottom of the “D” placed over the left side (or backbone) of the “D”
- Then pull the tail of the “D” up through the middle of the “D”
- Gently tighten the knot.
- For the 2nd part of this knot, form another “D” but this time do NOT cross the right cord over the left first.
- Pull the tail of the “D” up through the middle of the “D”
- Gently tighten the knot. This completes one full Half Hitch Knot.
You can also view my video tutorial for making Half Hitch Knots. As you become more comfortable with them, you will see how you can gently control the direction and angle degree of each row you create.
Complete an entire row of Half Hitch Knots, going from left to right.
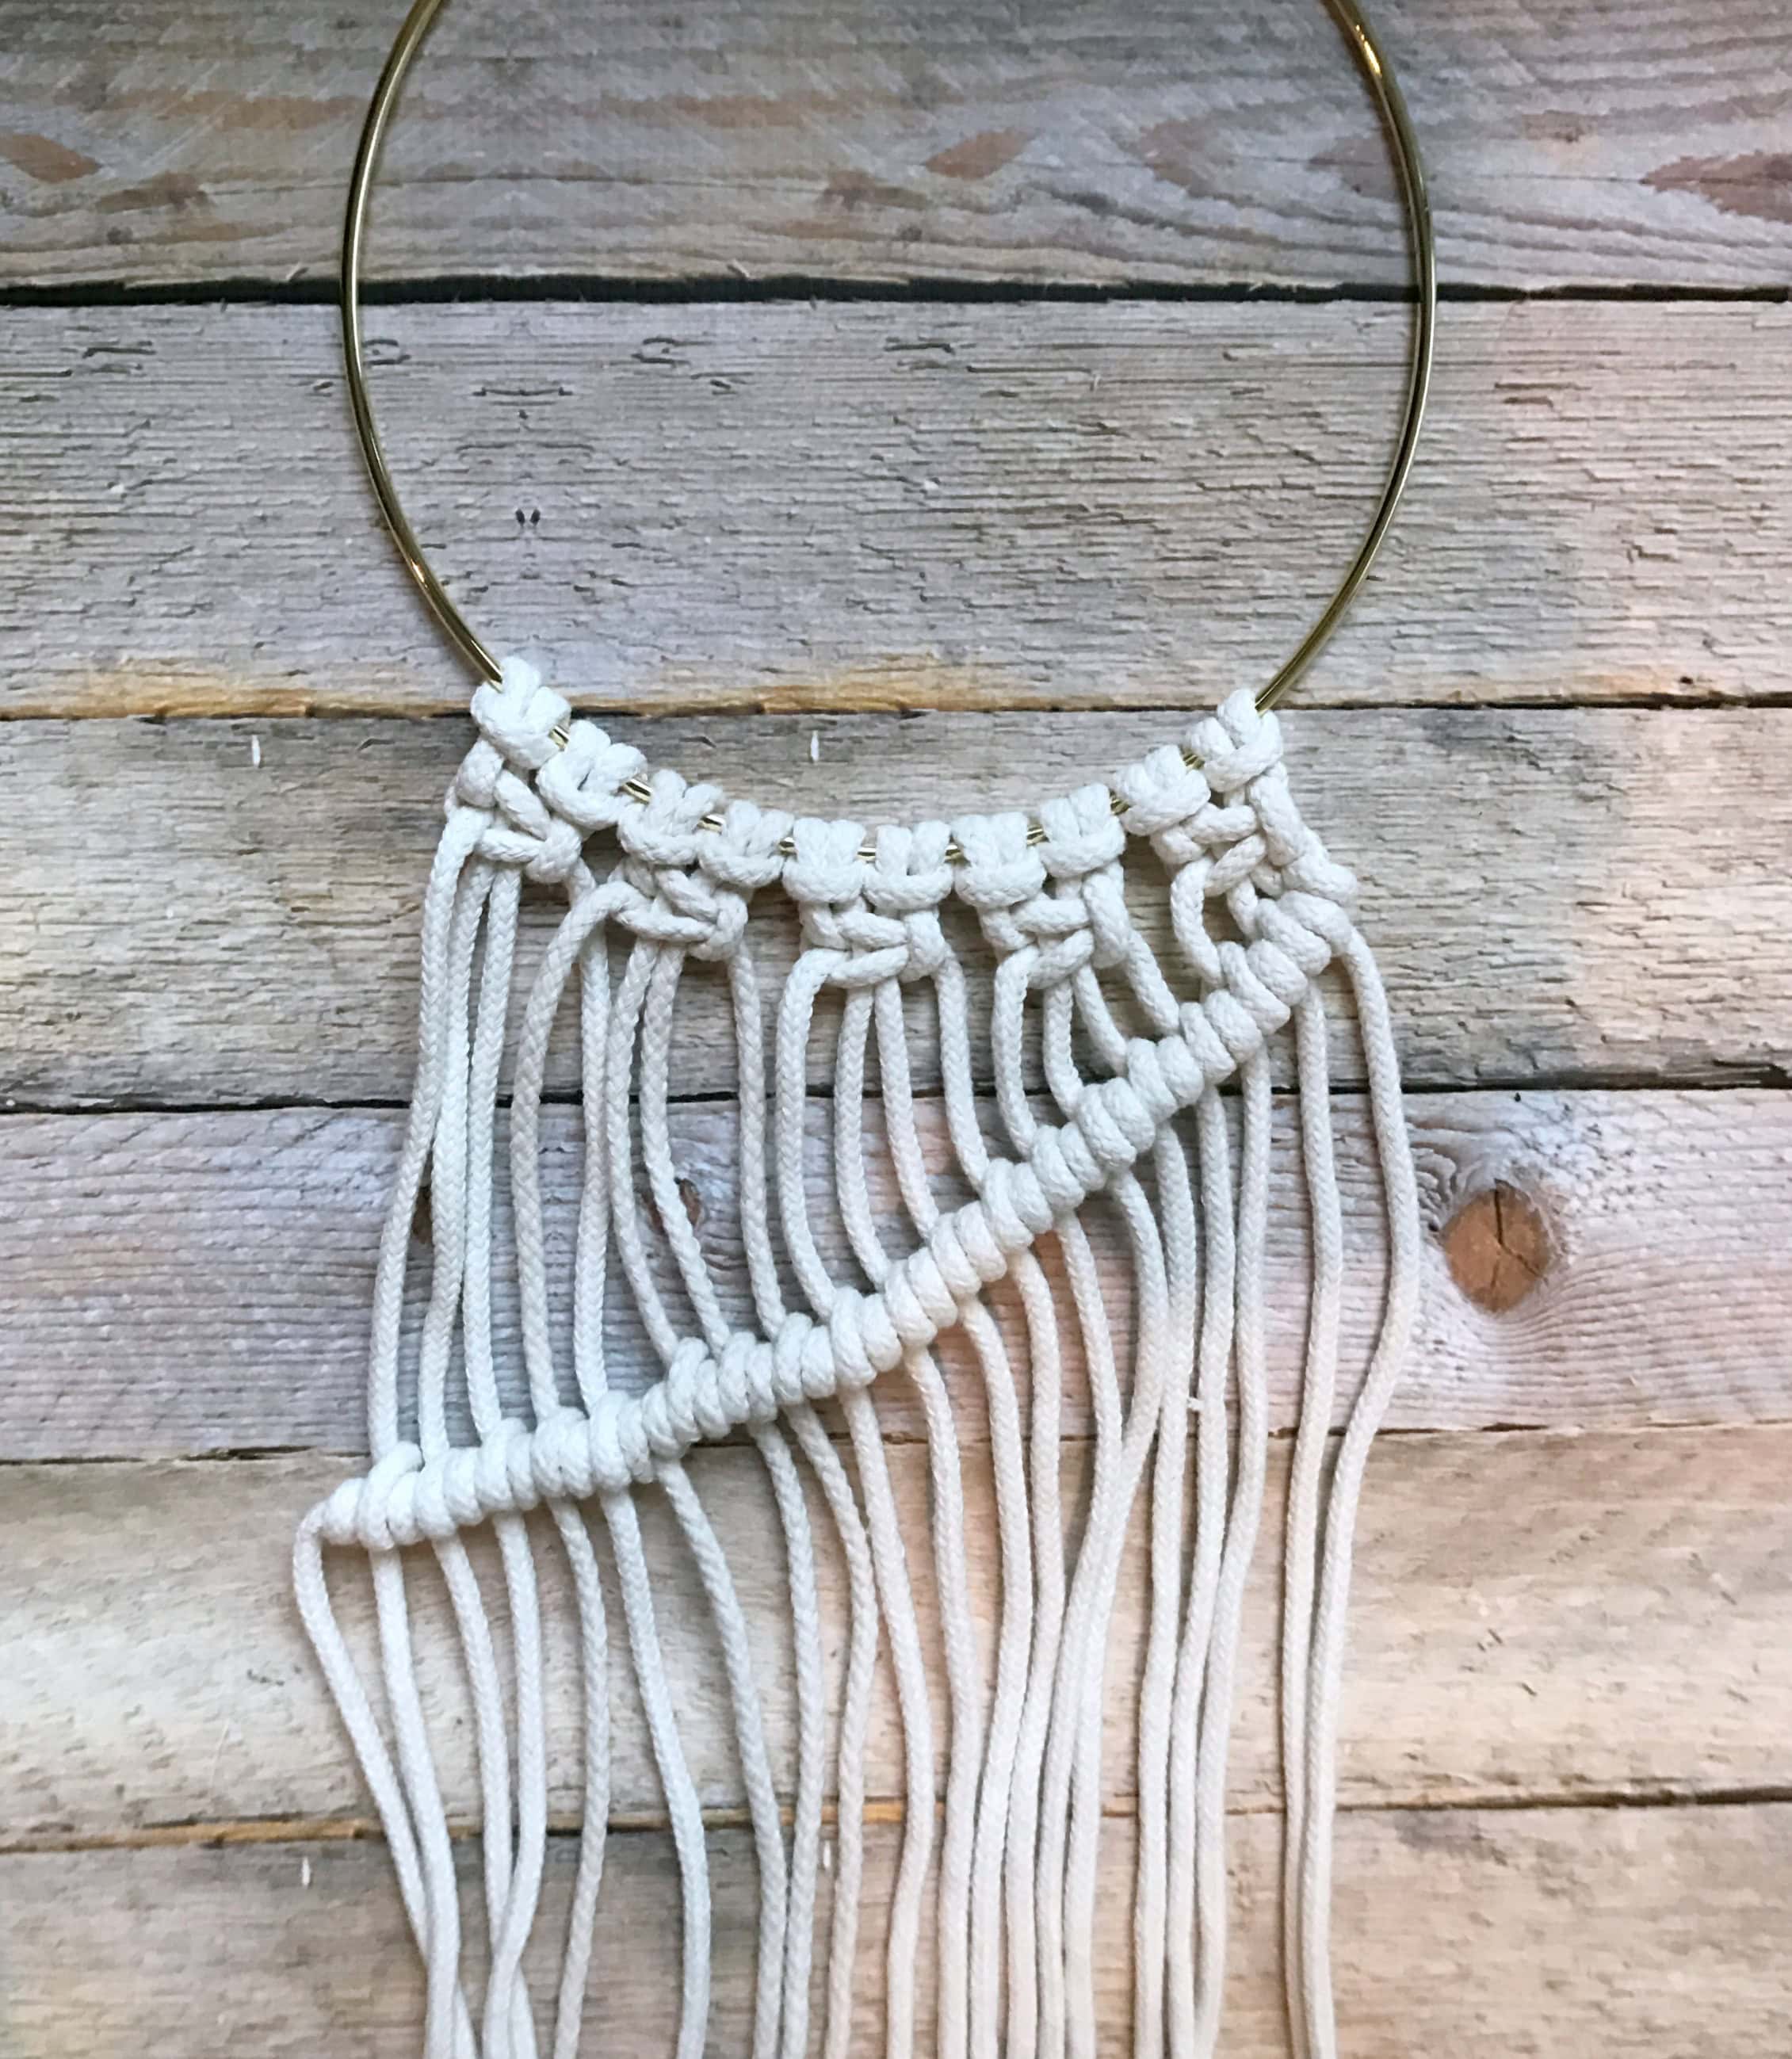
step 4
Now that you have completed the first “wave” of knots, you simply reverse the instructions to create another row of Half Hitch Knots, starting with the left side and weaving towards the right. Sounds easy, but believe me, sometimes shifting your brain into reverse gear is tricky.
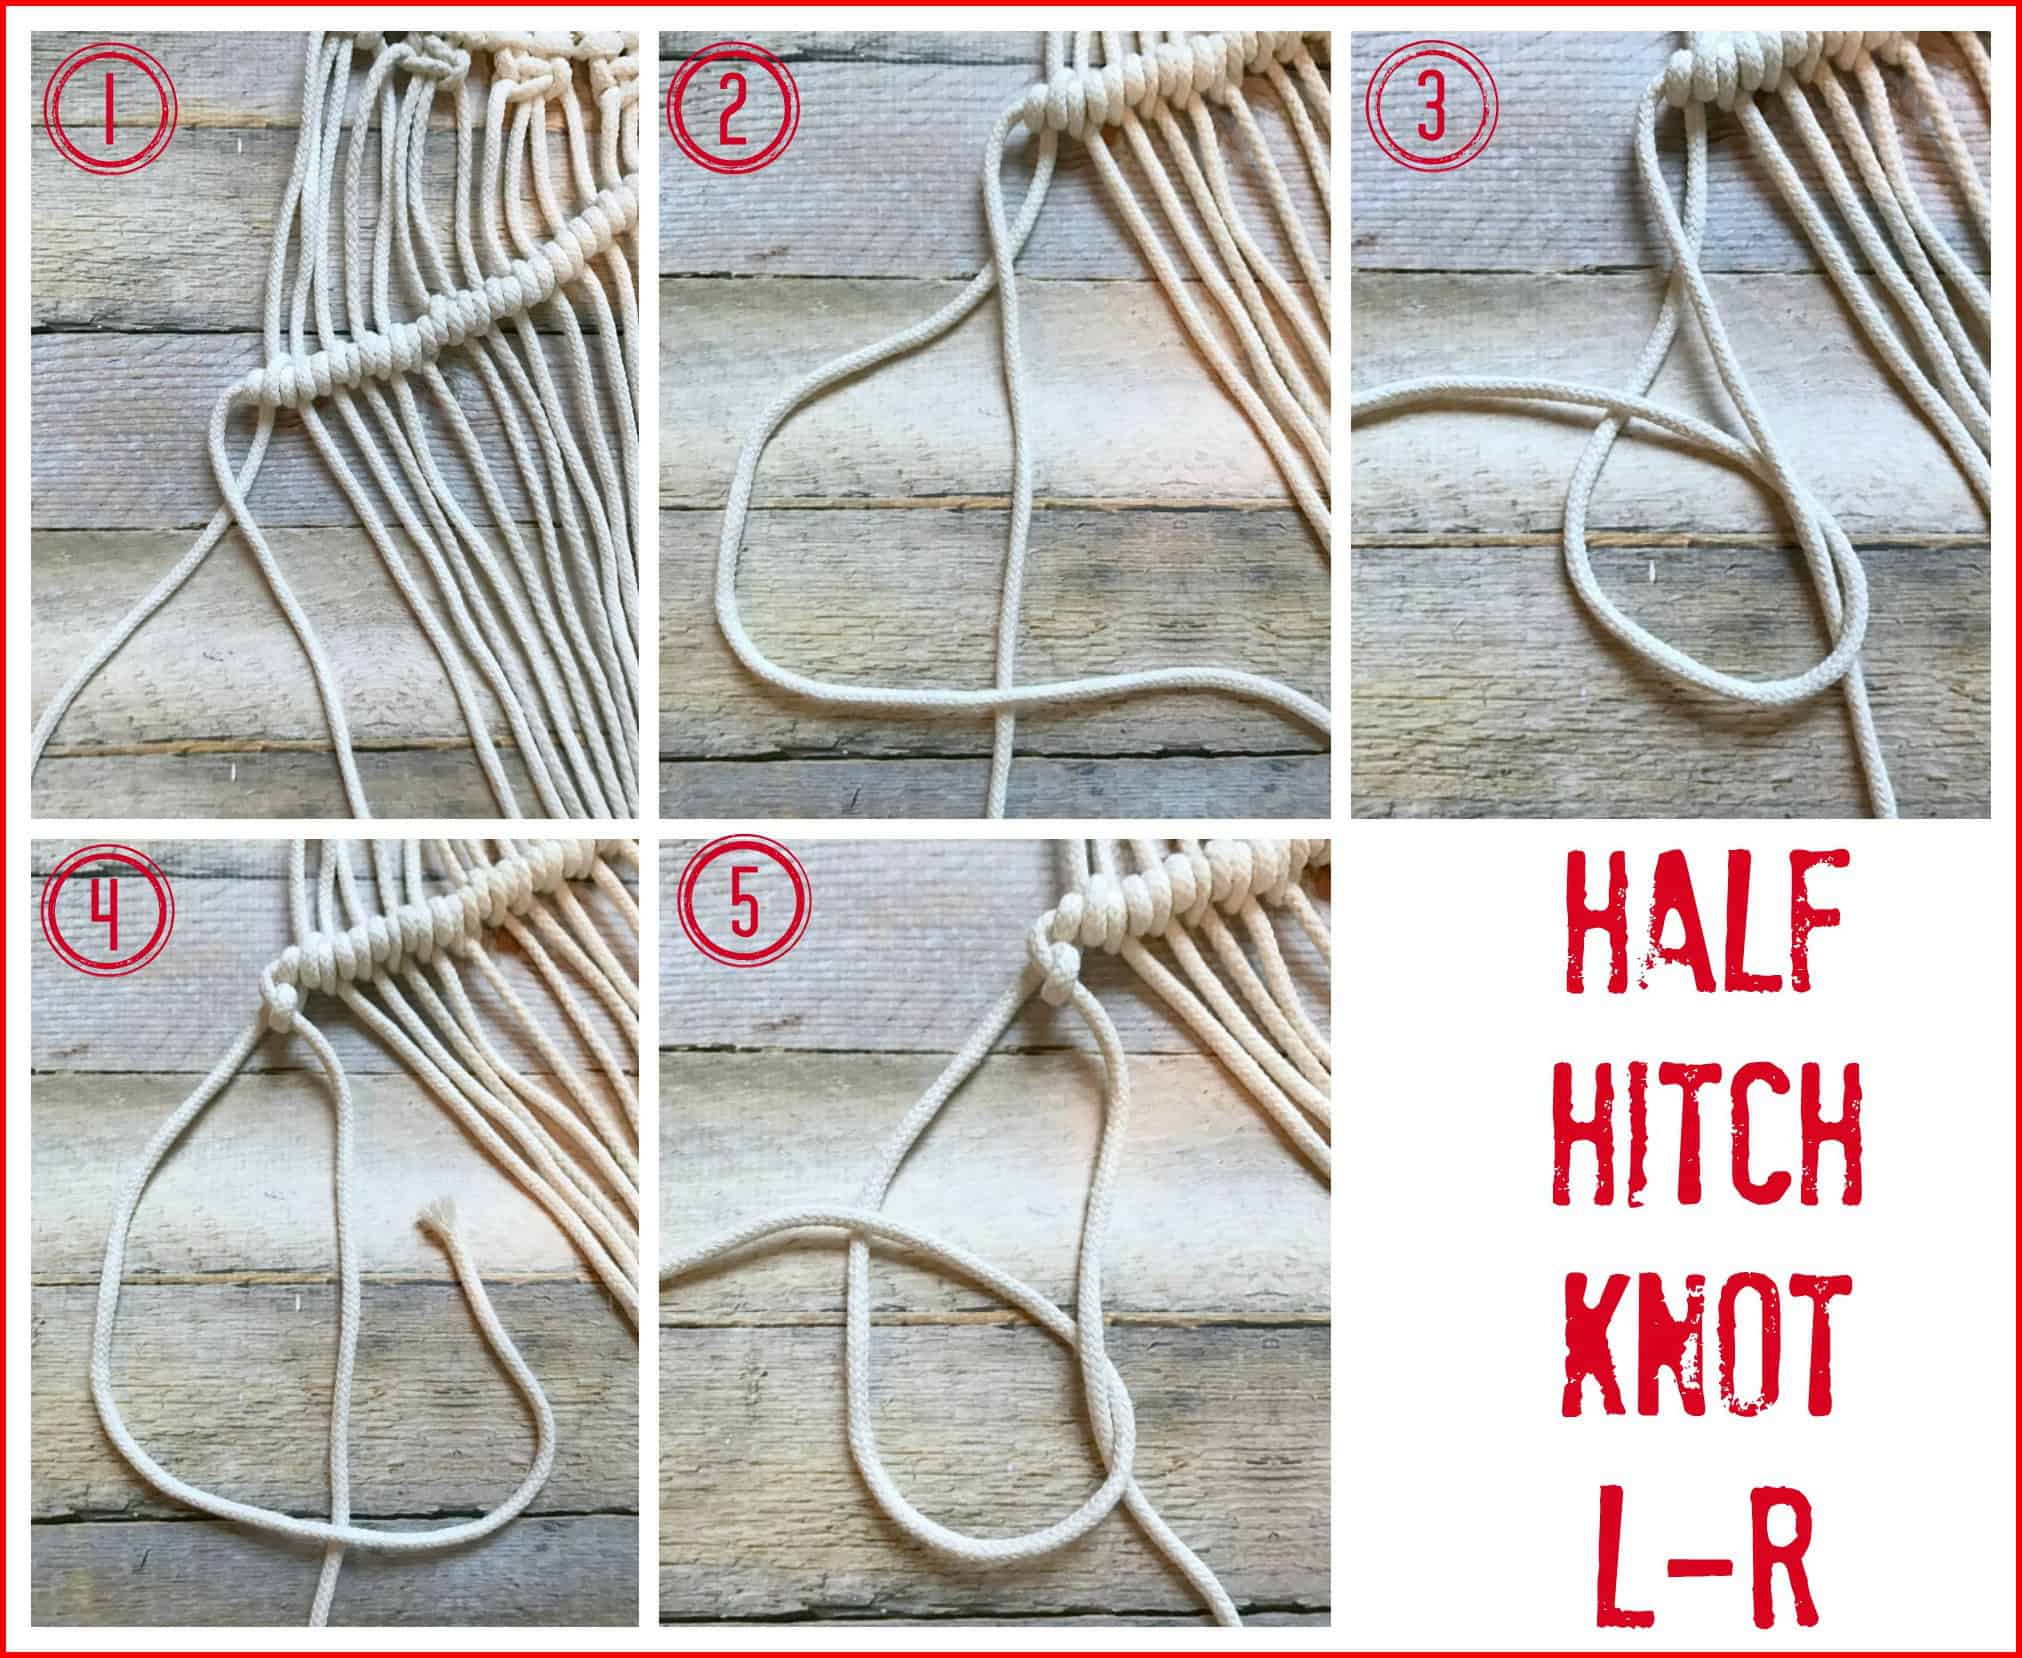
- Starting with the cord on the far left, cross it over the cord to its right.
- Then with the left cord, form a capital backwards “D” shape, with the bottom of the “D” placed over the right side (or backbone) of the “D”
- Then pull the tail of the “D” up through the middle of the “D” & gently tighten the knot.
- For the 2nd part of this knot, form another backwards “D” but this time do NOT cross the left cord over the right one first.
- Pull the tail of the “D” up through the middle of the “D” & gently tighten the knot.
Continue weaving Half Hitch Knots until you complete another row.
step 5
When finished with the second row of Half Hitch Knots, complete one more, starting at the right and weaving left. You will then have 3 rows of Half Hitch Knots.

step 6
To create the “basket” to hold a flower pot or mason jar, create an even row of square knots that will transform your wall hanging into a circular shape:
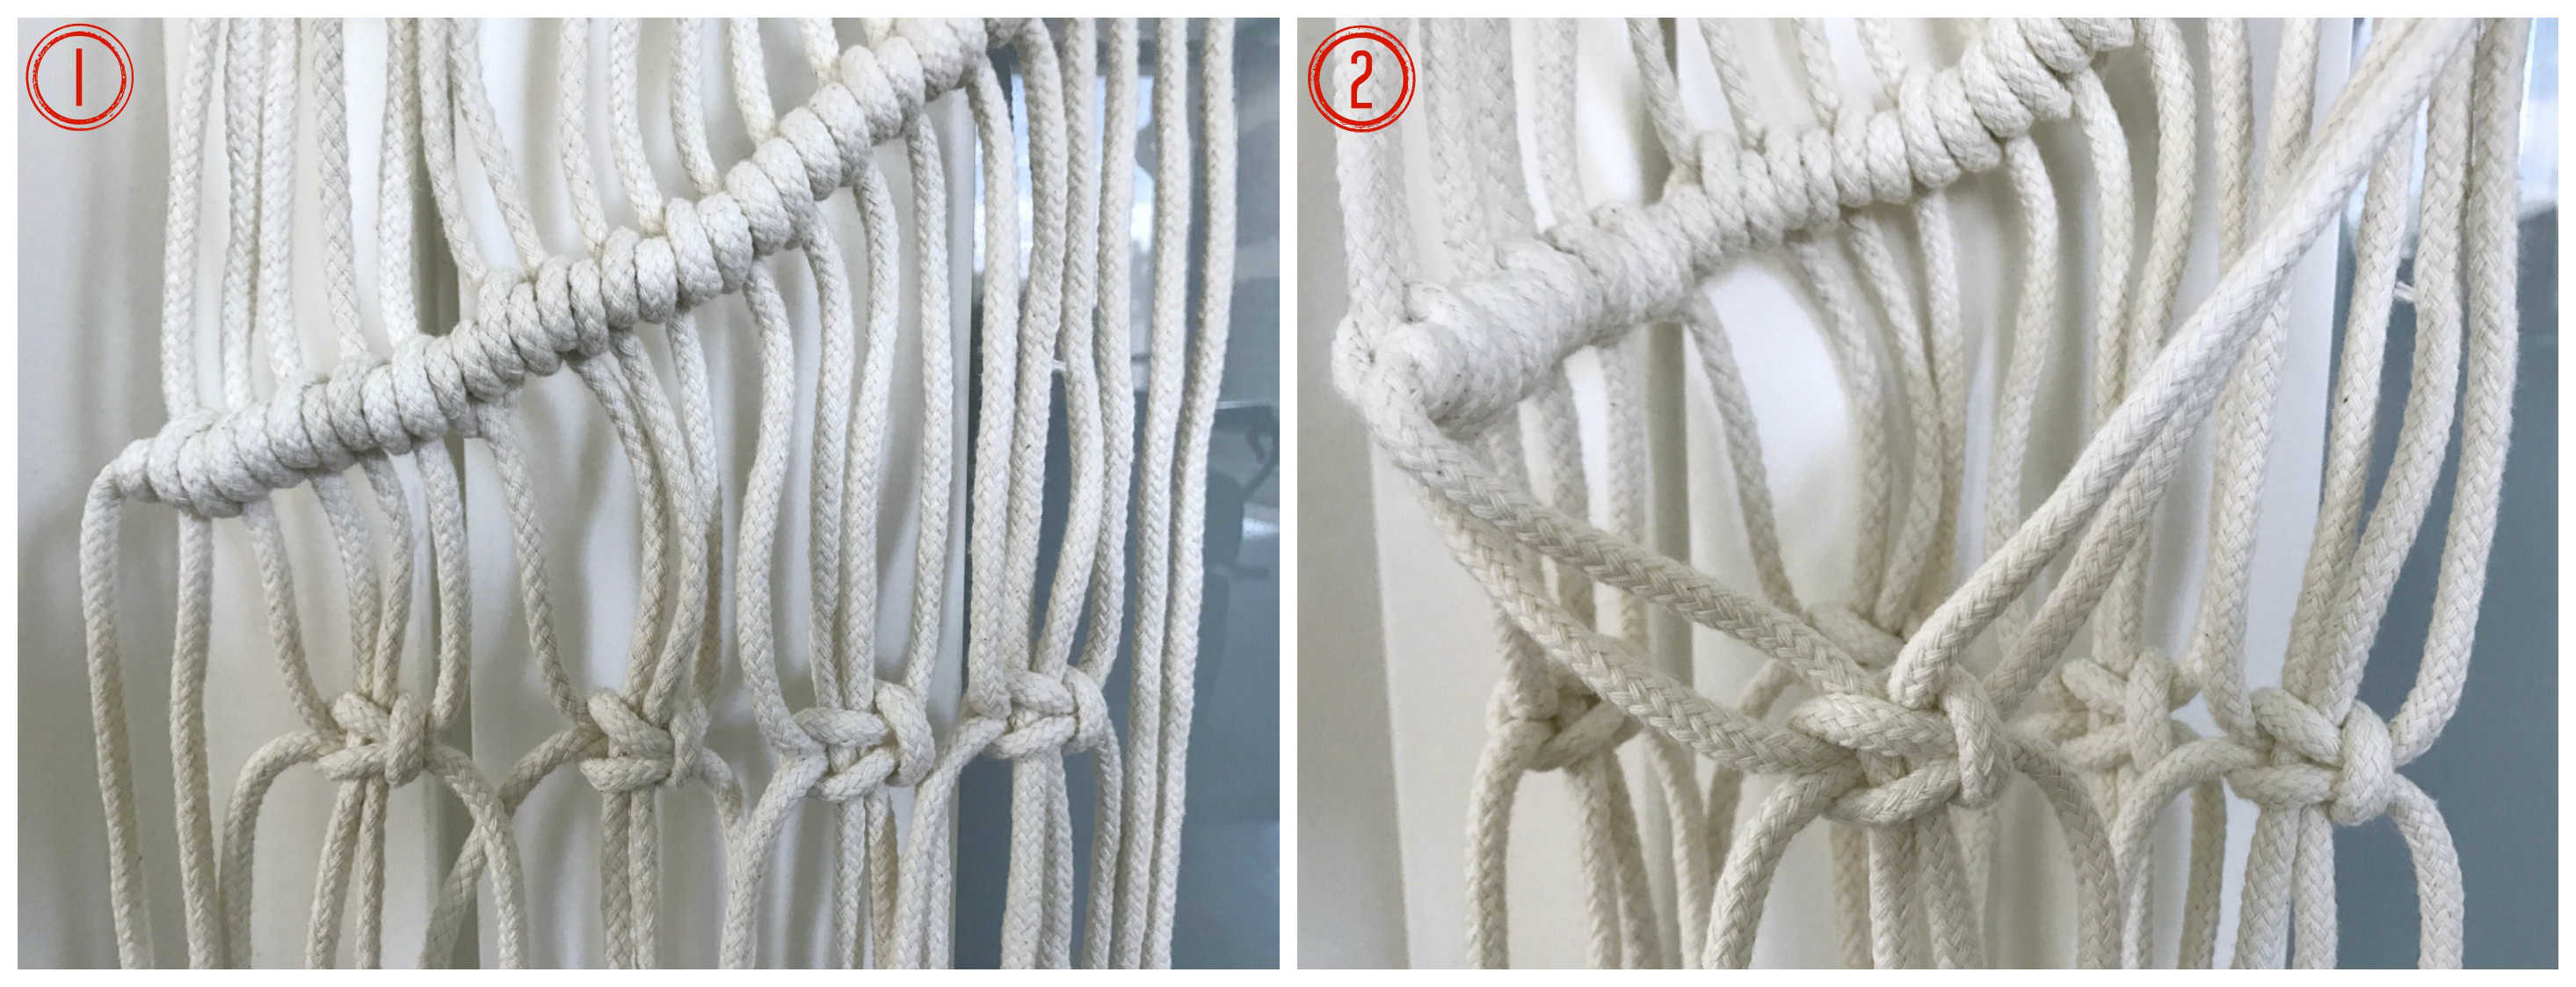
- Starting with the 3rd cord from the left, create a row of 4 square knots. Make sure the row is horizontal to the floor. (You can follow this easy tutorial for Square Knots.)
- Join the remaining 2 cords on the left side with the 2 remaining cords on the right side to form another square knot. You will now see a circular “pocket” beginning to form.
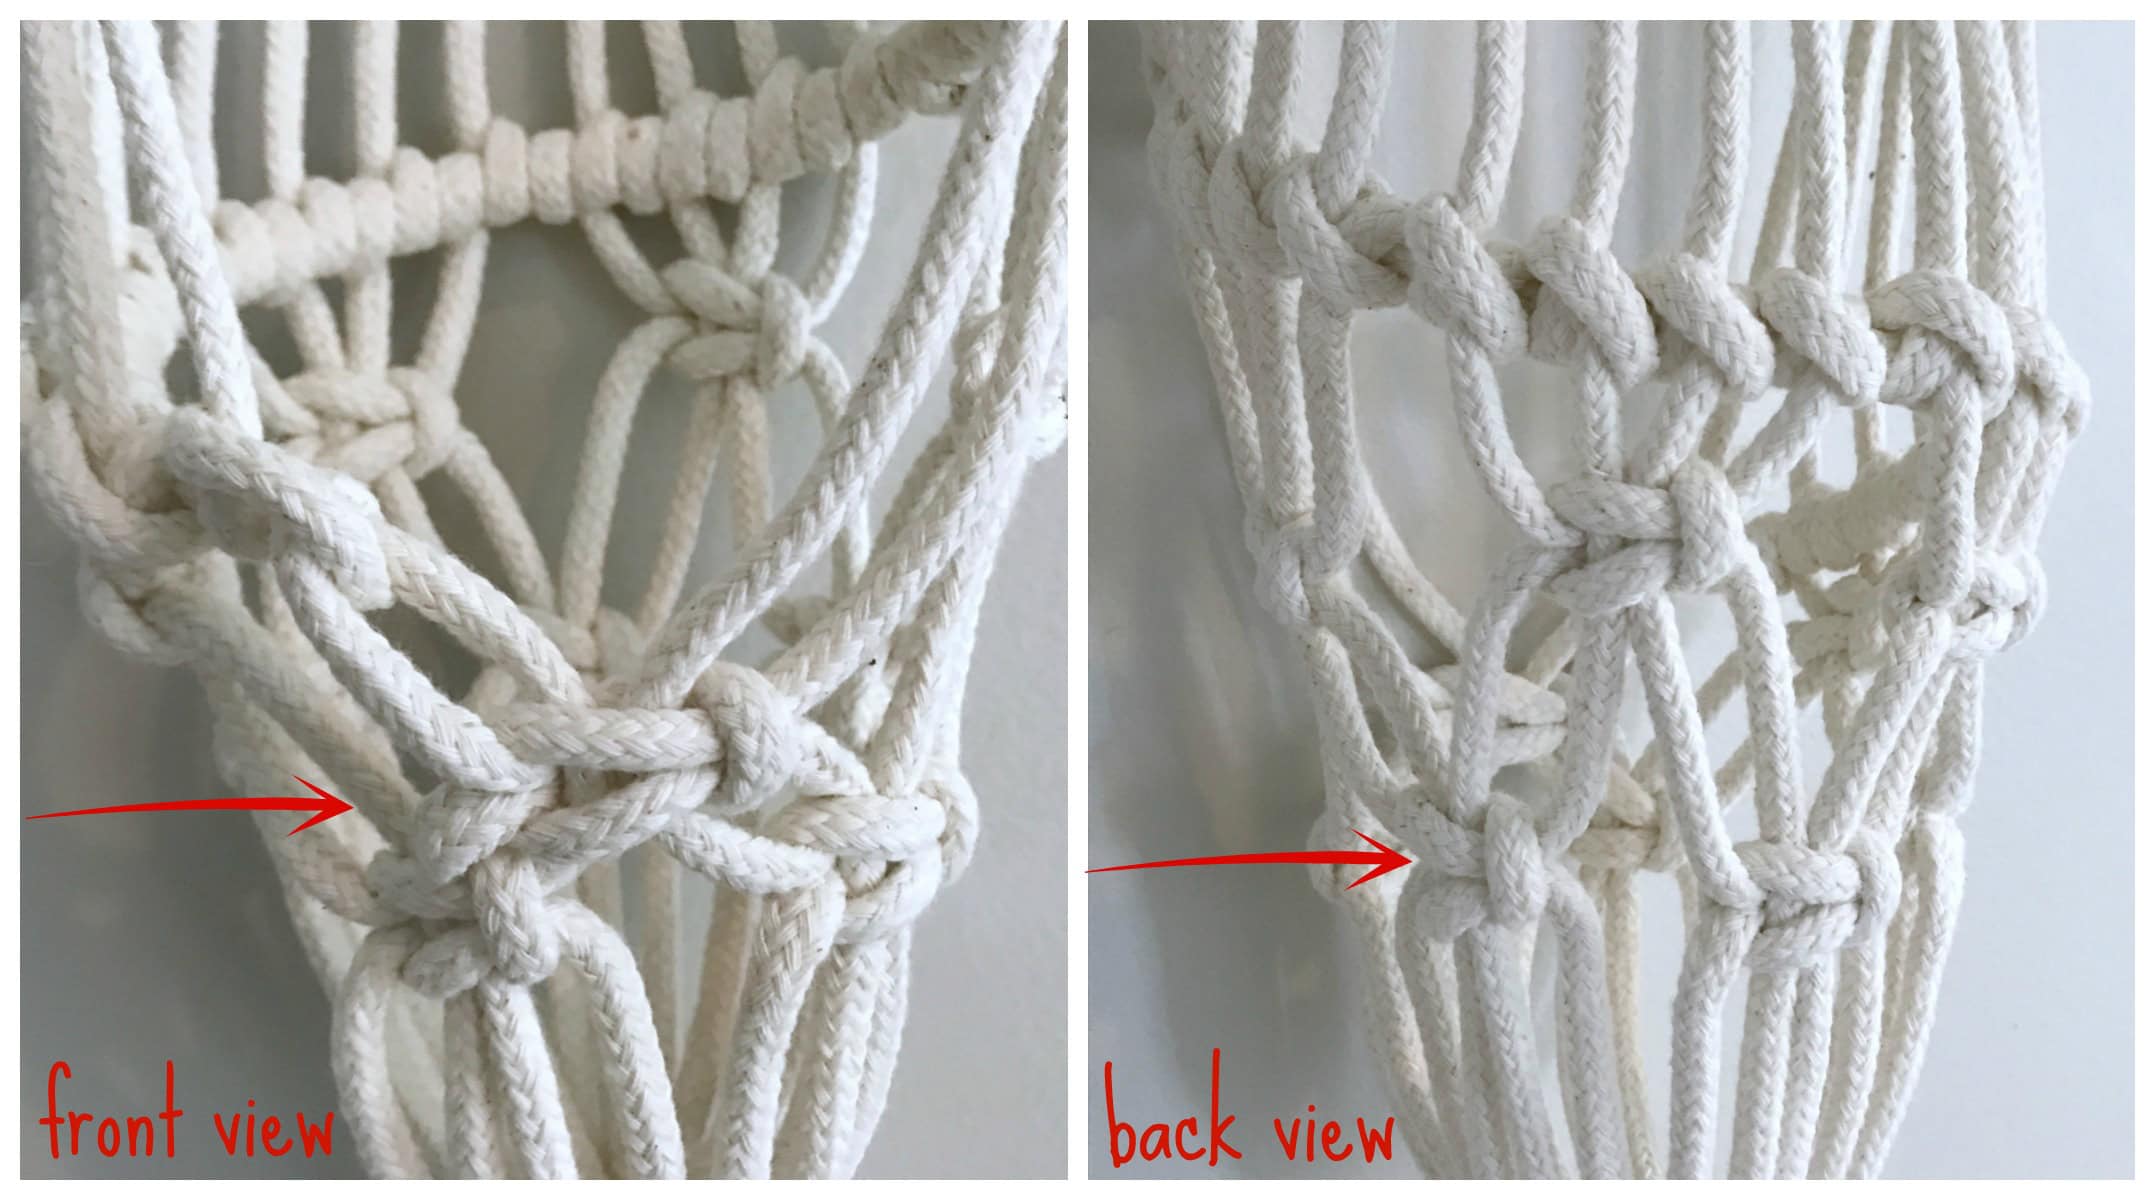
step 7
Approximately 1 to 2 inches below this row of square knots, create another row of Alternating Square Knots. (See this tutorial for making Alternating Square Knots.)
step 8
The final step is to make a Wrapped Knot about 3 inches below your last row of alternating Square Knots. (See this Wrapped Knot tutorial for instructions.)

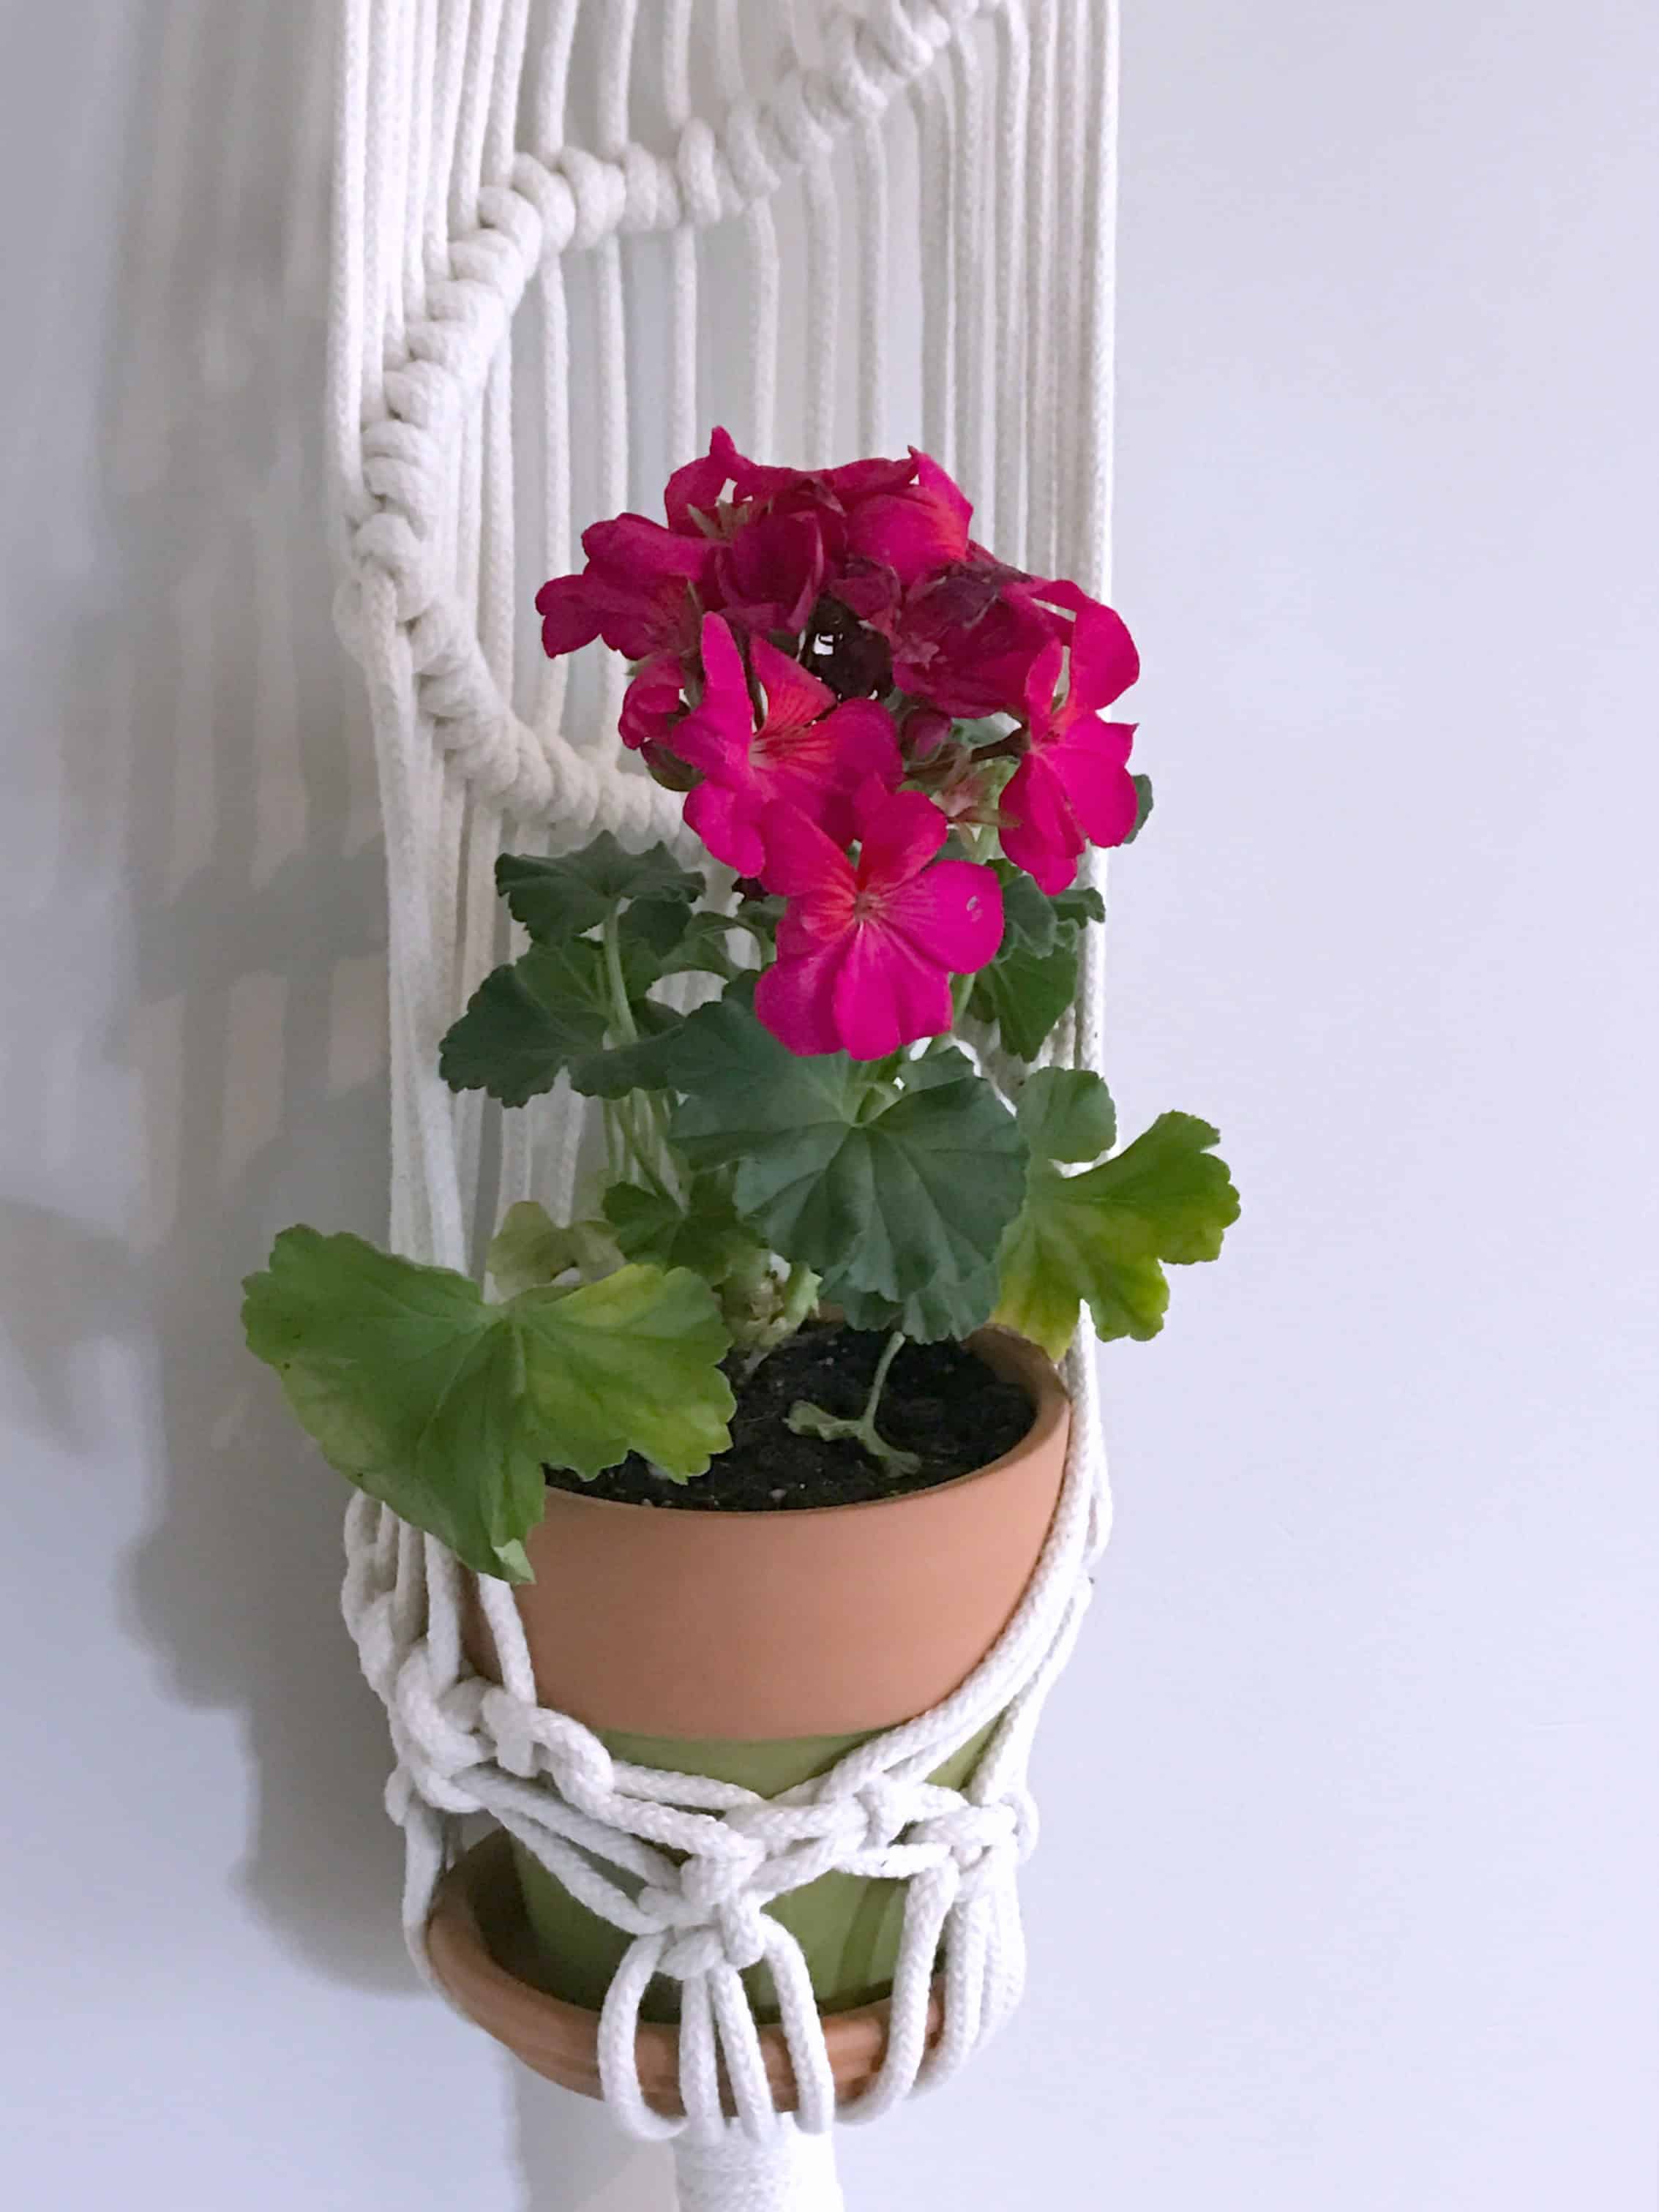
Here’s the fun part: place your favorite flower pot in it, find a place to hang it, and enjoy! Let’s Get Hitched, shall we?

If you’re ready for more, check out this post:
I love the terra cotta planter. Could tell me where I can get the macrame string. I would love to start macrameing again.
Thank you.
I get most of my cord for projects like this from here – goo.gl/rCWqMd
Good idea! This decoration makes our flower pot more beautiful and has an attractive look as well. Thanks for sharing your tutorial!
Thanks!