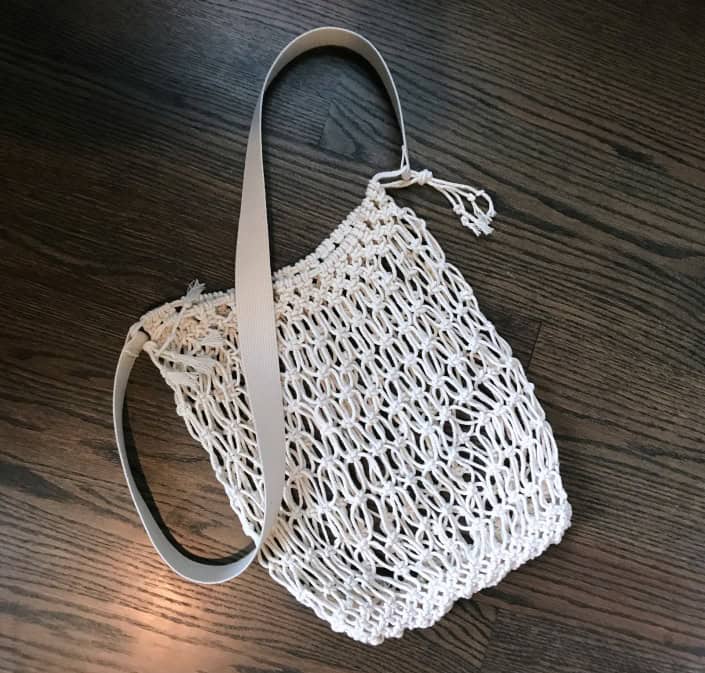
I’ve wanted a macrame market bag for a while, so recently I decided to make one with all the features I love. First of all, SPACIOUS. An actual practical sized bag for shopping fresh produce markets. Secondly, CROSSBODY. Need I say more? I love this style. And lastly, LIGHTWEIGHT. Not one made of heavy rope, but a bag that is easy and comfortable to carry. The best thing about this macrame bag, however, is that it isn’t difficult to make at all. It takes a little time, but there’s only one knot to learn – the Square Knot. So what are you waiting for? Let’s do this.
(Affiliate links included for your convenience. As an Amazon associate I earn from qualifying purchases. See disclosure here.)
supplies needed:
- 3mm cotton macrame cording – 374 feet
- masking tape or painters’ tape
- 1.5″ heavy cotton webbing – 45″
step 1 – preparation
Note: the finished size of this bag when lying flat is approximately 15″ wide x 15″ long. Cut 4 pieces of cording, each measuring 20″ long. Next, cut 48 pieces of cording, each measuring 92″ each. Make sure to tape all rope ends with masking or painters’ tape to prevent fraying while knotting.
step 2 – side one
Lark’s Head Knots – Place two 20″ pieces of cording horizontally on a flat surface. These will be the handle. Next, using Lark’s Head Knots, tie 24 pieces of cording (each measuring 92″ in length) onto the two horizontal pieces.
Once the 24 pieces are tied onto the handle, you can continue knotting with the cords placed flat on a tabletop, or you can tie the handle around a lamp base (shown in right photo below). This keeps the project steady and allows you to create slightly curved rows into the design. Either way is fine.

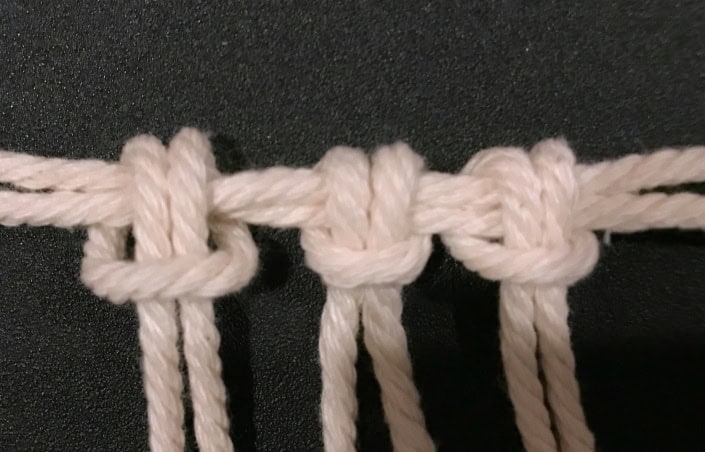
Rows 1-3 – The first 3 horizontal rows of Square Knots will be woven closely together, without a lot of open space between them. Starting with the first cord on the left, make a horizontal row of 12 Square Knots.

For row 2, begin with the third cord from the left and make a row of 11 Alternating Square Knots.

For row 3, begin with the first cord on the left and make another row of 12 Square Knots.

Row 4 – Begin the fourth row about 1″ down from the last row. Begin with the third cord on the left and make a row of 11 Alternating Square Knots.

step 3 – side two
Using the remaining (2) 20″ cords and (24) 92″ cords, repeat step 2. This creates side two of the bag.
step 4 – joining the sides
Place the two sides next to each other; tie the two loose cords on the end of each side together in a Square Knot.

Join the other end in this same manner. Next, tie the top cords together with a simple knot, leaving at least 2″ of space from the body of the bag. Do this for each side.

step 5 – completing the body
Now that the sides are joined, continue adding more rows. At this point, you may find it easier to hang the bag onto a rack, as shown below.

Rows 5-9 – About an inch below row 4, add another row of Alternating Square Knots all around the circumference of the bag. Try to keep the row straight, but don’t worry if it curves up slightly on each side. This adds a bit of flair to the shape. As you continue with four more rows of Square Knots (rows 6-9), be sure to keep each row spaced about an inch apart. If you want to shorten the bag, you can stop after row 7 or 8 before going on to the next step.

step 6 – final three rows
To create a sturdy bottom for the bag, create another row of Square Knots directly underneath the last row of loosely spaced knots. Continue with two more rows of Alternating Square Knots, woven very closely together.

Once the final three rows are finished, locate the Square Knot on one end of the bag, and using its 4 strands, tie a regular knot. Then double tie it tightly.

Next, move to the Square Knots on either side of that double-tied knot, and using 2 strands from the knot on the left side with the mirrored 2 strands from the knot on the right side, tie a regular knot. Then double tie it tightly. Continue tying the two sides of the bag together in this manner, by tying cords with their mirroring cords on the opposite side.

Continue in this fashion until the bottom is completely knotted together. Trim the excess cording.

Now, simply turn the bag inside out, and you will notice that you’ve created a neat, secure bottom.

step 7 – attaching the handle
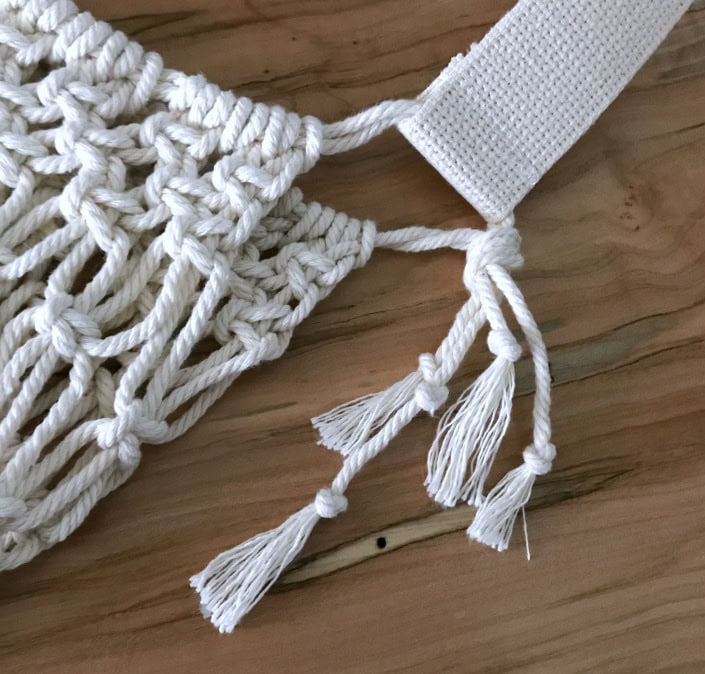
Cut a piece of 1.5″ wide heavy cotton natural webbing at 45″ long. Insert one end through one rope handle and stitch down, as shown in the photo below, using a sewing machine. Reinforce the stitch several times for added support. Attach the other end of the webbing to the other handle in this same manner.

step 8 – finishing touches
Lastly, knot the ends of the loose cords on the handles to prevent fraying. Then start using your new crossbody market bag!
The biggest compliment is a little share – pin the photo below!
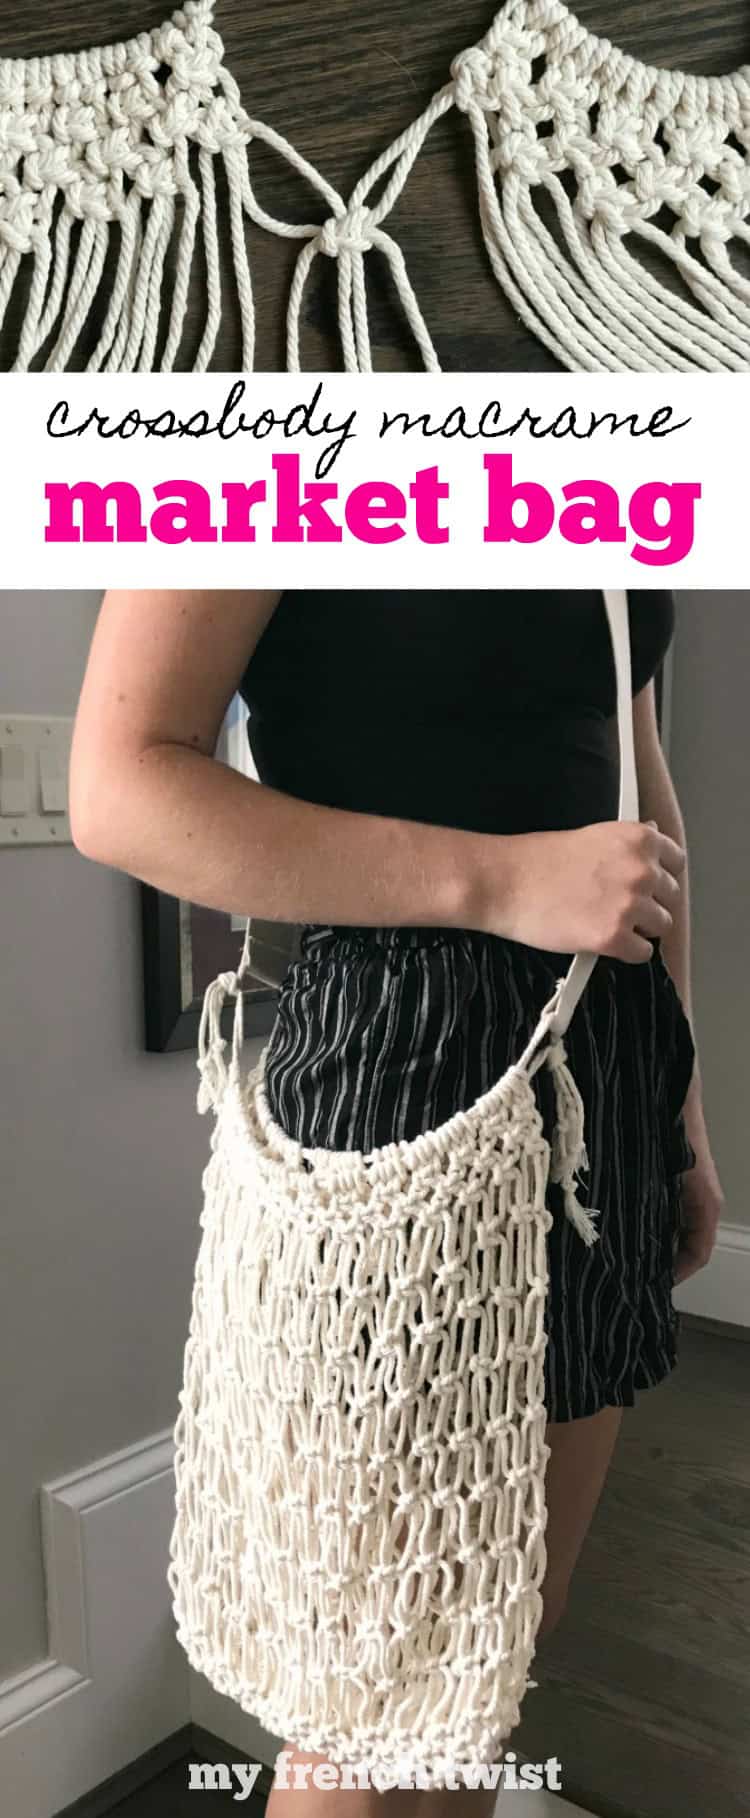
Need to save this for later?


I’m going to have a go at this tomorrow – lovely bag and a clearly explained tutorial – thankyou
Great bag and tutorial, Wendy! Thank you for sharing at Party In Your PJ’s.
Hi Wendy, This bag looks so useful and fun to make. I would like to do it, but not right now. In addition to all your “Share” buttons, I wish you had one for “Print”. This way I could save it as a pdf file and print it to use it when I do the project, without relying on electronics to follow your pattern.
Great suggestion. I get that often, so I’m planning to create pdfs for the macrame tutorials… just need time!! lol
It you just had a print button we can “print to pdf” ourselves and save you all the trouble. I do it on all the recipe blogs and it works great!!
oh my gosh i just learn something new everyday! lol Thanks for the tip – I will definitely do this.
Thanks for sharing your fun tutorial at Vintage Charm!
This bag is great! I love macrame techniques and I would like to learn them. Thank you so much for your tutorial.
so glad you enjoyed the tutorial!