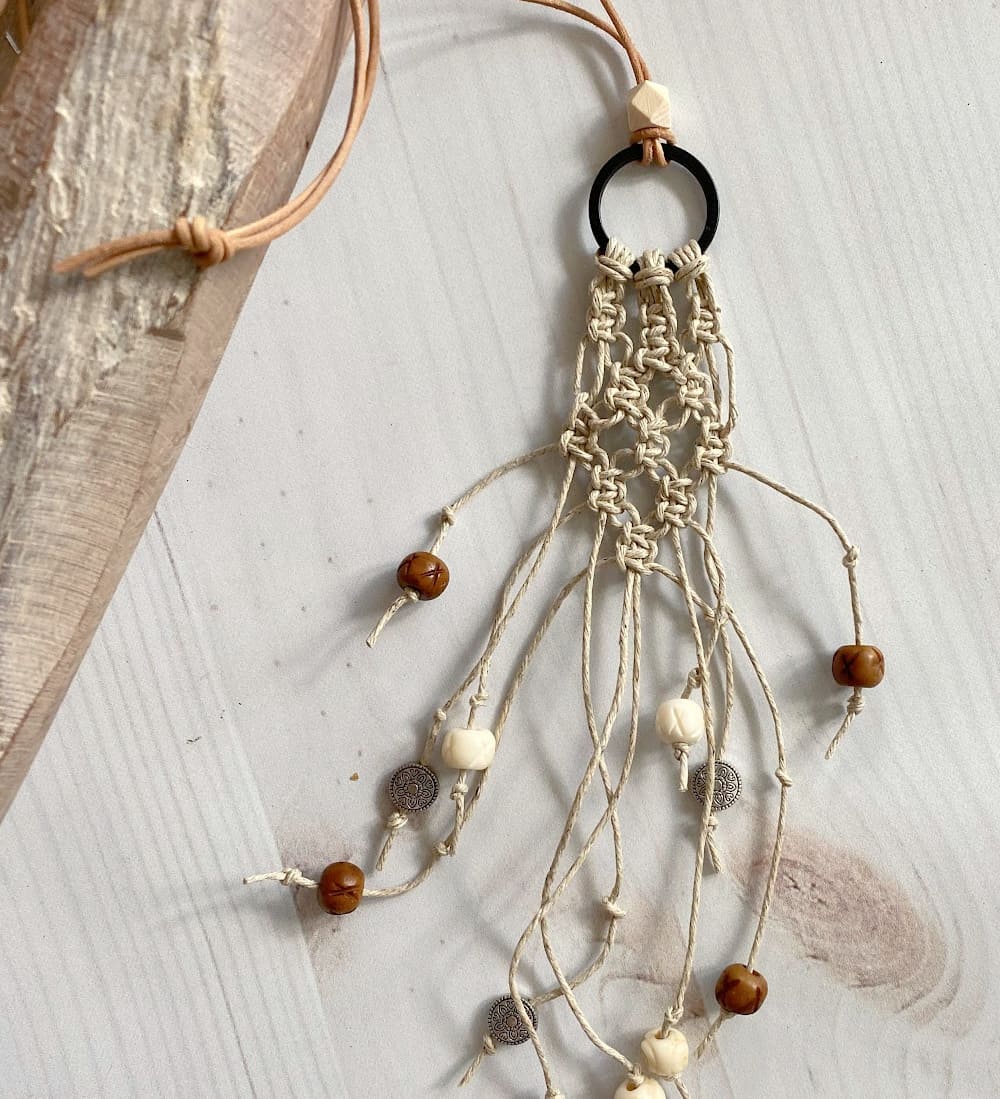
Sometimes all an outfit needs is the right necklace. And for simple boho shifts, what could be more perfect than a funky macramé pendant necklace? Here’s an easy macramé necklace tutorial that is perfect for beginners.
(This post may contain affiliate links; as an Amazon associate I earn from qualifying purchases. See disclosure here.)
supplies needed:
- metal ring
- twine
- beads
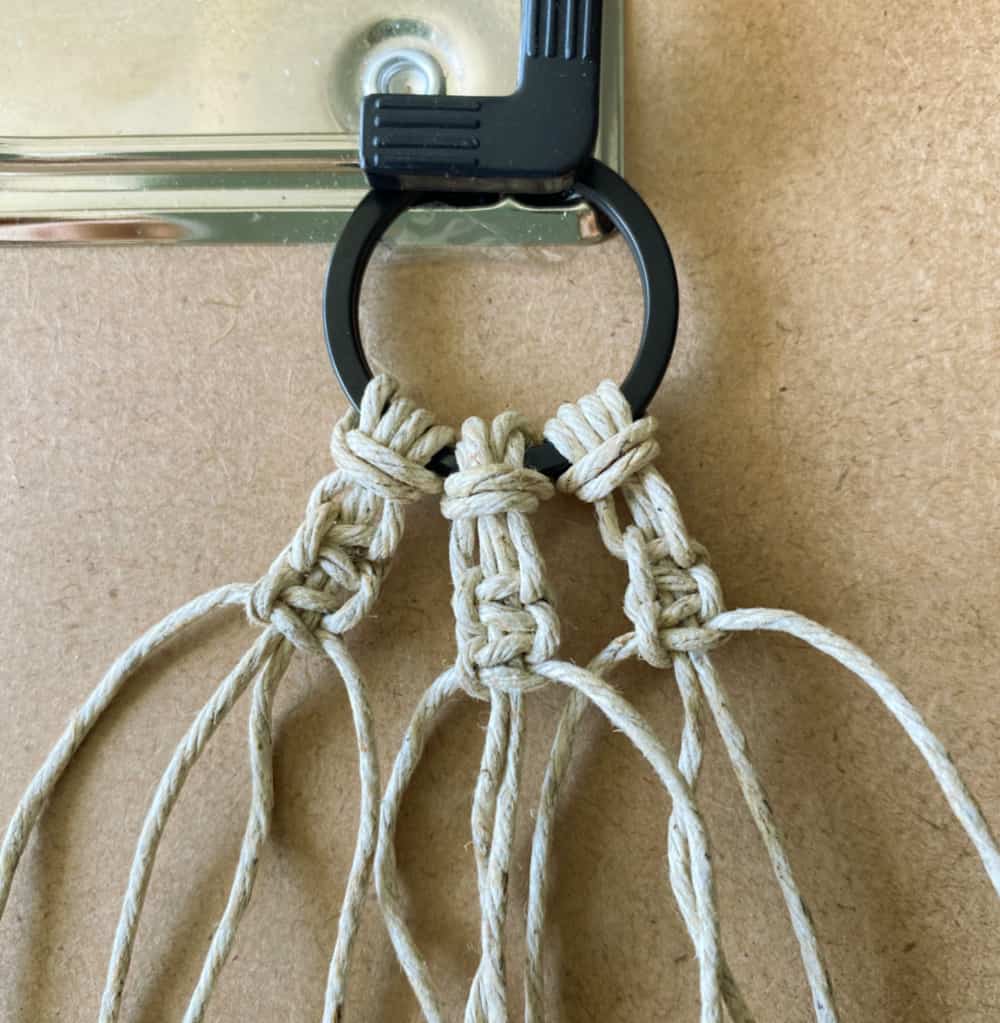
lark’s head knots
Cut 6 pieces of twine, each measuring 24″ in length. Using these 2 pieces together, tie them onto the metal ring using a Lark’s Head Knot. Create two more Lark’s Head Knots in this same fashion, so that you end up with 3 Lark’s Head Knots. Next, use a clipboard to keep the necklace stable while weaving the body.
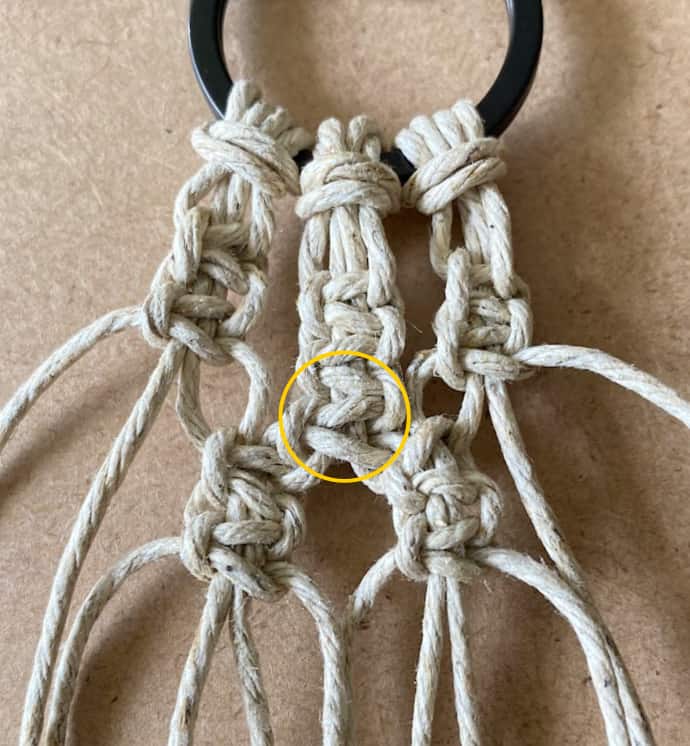
square knots
Beneath each Lark’s Head Knot, create a Square Knot, followed by a second Square Knot just beneath the first one.
Next, create one more Square Knot just beneath the Square Knots in the center. (This is optional.)
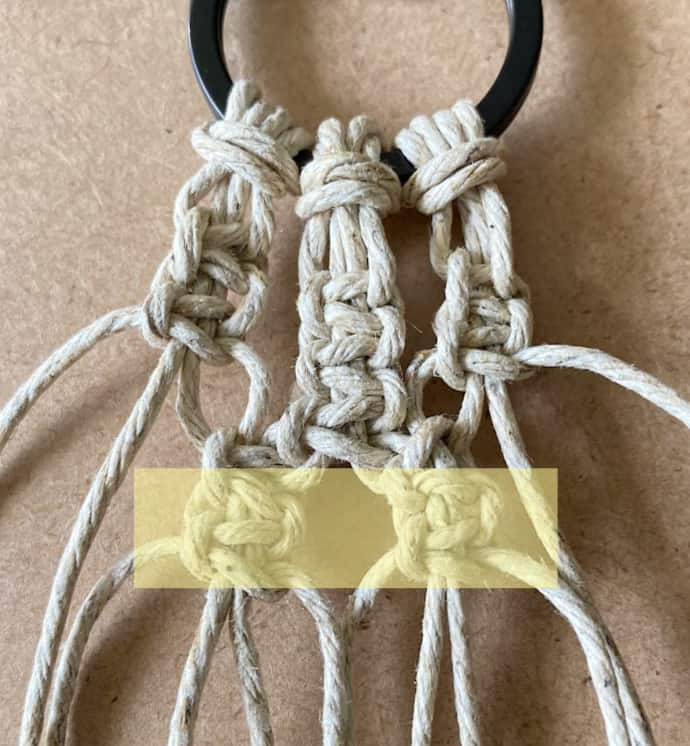
Now tie two Alternating Square Knots, as shown below. Once again, tie a second Square Knot just below the first ones. (I make two vertical Square Knots instead of just one throughout this entire project, because twine is so thin.)
Make a row of 3 Alternating Square Knots.

Follow with another row of 2 Alternating Square Knots.
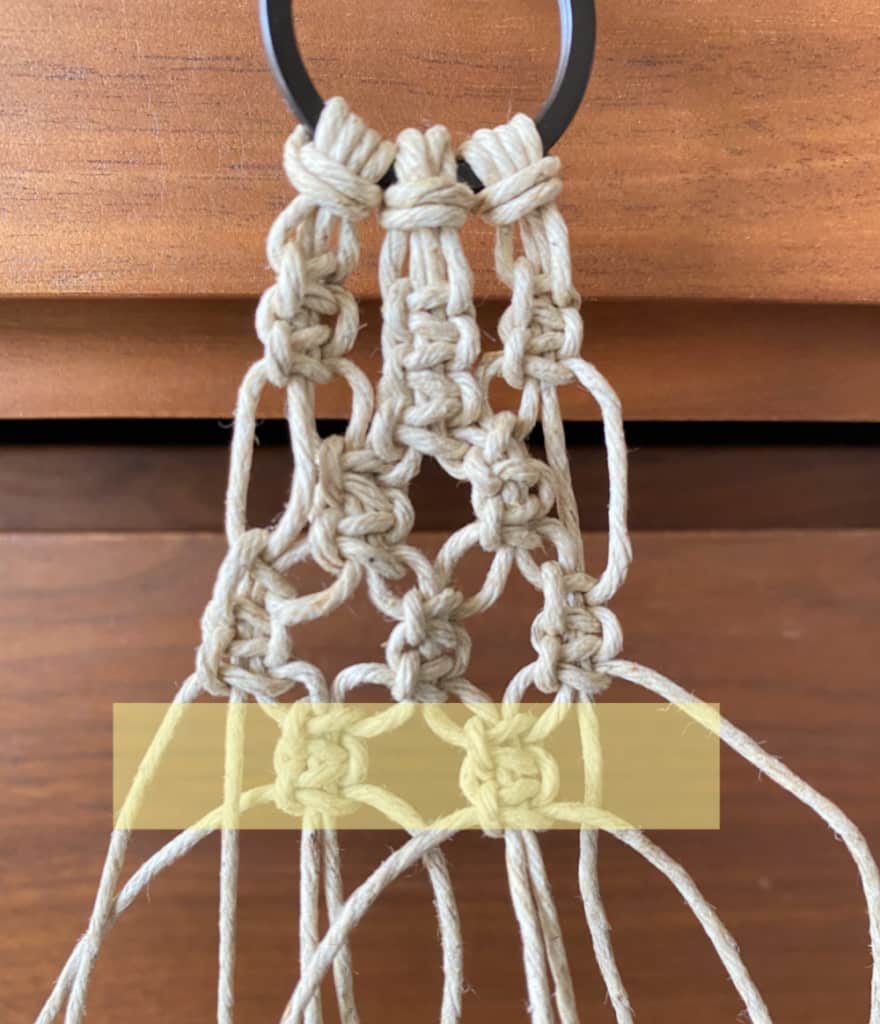
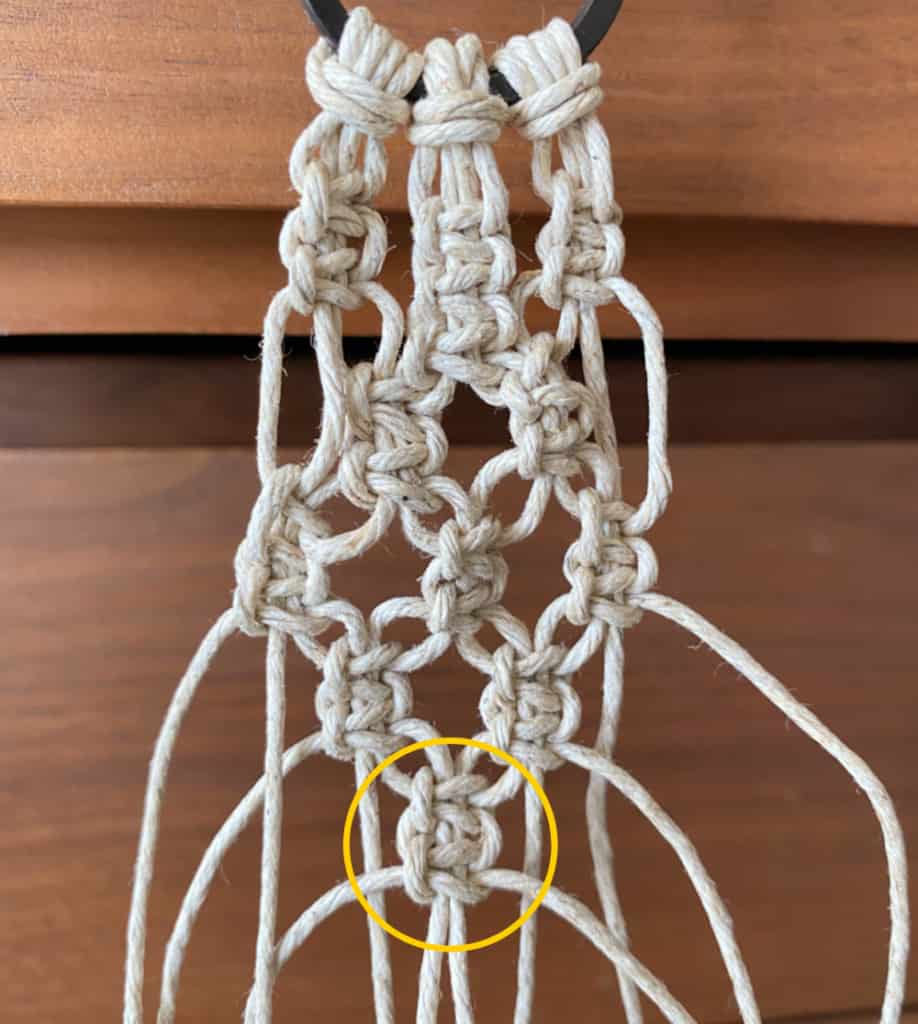
Make a final Square Knot, as shown below.
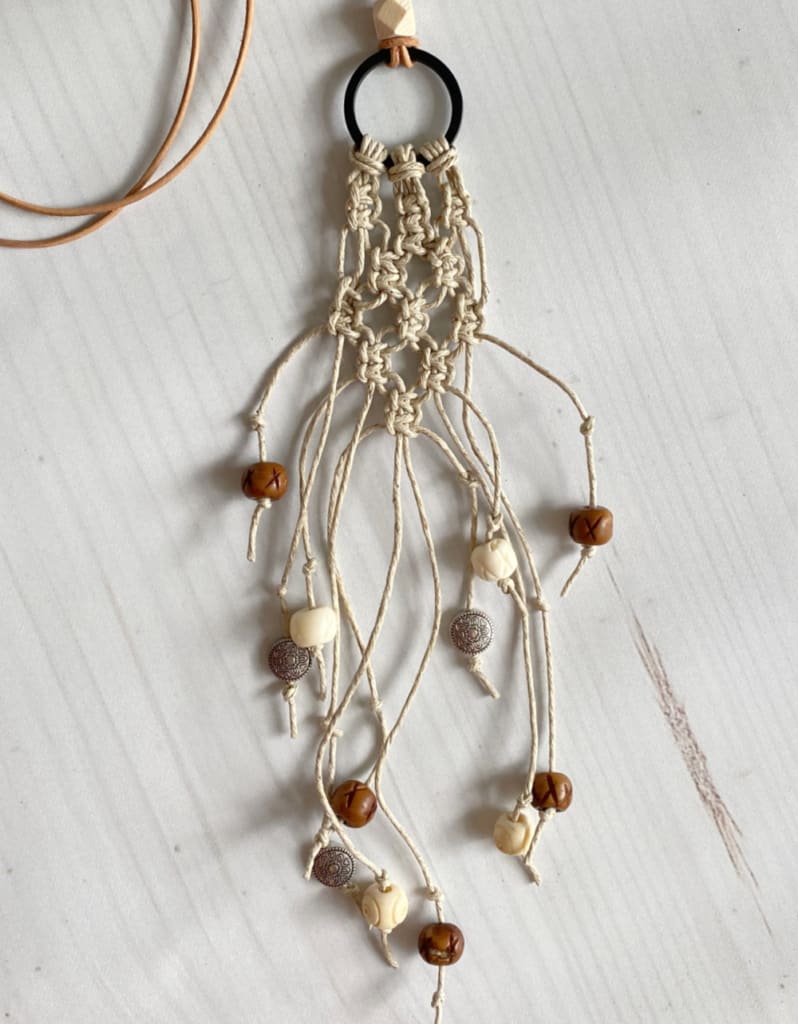
finishing touches
For the neck strap, tie a piece of leather around the top of the metal ring using another Lark’s Head Knot. I added a wooden bead to the leather before tying a regular knot on the strap’s end. To finish the necklace, lace beads onto the loose cords in a random fashion then secure with tiny knots.
If you prefer a more angled, polish look to the necklace ends, you can tape the loose ends down on the clipboard for stability. Then add beads & knots in an angled shape. See photos below.
Although this macrame necklace tutorial is easy to follow, working with thin twine can be tricky. Once you get used to it, though, the creative possibilities for more designs are endless!
The biggest compliment is a little share – pin the photo below!

Wendy, thank you so much for sharing this nice tutorial. I just loved it because it’s very much unique & really fashionable. I will try this at home for sure:) Looking to get more like this from you!
What a pretty boho summery idea. Thanks for sharing with us at Handmade Monday 🙂
These are such unique necklaces with a boho vibe. Your photos and instructions are really clear and precise, too.
Carol
http://www.scribblingboomer.com
Thanks Carol!
Thank you!