I’ve had requests for a tutorials for a macramé jar cover. I have to admit, jar covers are sweet. So here’s one of several I’ve made.
(This post may contain affiliate links; as an Amazon associate I earn from qualifying purchases. See disclosure here.)
supplies needed:
- 3mm macramé cord
- wooden beads
- mason jar
step 1 – preparation
Cut one piece of cord to be tied somewhat loosely around the top of the jar. To determine cord length, use the following formula:
(height of jar x 6) + circumference of top of jar
for this project: (7 in. x 6) + 9 in. = 51″
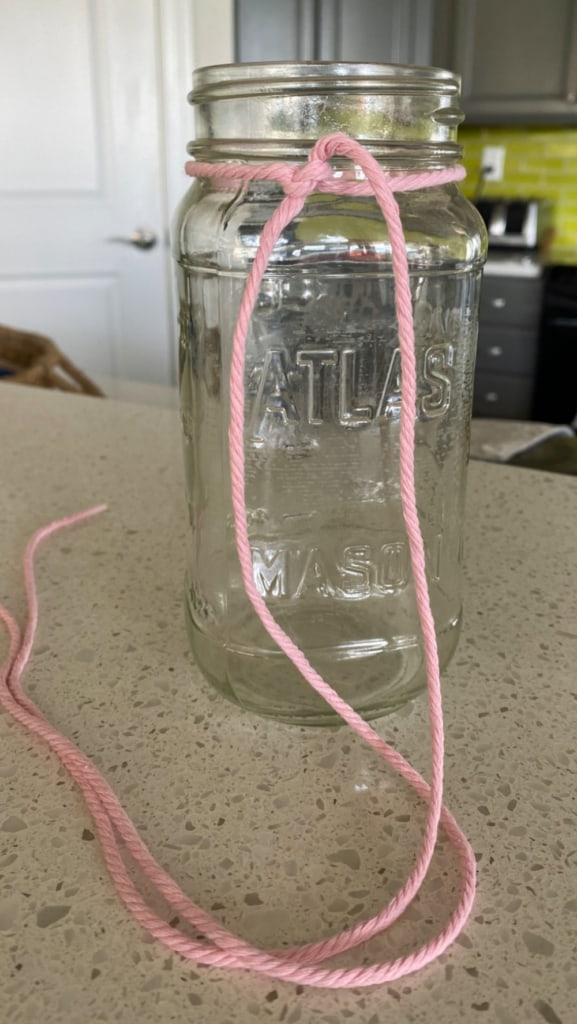
step 2 – lark’s head knots
Cut additional cords, each measuring the height of jar x 6. Tie these cords onto the top cord using Lark’s Head Knots. You will need enough individual cords to space closely around the entire jar, as long as the number of cords is divisible by four. Important: The tails of the first cord that is tied around the mouth of the jar is included in this count.
step 3 – square knots
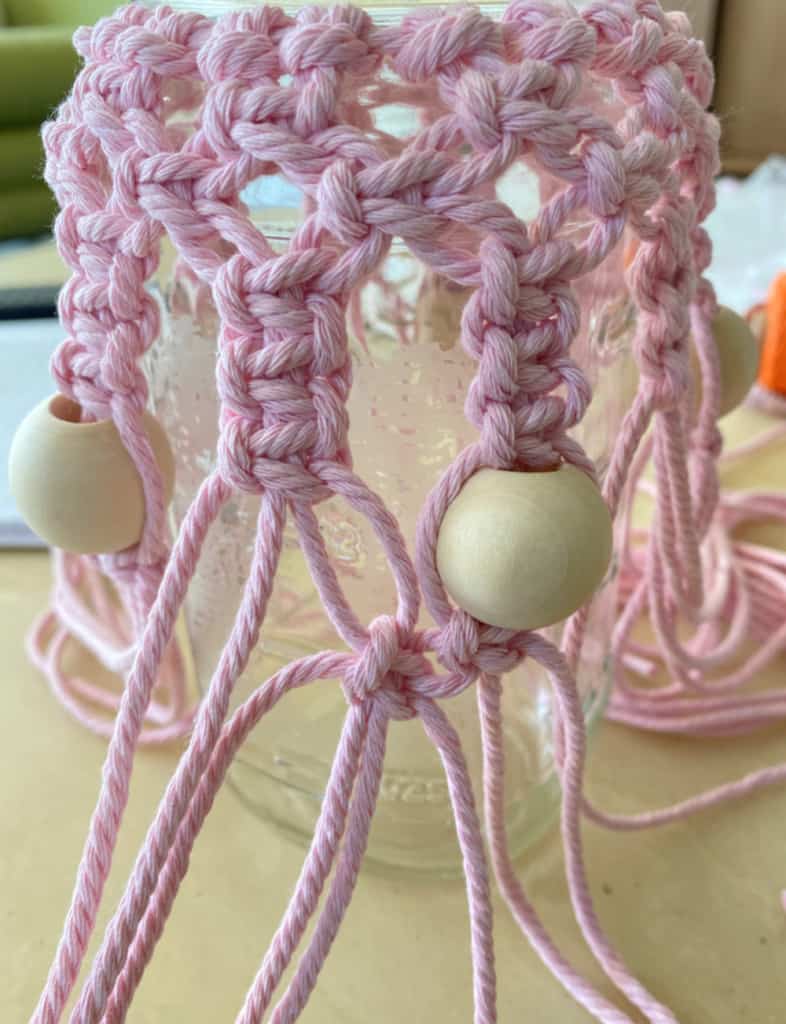
With 4 individual cords, make a Square Knot. Continue making a row of them around the cover, just under the Lark’s Head Knots.
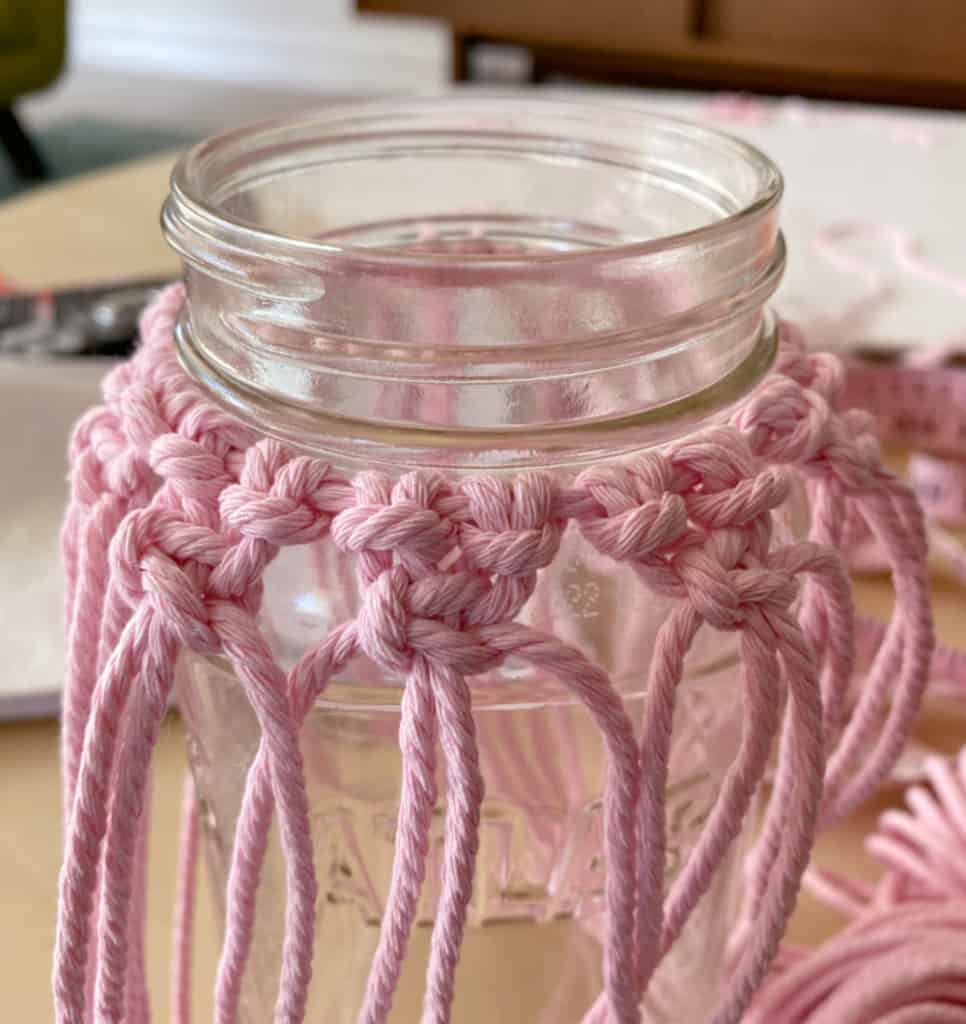
Now make a row of Alternating Square Knots, as shown below.
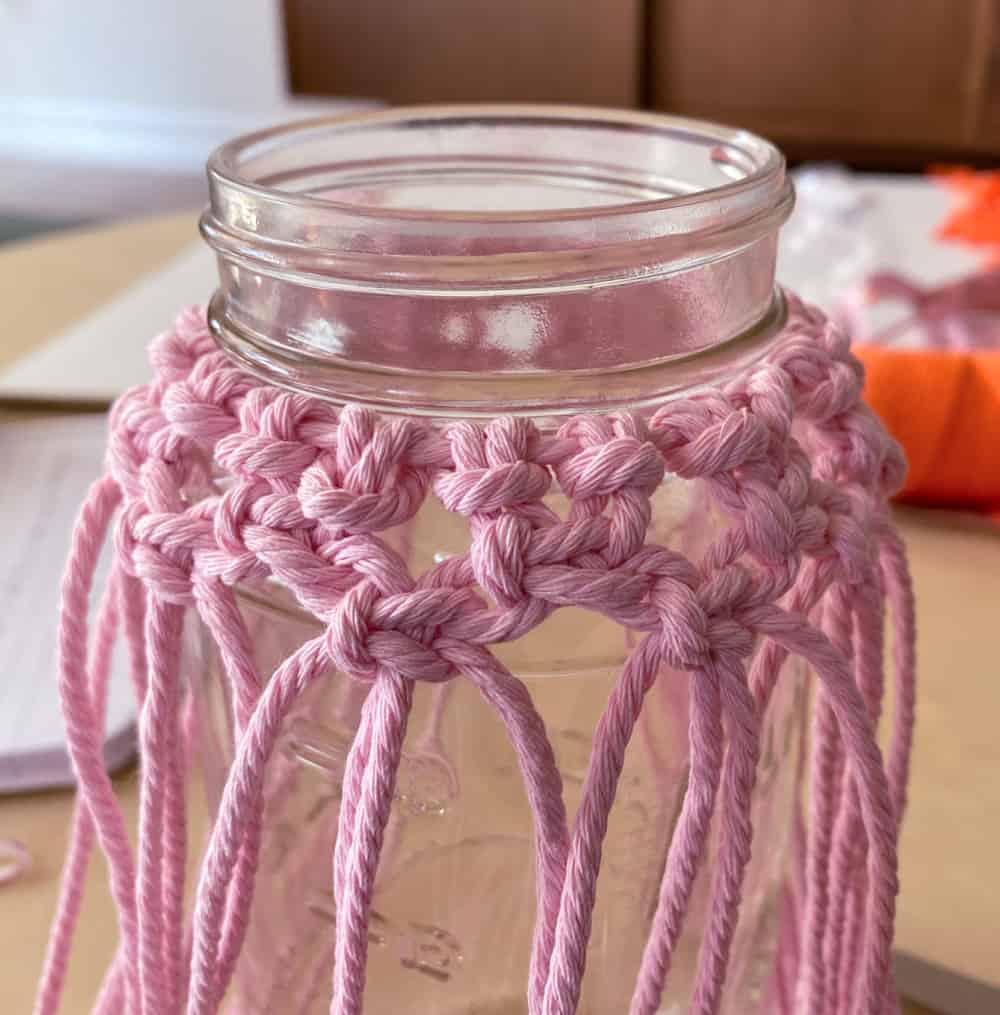
step 4 – square knot sennits
Create another row of Alternating Square Knots. Then add two more Square Knots directly underneath the first ones, creating Square Knot Sennits. Create 10 of these sennits around the entire jar.
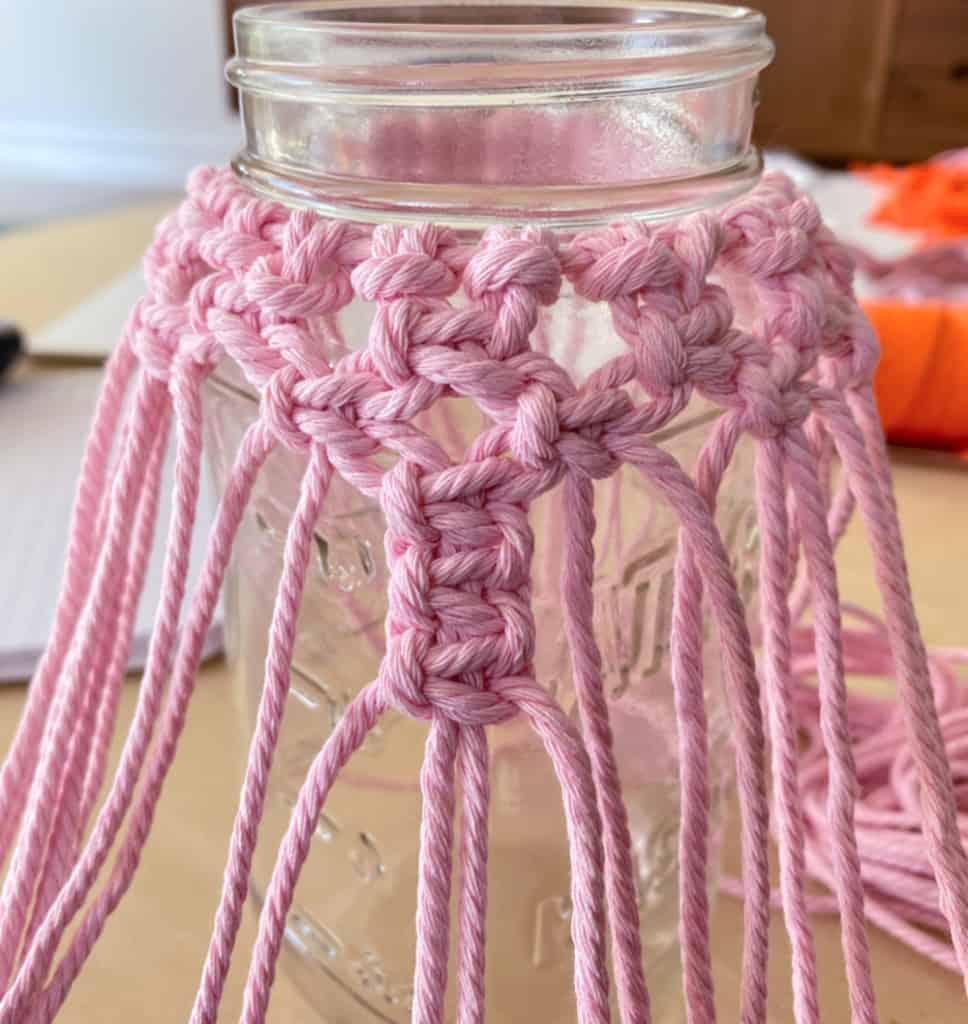
step 5 – add beads
Under one Square Knot Sennit, slide a wooden spacer bead onto the middle two cords. Then, with all 4 cords, tie a single Square Knot beneath the bead. Repeat this process for every other sennit.
Using two cords from a beaded sennit and two cords fromm an unbeaded sennit, make a Square Knot. Do this all around the jar.
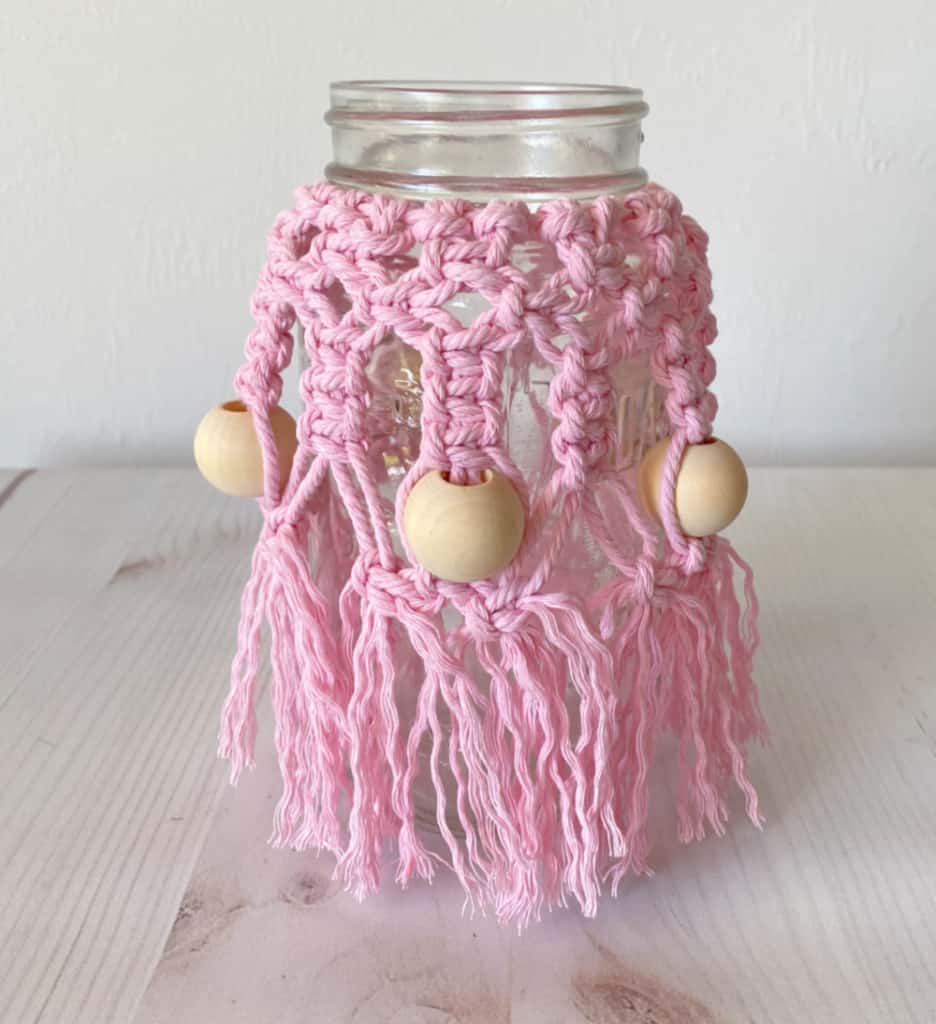
step 6 – finishing touches
Cut the loose cords evenly around the jar. Untwist the cords to create fringe. Now all that’s missing from your macramé jar cover is a bouquet of fresh flowers!
The biggest compliment is a little share – pin the photo below!