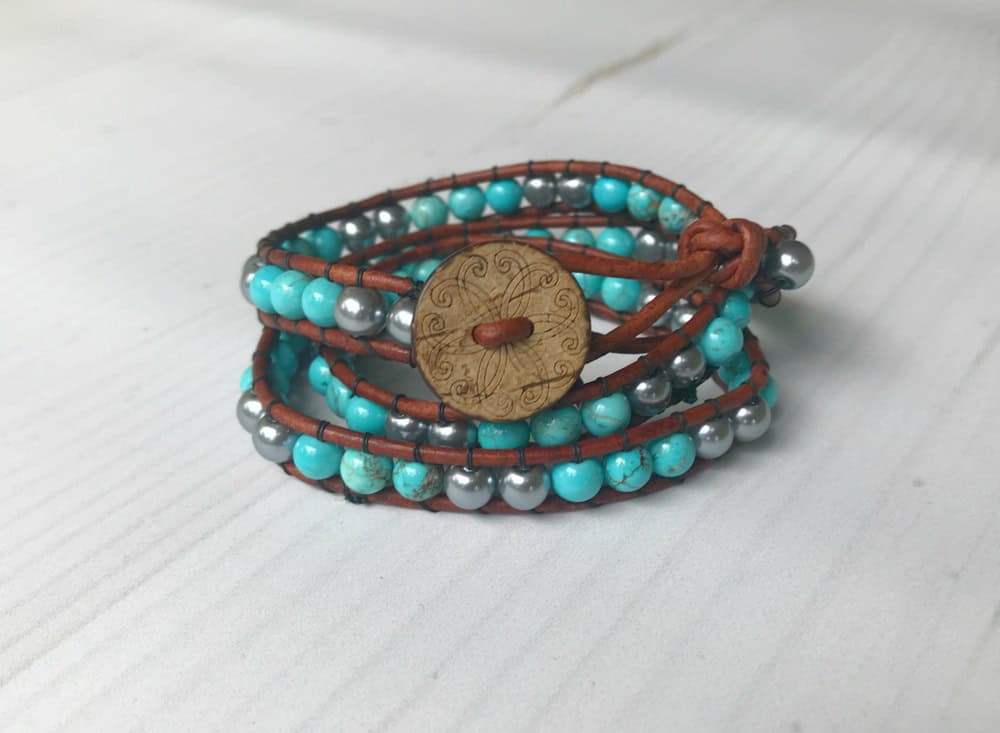
This boho wrap bracelet is a bit more complicated to make than simply stringing beads onto a cord, but the time it takes to learn it is totally worth it. This bracelet is so adorable and has such a sweet free-spirited flavor. Once you make your first one, the process will become much easier, and you are on your way to making hoards of them for friends. Because your friends will want one. Trust me.
(This post may contain affiliate links; as an Amazon associate I earn from qualifying purchases. See disclosure here.)
supplies needed:
- 2 mm leather cording, 60 inches in length
- bead weaving thread
- small sewing needle
- small beads – 3mm size works well; for this project I used beads that were a bit larger (If buying beads from JOANN Fabric or Michaels, about 3 strands)
- flat button
step 1
To begin, cut a piece of leather cording 60 inches long. Fold in half and tie a knot (big enough to fit over your button) in the folded end.

step 2
Next, thread a small needle with a long strand of bead weaving thread; knot the end. Insert it through the knot to secure it.

Begin using an “under-over” weaving motion (as shown below) for about 8 to 10 times. I use a clipboard to keep the bracelet secure.


step 3
Now you are ready to begin adding beads. Use the same “under-over” technique. Go under one leather side with the needle, insert it through the bead, then go over the other leather side. Bring the needle back under that same side (tightening the thread and keeping it snug), run needle through the same bead a second time, then over the other leather side. Pull the thread tightly before adding another bead. Continue adding beads in this fashion, keeping the thread snug throughout. Weaving the first few beads is the hardest; the process becomes easier as you continue.


Here is a great video from Becky Stern that shows you exactly how to master this weaving technique.
step 4
Once you reach the desired length, again weave under and over several times (without beads) to secure the end of the bracelet (as shown below). Next add a button by threading one end of the leather cording through its holes. Tie a knot to secure it, and trim ends.


important notes
Throughout the weaving, you may run out of thread. Create a knot and trim the ends. Then rethread your needle and keep going.
It is also important to test your needle size before beginning. Make sure the needle easily fits through the beads you are using.
The biggest compliment is a little share – please pin the photo below!


Is there any way to contact you with a question? I think the 3mm beads are way too small for this project.
my email is bricoleart@aol.com
Hi Mary, I looked back over my notes for making the bracelet, and it does say 3mm beads but I also mentioned that I sometimes opt for a bit larger beads. If you feel the 3mm are too small to comfortably work with, go ahead and select beads a size you prefer. The process is still the same.
My beads arrived today. I have been so excited to try this project. I ordered 3mm beads and they are tiny. Is there some mistake. I can’t imagine how this will even work. Did you mean 3mm hole? Please advise.
This is so awesome! I want to make a whole flock of them!
I’m glad that you share at our Party in Your PJs link party. I’m going to feature it at the link party that starts this evening. Thanks so much for sharing.
Thanks so much Nina.
Hi Wendy,
Great & Beauthyfull Learning!!! I have always loved to use bracelets. It will be so beautiful and strong to look at. Usually, these bracelets are made by hand. Here are tips for creating such a bracelet. You will learn how to create it step by step. I’ve been searching for a bracelet to create a blog for a long time, and I found it. At home today I will try to create it and gift it to my friends.
Thank You!!!
–Lily
Glad you enjoyed the post!
This is beautiful! I just bought my first ever wrap bracelet and I love it but I never thought of trying to make one for myself. I am totally pinning this!!
Thank you Joanne! I love wrap bracelets, too.