I’m incredibly excited about a very large macramé project in the works in my studio. But while I’m waiting on new supplies, I made a simple little bunting that turned out so sweet. When I added mismatched covered buttons to this macramé garland, I loved it even more!
(This post may contain affiliate links; as an Amazon associate I earn from qualifying purchases. See disclosure here.)
supplies:
- macramé cord
- masking or painter’s tape
- covered buttons
- fabrics scraps
step 1 – preparation
Cut one piece of cord 4 feet long and 100 pieces each 32 inches long. Wrap all ends with tape to prevent fraying while working.
step 2 – lark’s head knots
I found the easiest place to work was on a flat surface, so tape a section of the long cord onto the counter. Next, tie 10 shorter cords onto the longer one, using the Lark’s Head Knot (see photos below.)
![]()
step 3 – square knots
Creating a triangular shaped flag is easy. You have 20 individual cords (for each flag) tied onto the working rope. For Row 1, begin with the cord on the far left and make a horizontal row of 5 Square Knots.

Row 2: Begin with the 3rd individual cord from the left and make a horizontal row of 4 Alternating Square Knots.

Row 3: Begin with the 5th individual cord from the left and make a horizontal row of 3 Alternating Square Knots.

Row 4: Begin with the 7th individual cord from the left and make a horizontal row of 2 Alternating Square Knots.

Row 5: Begin with the 9th individual cord from the left and make a single Alternating Square Knot.

step 4 – half hitch knots
Finish off the bottom of the flag with a row of Half Hitch Knots. First work on the left side, working from left to right. Then work on the right side, going from right to left. See this Half Hitch Knot tutorial and this video for guidance.
![]()
step 5 – create more flags
Repeat steps 2 through 4 to create 9 more flags.
step 6 – trim flags
Give the bunting a more polished look by trimming each flag in a downward center angle. I taped several business cards together in a right angle to use as a guide (see photo below).
![]()
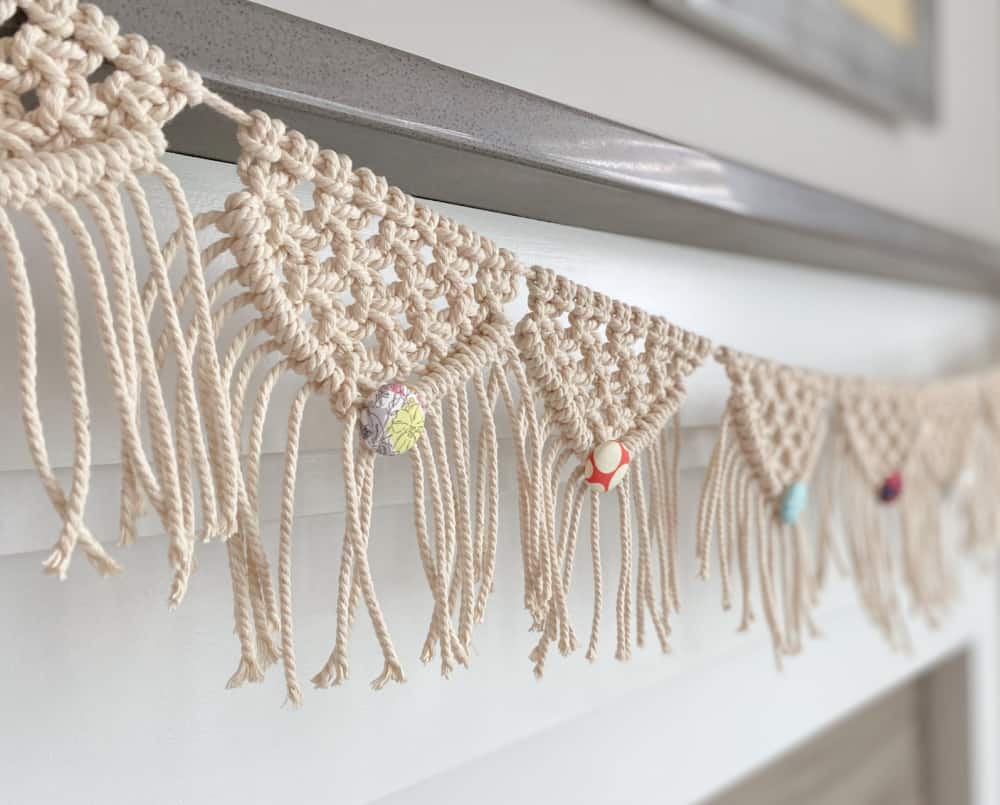
step 6 – add buttons

There are many ways you can embellish a macramé garland, such as with wooden beads or yarn pom-poms. But I thought covered buttons would add a sweet touch. A kit makes the process easy and comes with all the tools you need. I just used fabric scraps I had on hand.
![]()
How to make a covered button (refer to photo above):
- Place a small scrape of fabric into the large circular base. Then place the button front face down into it.
- Trim off the excess fabric and fold what’s left into the button center.
- Place the button back on top and press gently.
- Place the small blue circular tool on top and press firmly to seal the button together.
Using an embroidery needle and thread, I stitched a button onto the bottom of each flag. (If you prefer to buy ready-made covered buttons, check out these super cute ones on Etsy!)

Now you’re ready to use your macramé garland! It’s super sweet hanging from a mantle, and it also makes a lovely homemade gift to a friend.
The biggest compliment is a little share – pin the photo below!
![]()

I’m so happy to have stumbled upon your site!! It’s been wonderful to make these crafts and your instructions are wonderful!
I just love your garland, Wendy! I have some macrame cord left over from another project and I want to make one. The tutorial is excellent! Thanks for sharing at Celebrate Your Story! Link Party. You’ve been featured this week 🙂
Thanks so much Rebecca!
That’s gorgeous, the little buttons are a perfect finishing touch.
Such a pretty garland for any time of year Wendy.
Thank you for sharing your DIY macrame garland at Create, Bake, Grow & Gather this week. I’m delighted to be featuring it at this week’s party and pinning too.
Hugs,
Kerryanne