This is a tutorial for an easy macrame curtain, but there is a back story. I pride myself on having diverse friends. There’s so much to learn from people of all ages and interests! And one of my favorites is Phoebe. She’s a young beautiful mother who, along with her husband, has embarked on an adventurous expedition with their two small children. They’ve transformed an old trailer into a little bohemian camper, filled with basic essentials and a plan to travel the country. But more important then the supplies they’ve packed into that little trailer is the sense of wonderment and adventure they’re gifting their small sons. I adore this family!
Are you thinking what I’m thinking? What boho tiny-house adventure is complete without a macrame curtain?! So here’s what I made for them…
(This post may contain affiliate links; as an Amazon associate I earn from qualifying purchases. See disclosure here.)
supplies needed:
- metal drapery pole & brackets
- cotton rope
- masking or painters’ tape
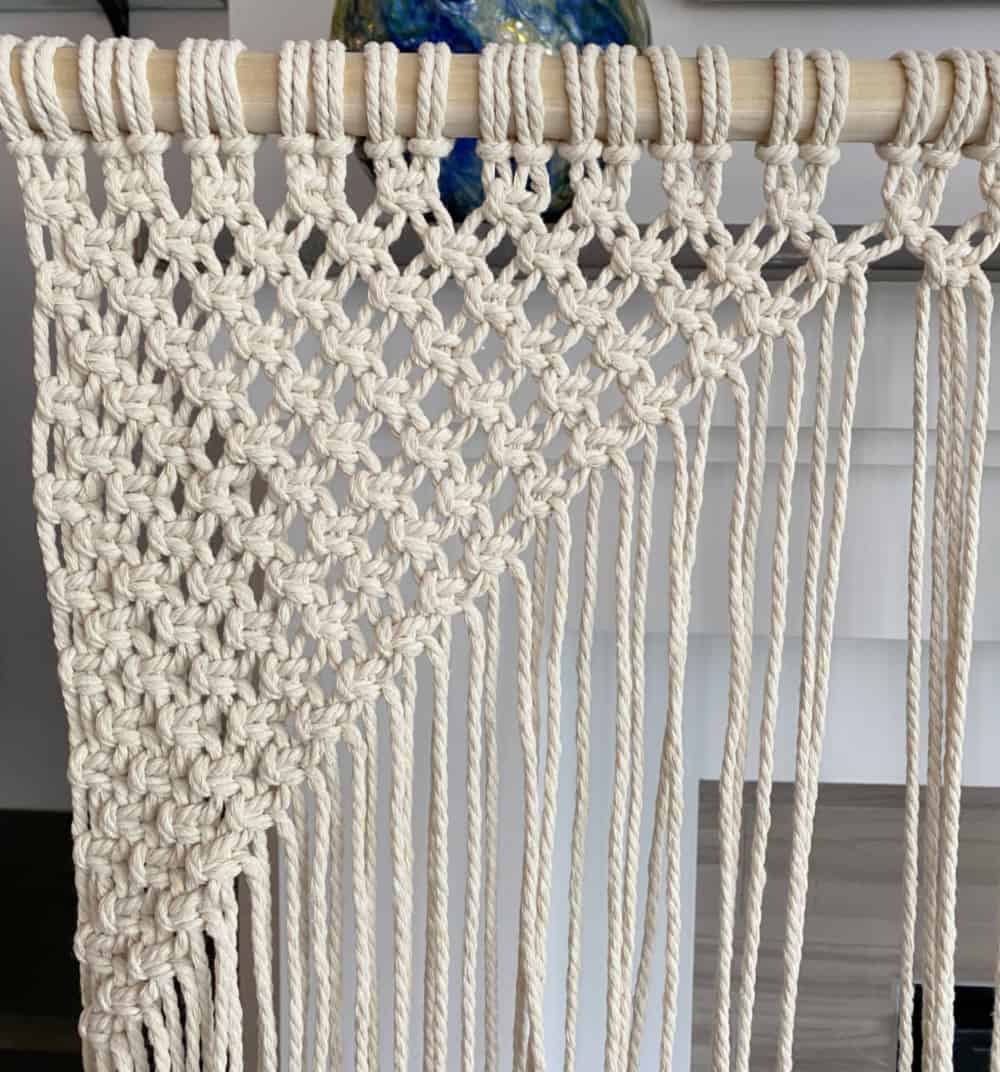
step 1 – getting started
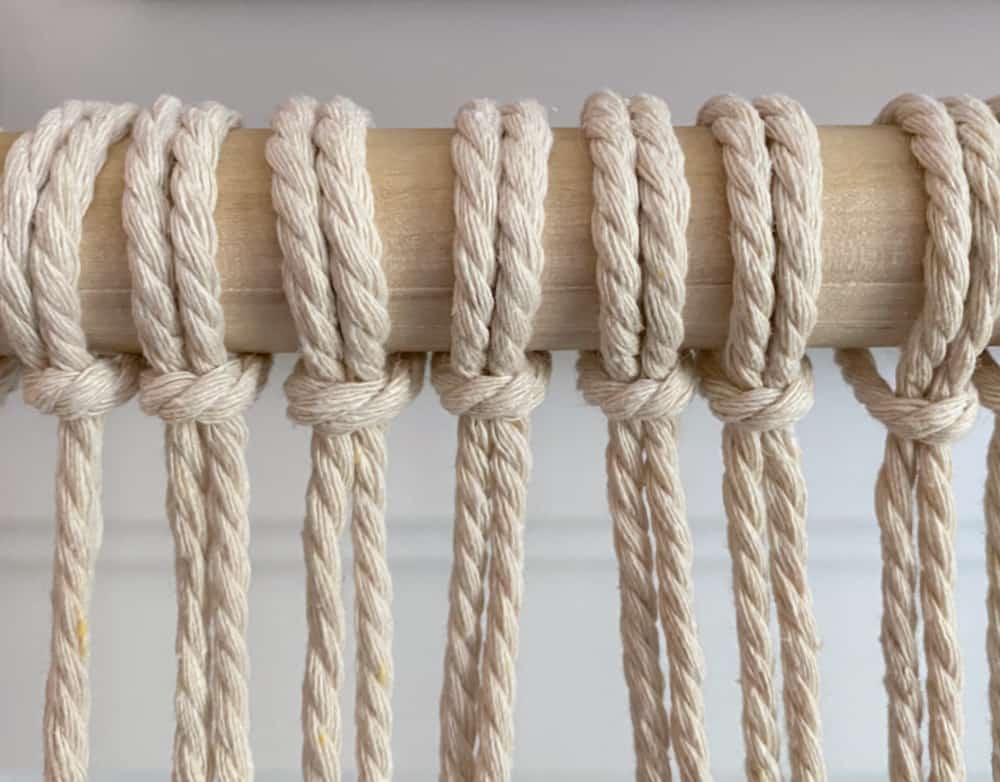
Cut 52 pieces of cotton macrame cording, each measuring 20 feet each. Be sure to wrap all ends with masking tape to prevent fraying while working. Tie all the pieces to the wooden pole using Lark’s Head Knots.
Next, beginning with the first 4 individual cords on the left, create a horizontal row of 26 Square Knots.
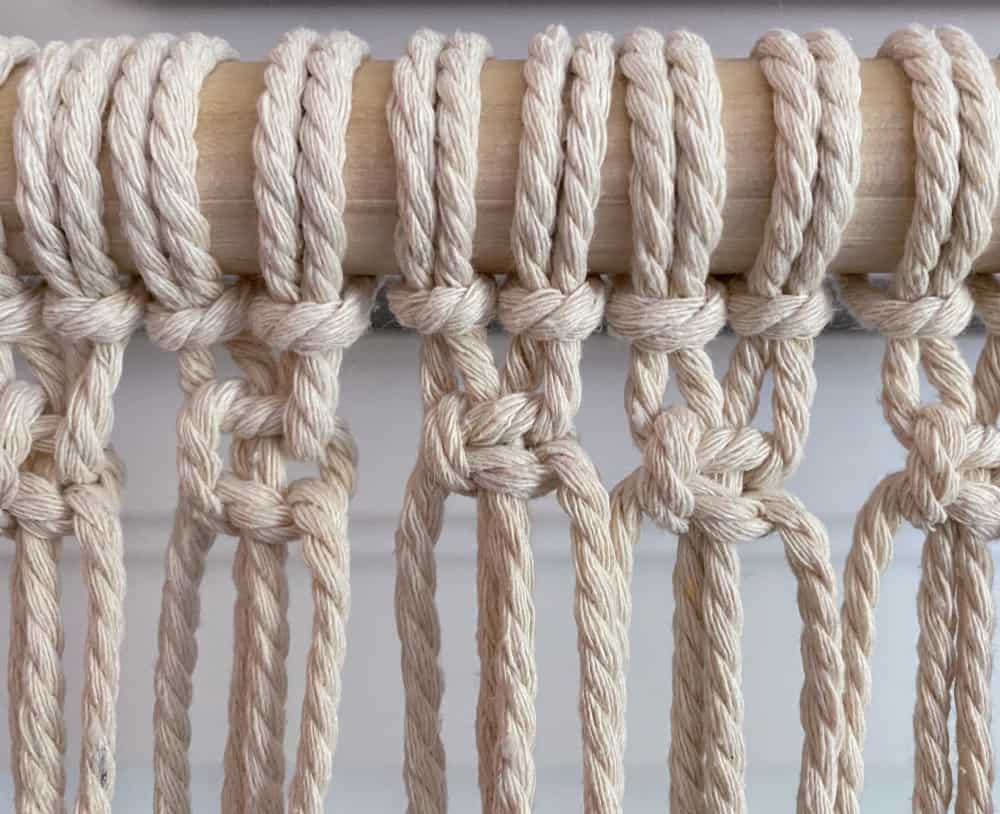
Beginning with the third individual cord on the left, make a horizontal row of 25 Alternating Square Knots.
step 2 – left section
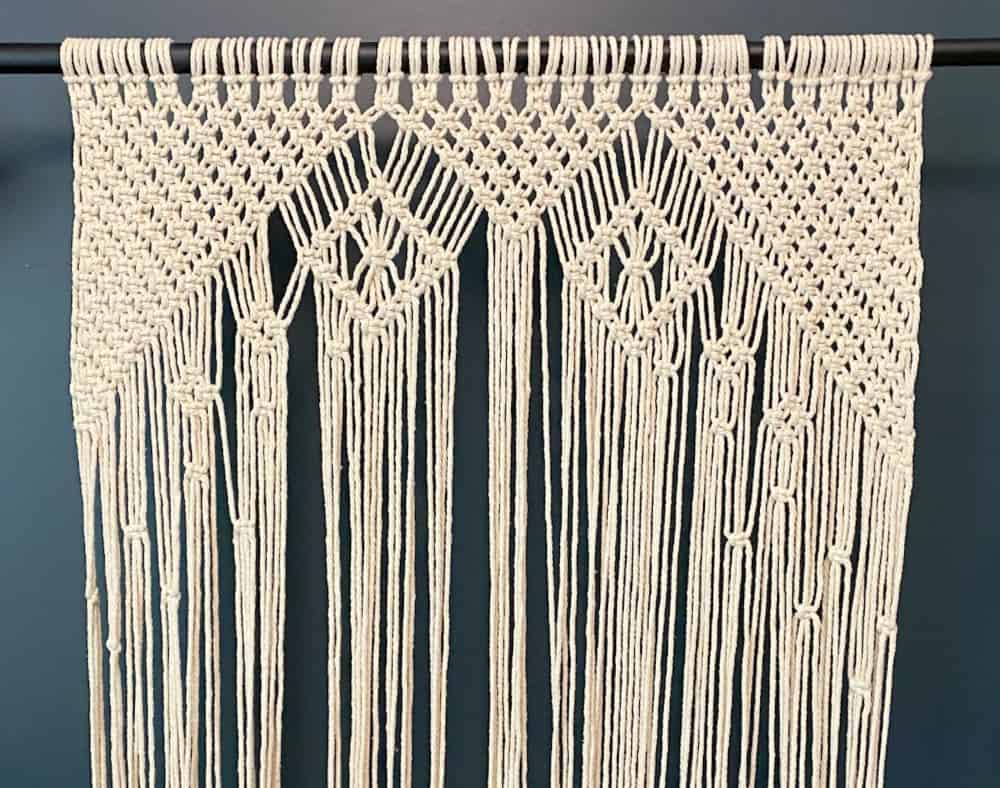
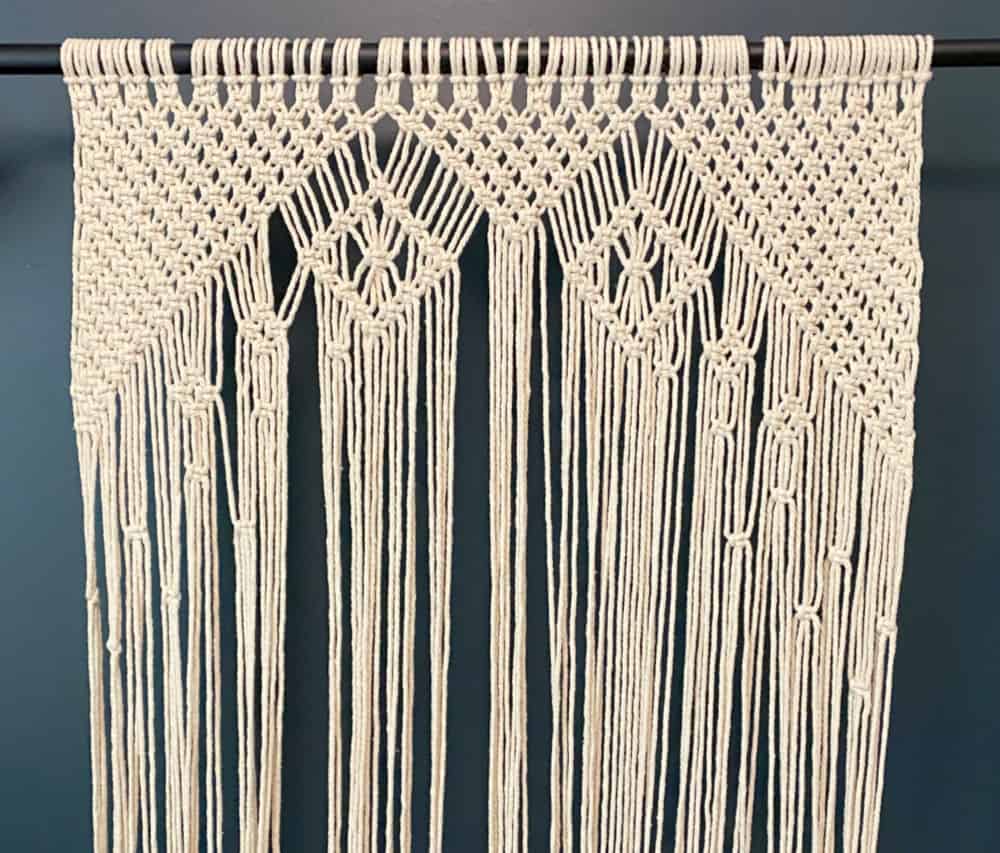
To create a triangular shaped section on the left side of the curtain (see photo below), follow the subsequent instructions.
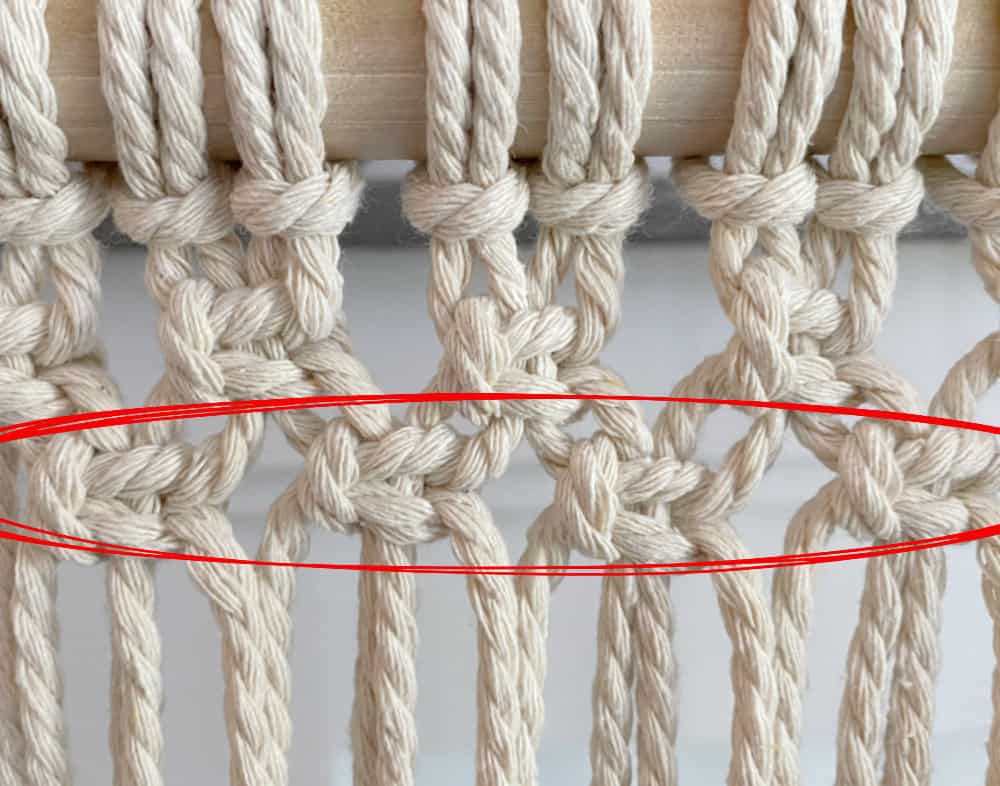
Two horizontal rows of Square Knots have already been made. So for row 3, beginning with the first individual cord on the left, make a row a 9 Square Knots.
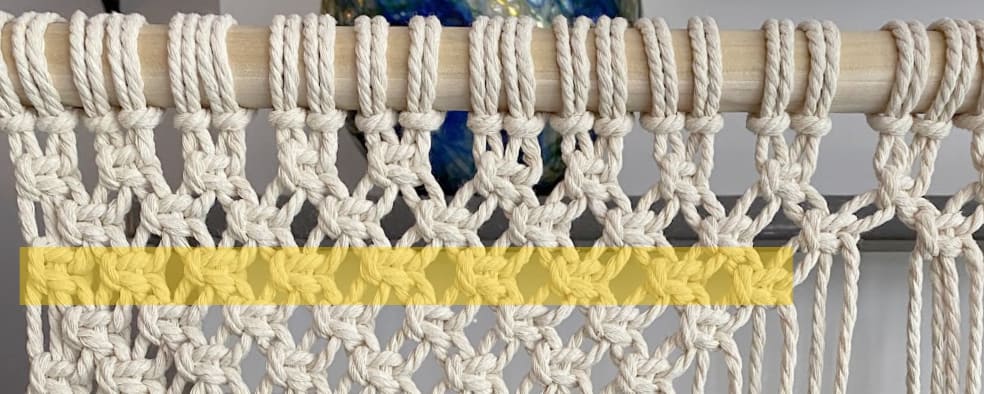
Row 4 – Beginning with the third cord on the left, make a row of 8 Square Knots.
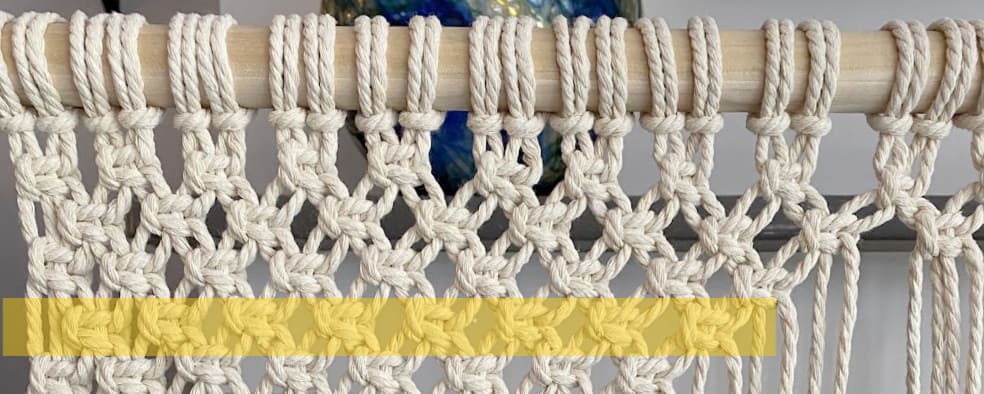
Continue in this fashion to create more rows.
- Row 5 – Beginning with the first cord on left, make 8 Square Knots.
- Row 6 – Beginning with the third cord on left, make 7 Square Knots.
- Row 7 – Beginning with the first cord on left, make 6 Square Knots.
- Row 8 – Beginning with the third cord on left, make 5 Square Knots.
- Row 9 – Beginning with the first cord on left, make 4 Square Knots.
- Row 10 – Beginning with the third cord on left, make 3 Square Knots.
- Row 11 – Beginning with the first cord on left, make 2 Square Knots.
- Row 12 – Beginning with the third cord on left, make 1 Square Knot.
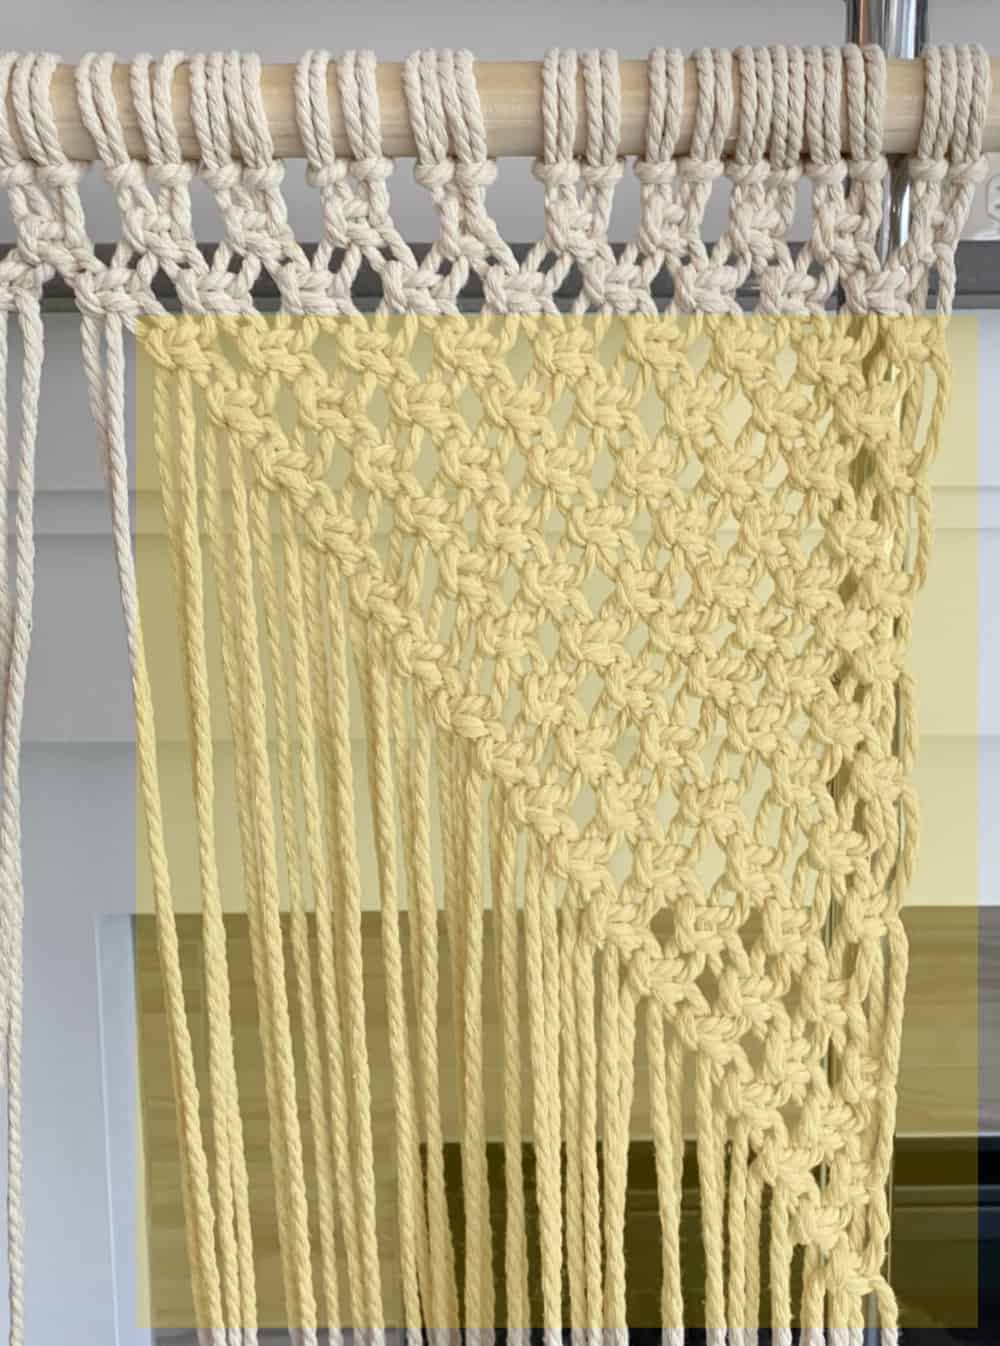
step 3 – right section
In this same fashion, create a matching triangle section on the left side of the curtain, as shown in photo below.
step 4 – center section
Now, using the 28 individual cords in the center of the curtain, follow the instructions below to create a small triangle design.
Beneath the two existing rows of Square Knots, create six more rows of Alternating Square Knots. This is row 3.
- Row 4 – Make 5 Square Knots.
- Row 5 – Make 4 Square Knots.
- Row 6 – Make 3 Square Knots.
- Row 7 – Make 2 Square Knots.
- Row8 – Make 1 Square Knot.
step 5 – large diamonds
Now that all three triangle sections are completed, you will add two large diamond designs to the curtain. Let’s begin with the area to the right of the center section. Find the 16th and 17th Square Knots from the left on the second horizontal row; then about 2 inches down make a new Square Knot, as shown in the photo below.
Follow the illustrations below to add more Square Knots. You will see a diamond shape beginning to form. For the center row of the diamond (see illustration 4) you will make a horizontal row of 3 Square Knots* across.
*Note – the Square Knot in the center of the large diamond is tied using 6 cords instead of the traditional 4.
Continue in this fashion to create the bottom half of the diamond, as shown below.
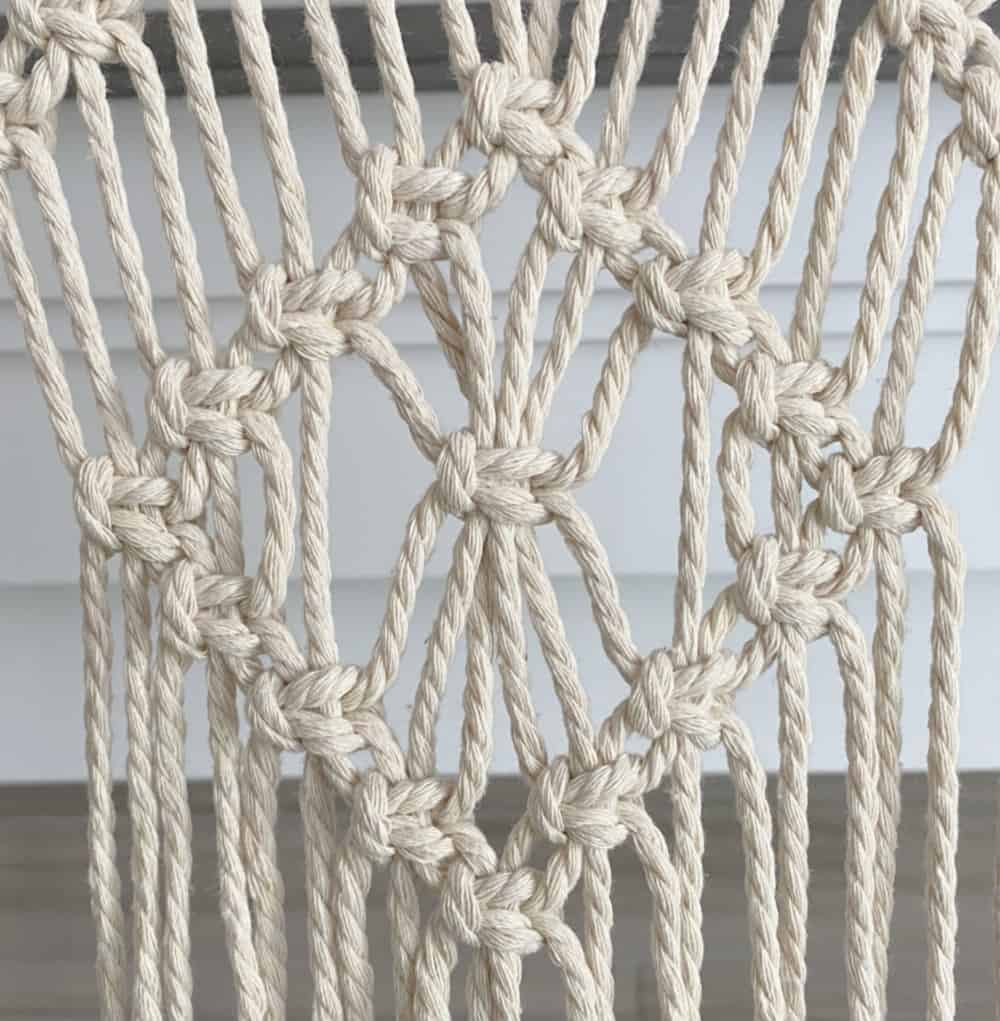
Create an identical large diamond between the center section and the left section of the curtain.
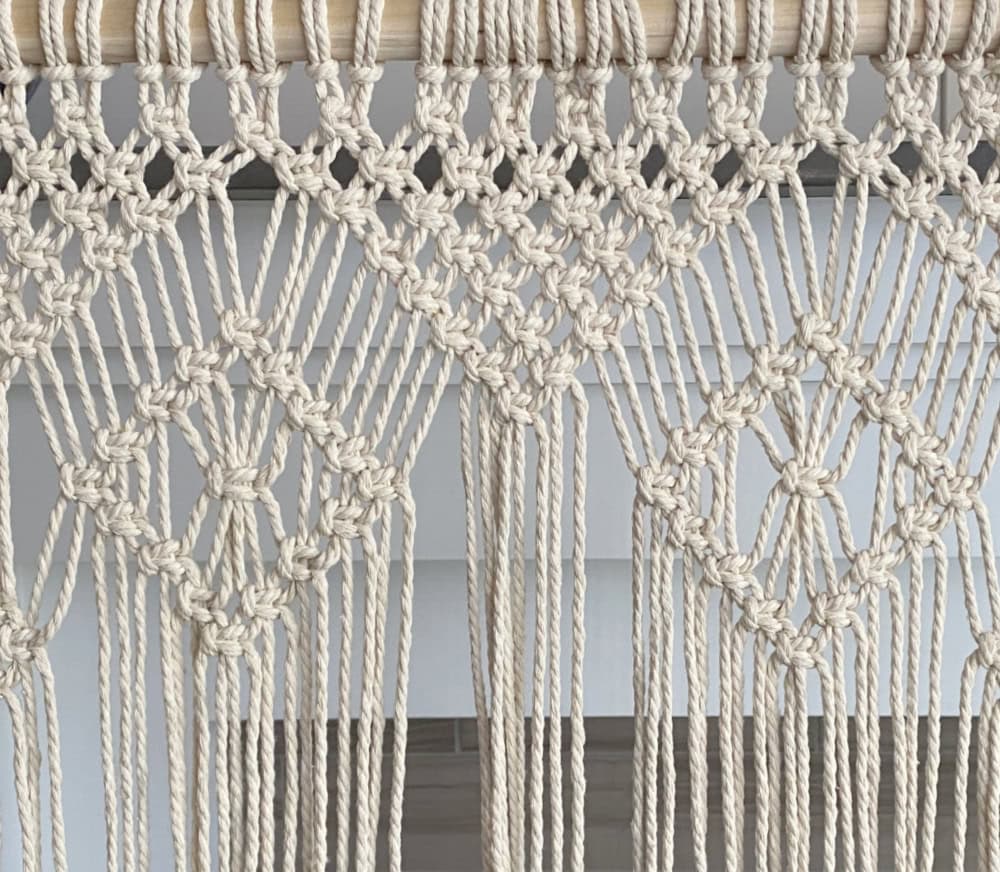
step 6 – small diamonds
Between the left section and the large diamond, make a Square Knot in the placement shown in photo below
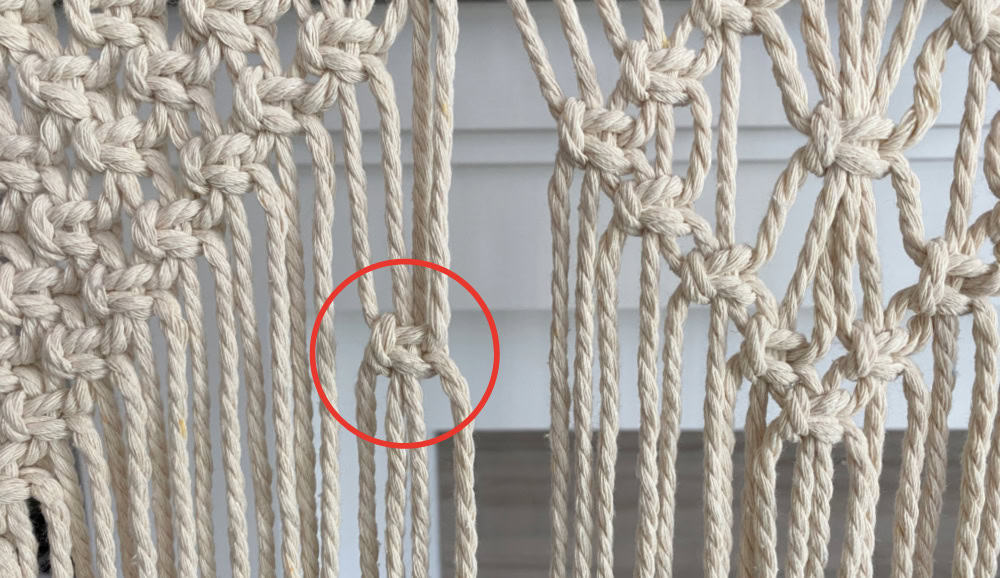
Next, make two Alternating Square Knots below it (photo 1 below). Then make a final Square Knot below those (photo 2). This creates a small diamond design.
Make an identical small diamond on the right side of the curtain, as shown below.
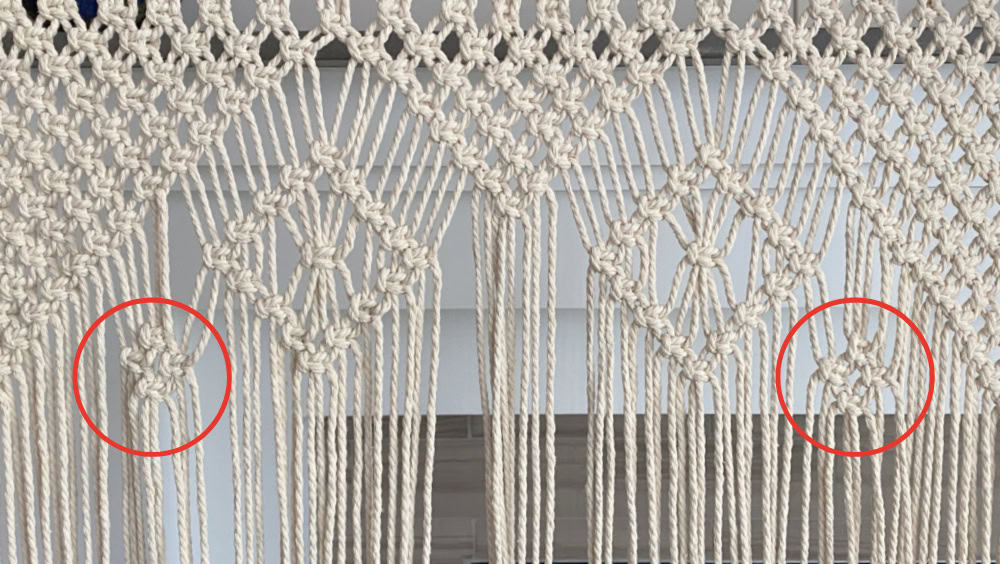
step 7 – finishing touches
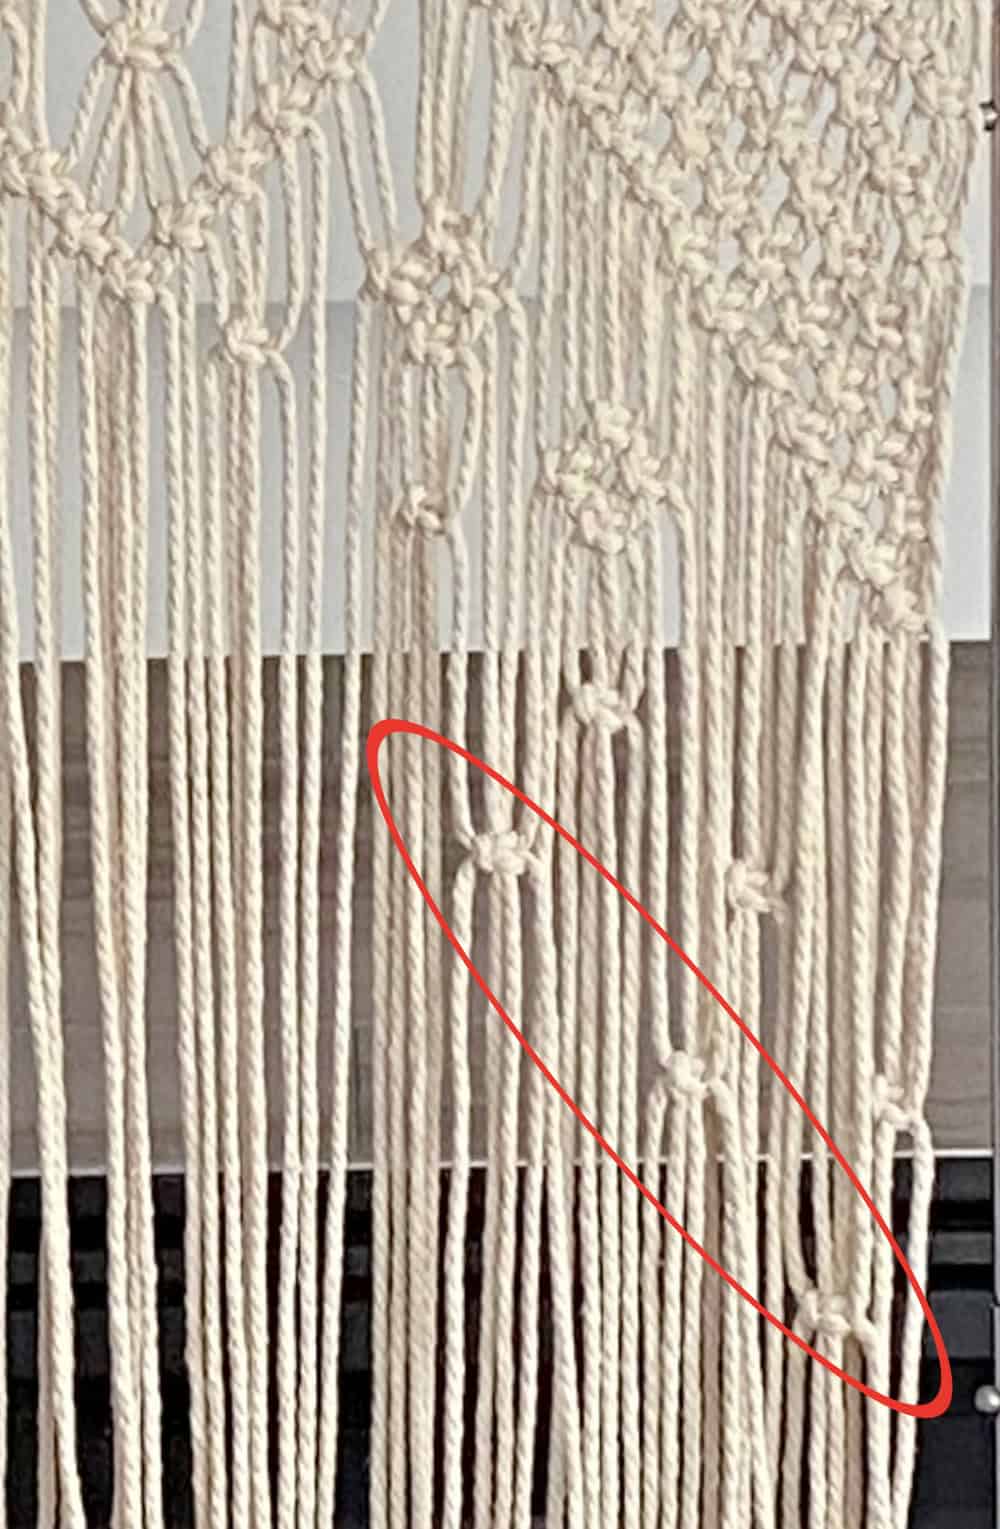
Finally, add some single Square Knots placed evenly in a downward angle, as shown in photo below. Repeat for the other side.
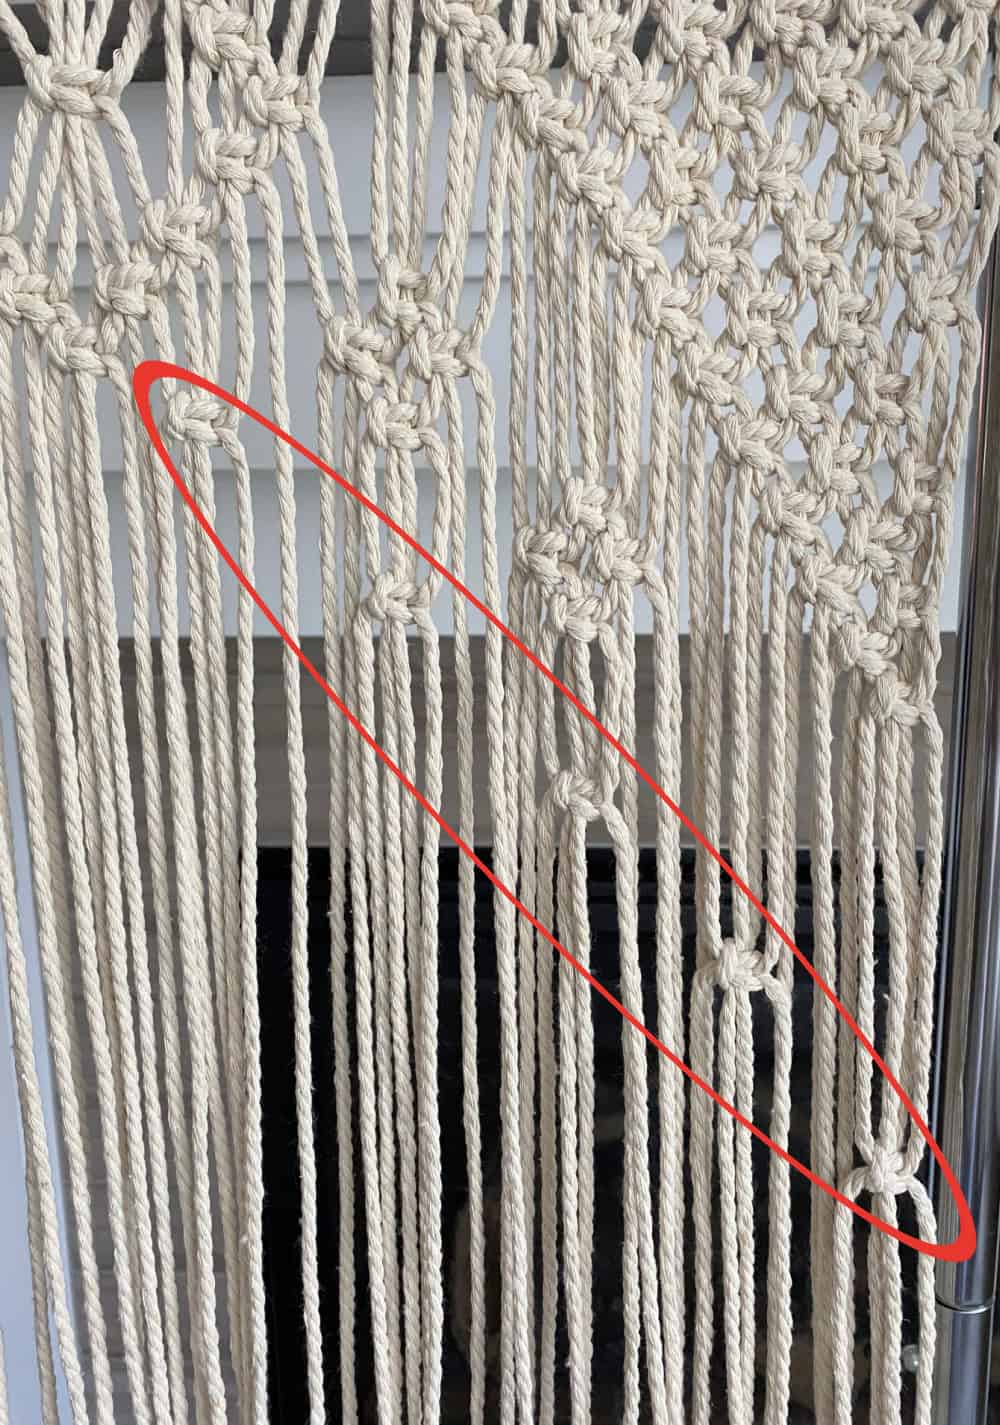
Make a second downward angled line of Square Knots, as shown below. Repeat for other side.
Although I used a wooden pole on which to make the curtain, I later transferred it to an adjustable metal drapery rod. Now my friends will be able to install it in their little boho camper themselves. They’ll be using the macrame curtain as a divider between the little boys’ room and their own. Can’t wait to see it in use!
*Important tip: When making a macrame curtain, make sure the total number of individual cords is divisible by four.
The biggest compliment is a little share – please pin the photo below!


Could you give the width & length of this curtain? And please show a picture of the bottom?
Thank you!
I want to try this so bad but would have to see a video. Love this!
Wendy, I love your tutorial. Can you help me by telling me the measures of the final curtain? If I want it a little bit shorter, how should I measure the cords? Thankyou
Hi,Wendy Your macrame curtain is so wonderful! I was super inspired by your talent and macrame skills! I would love to invite you to link up your project at Whimsy Home Wednesdays to inspire others and have a chance to be featured https://www.artsandclassy.com/category/diy/whimsy-home-wednesdays-linky-party/
So beautiful! I have actually been considering buying one of these to use in place of a headboard. I’ll be featuring it tomorrow at the Thursday Favorite Things blog hop. 🙂
This is so fun and yes, definitely Bo-ho. I was around for the original trend in the 70’s but never got further than a hanging basket, LOL! Thanks for sharing at All About Home Link Party. I’m sharing this post on Monday evening. We appreciate you joining in on the fun!
Wendy, I love the back story and the macramé curtain.
Thank you for sharing this easy DIY at Create, Bake, Grow & Gather this week. I’m delighted to be featuring this project at the party tomorrow and pinning too.
Hugs,
Kerryanne
Thanks Kerryanne!
This curtain is beautiful. You are so talented.
Thank you so much!
This is lovely, but you don’t show a picture of the entire curtain. How do you finish off the ends of the cords that you have taped to prevent fraying?