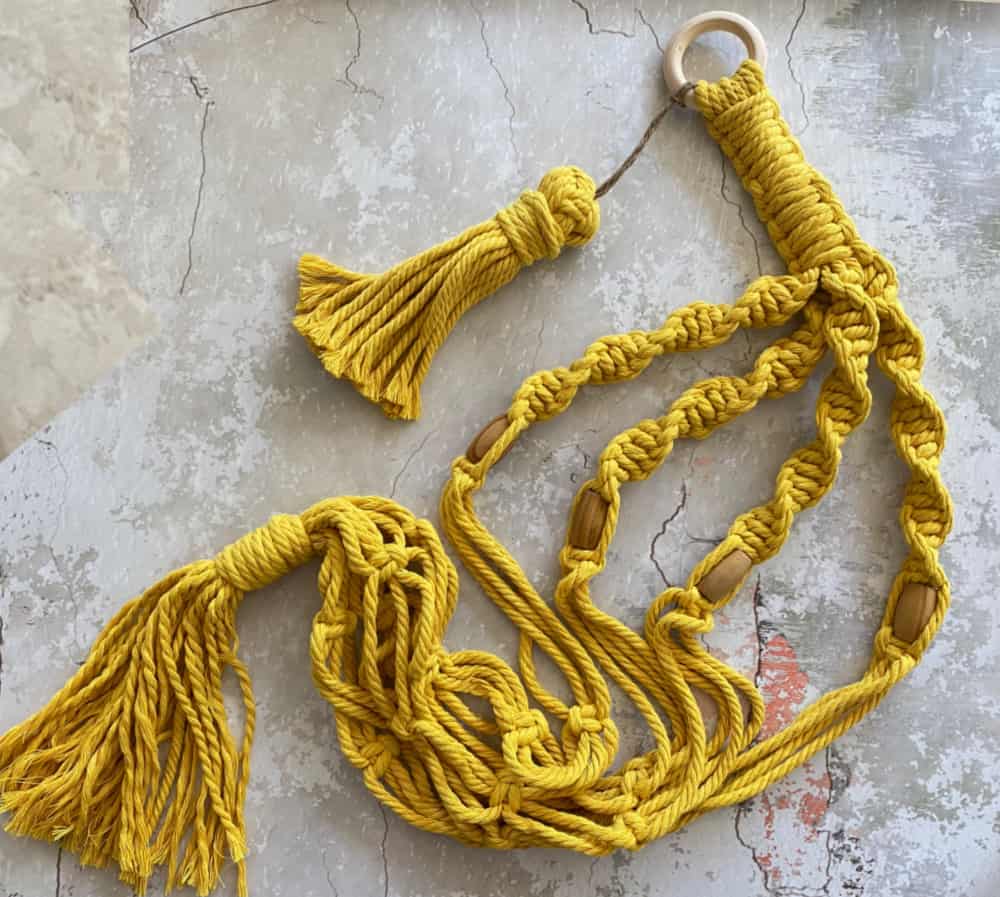
Although I love the apricot hanging planter I made recently, I have to say that I like this one even more! It’s an easy spiral macramé planter made with bright yellow rope and natural wooden beads. And it takes less than an hour to make.
(This post may contain affiliate links; as an Amazon associate I earn from qualifying purchases. See disclosure here.)
supplies needed:
- 5 mm rope
- wooden beads
- wooden ring
- painter’s tape
- scissors
preparation
Cut 6 pieces of rope, each measuring 15 feet. Cut two more pieces of rope, each measuring 20 feet. Wrap all ends of cut pieces with painter’s tape to prevent fraying while working.
step 1 – top
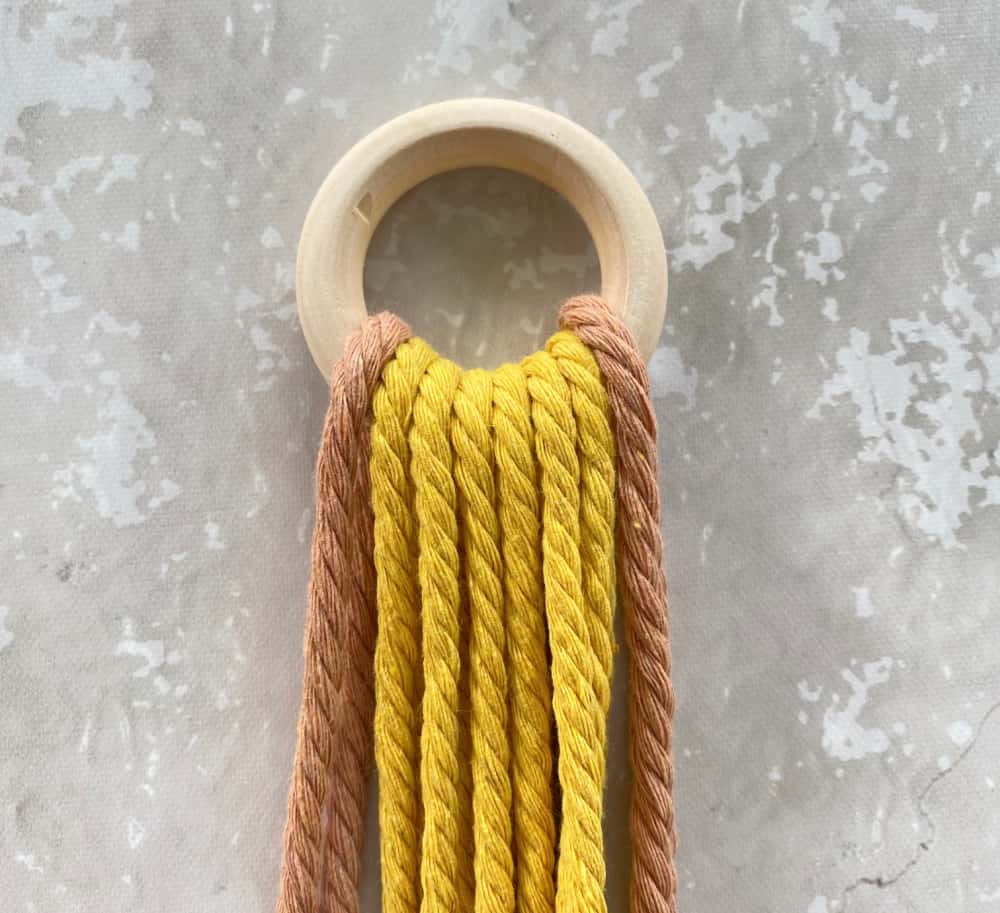
First drape the six 15′ pieces of rope through the wooden ring. Make sure the center of each rope is on the top and all ends hang evenly. Next, drape the two 20′ pieces of rope through the ring, one on each side.
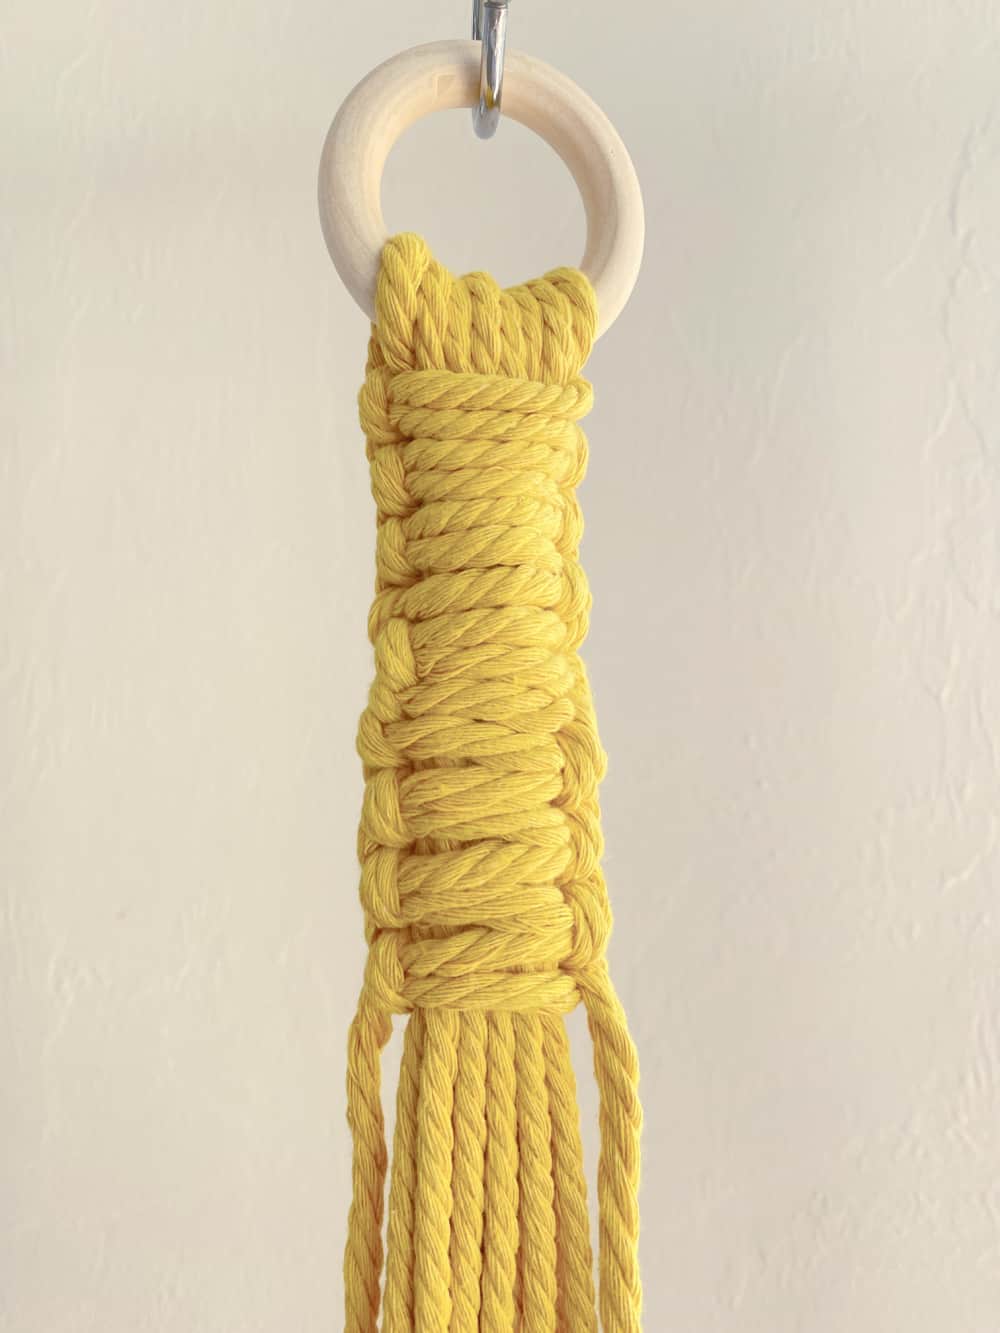
Using one of the 20′ cords from each end, make a vertical chain of Square Knots, while keeping the inner cords embedded through the center.
(In the photo below, for demonstration purposes, I used different color cords on each end to represent the two 20′ pieces. However, you will actually use cords all the same color.)
Continue tying Square Knots in this fashion until the chain is about 4″ long. It will look like the photo below.
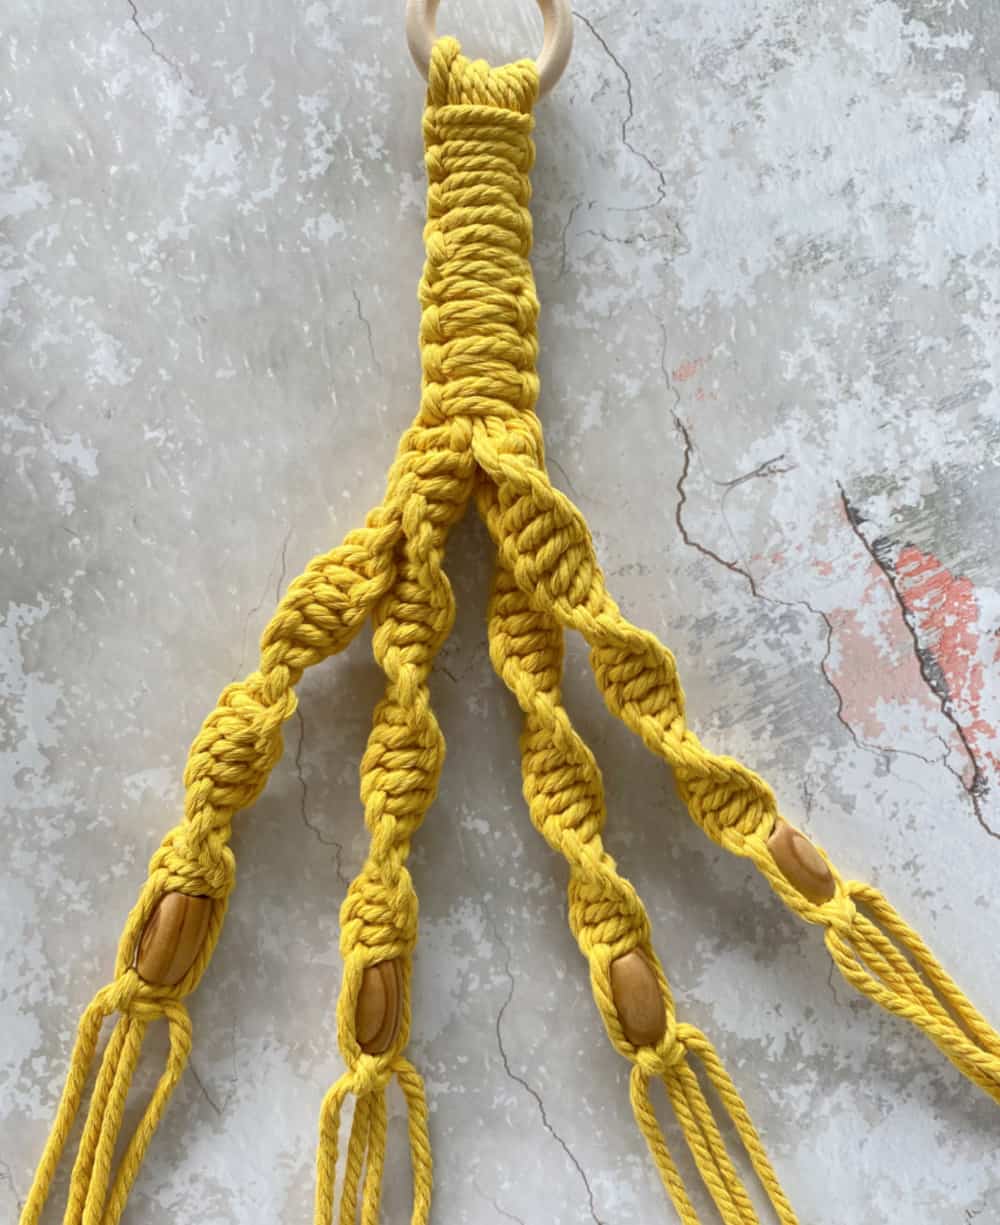
step 2 – spirals
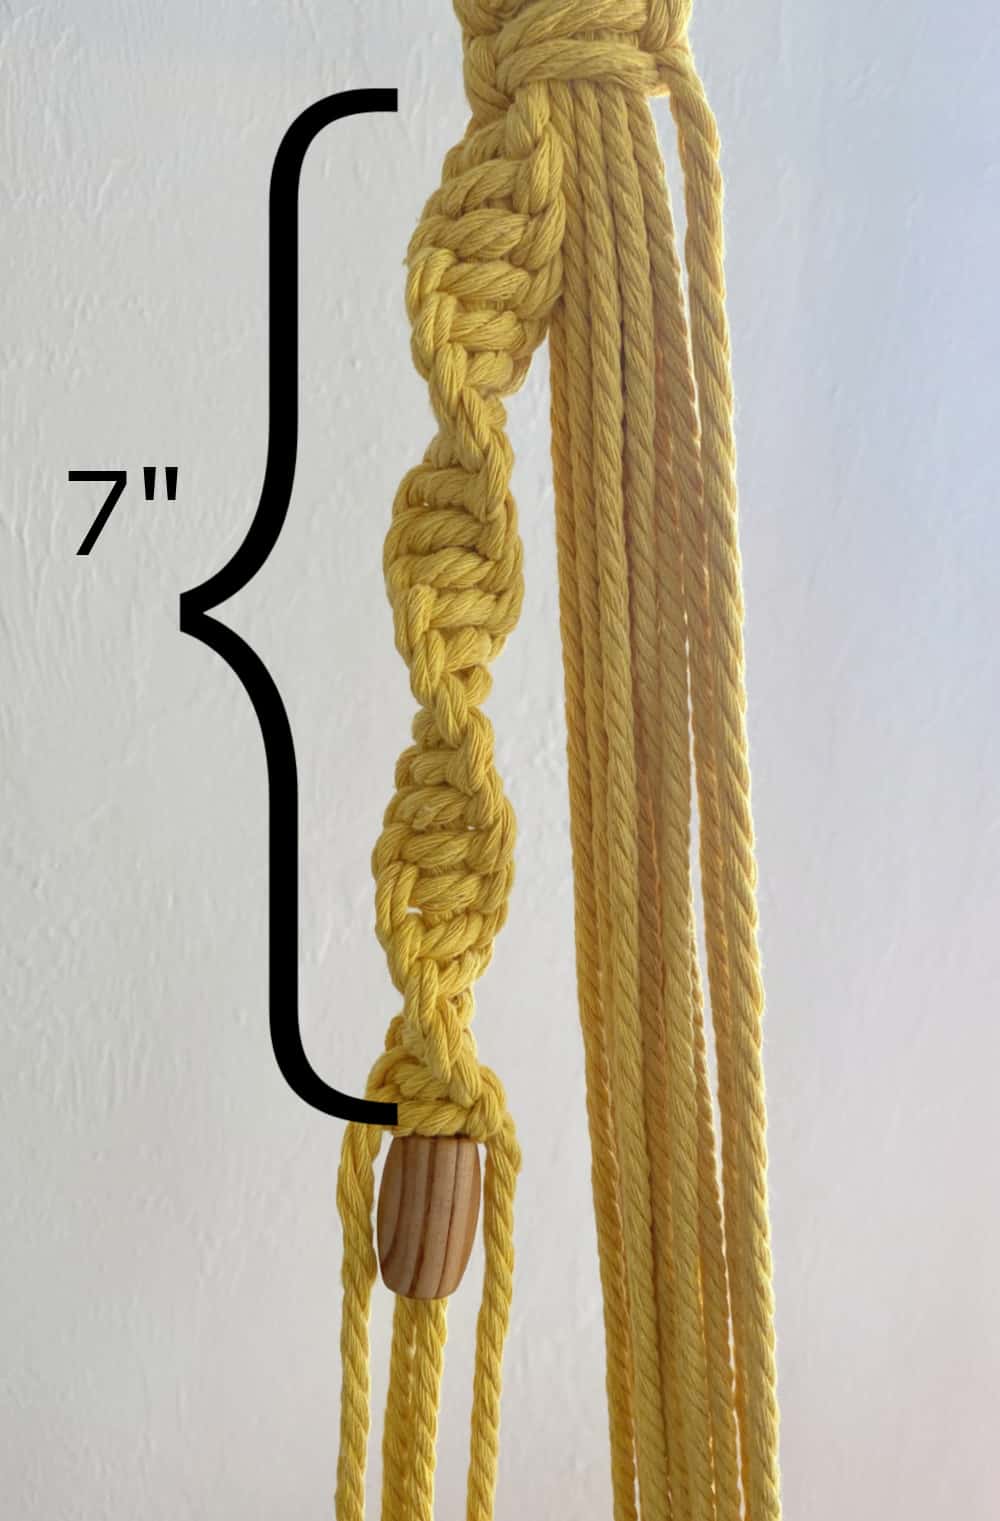
Divide the cluster of cords just beneath the Square Knot chain into 4 groups of four. With one group, make a chain of Half Square Spiral Knots. See this video to learn the technique. Extend the chain until it is 7 inches long. Next, thread the middle two cords through a wooden bead then secure with a Square Knot.
Repeat this process for the other three groups of cords.
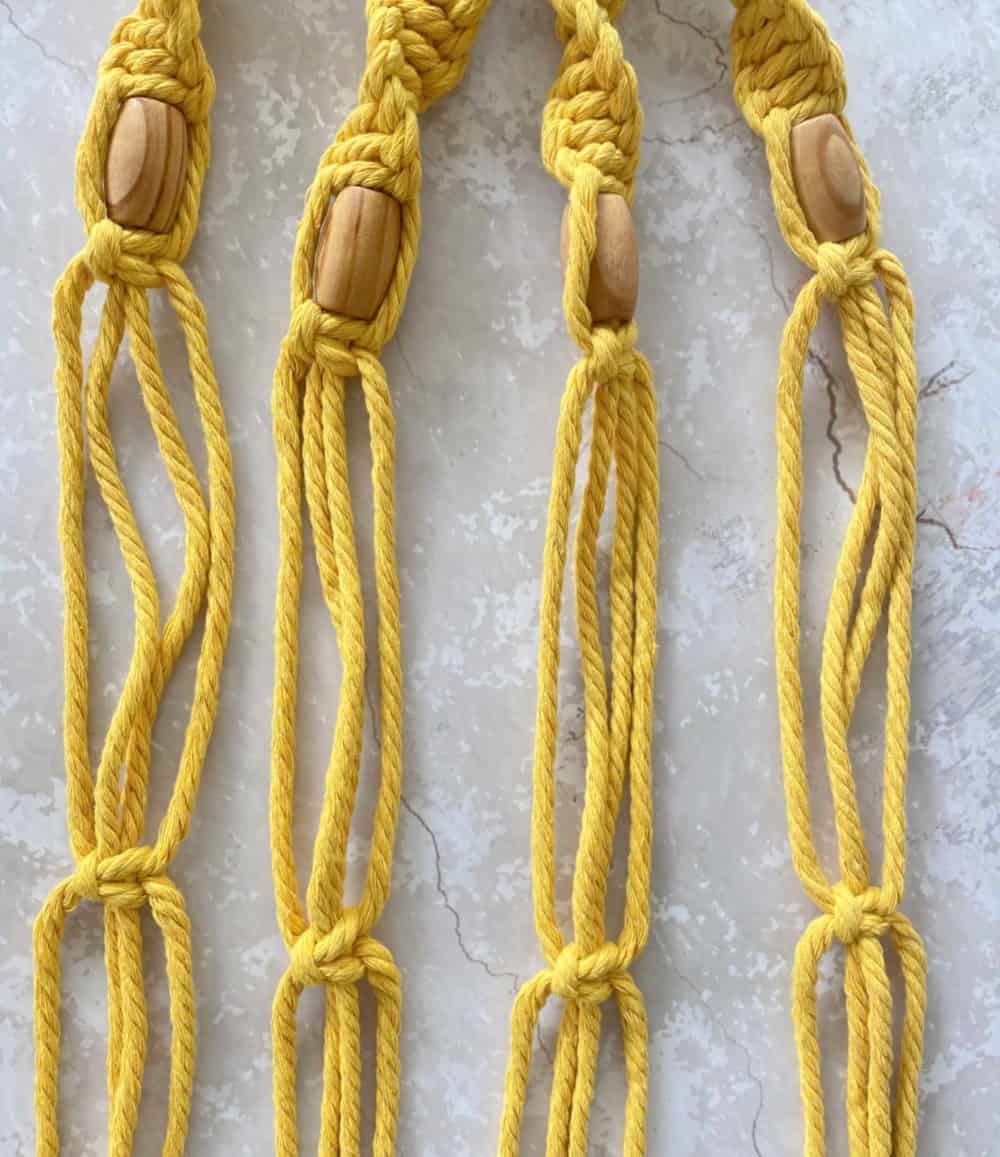
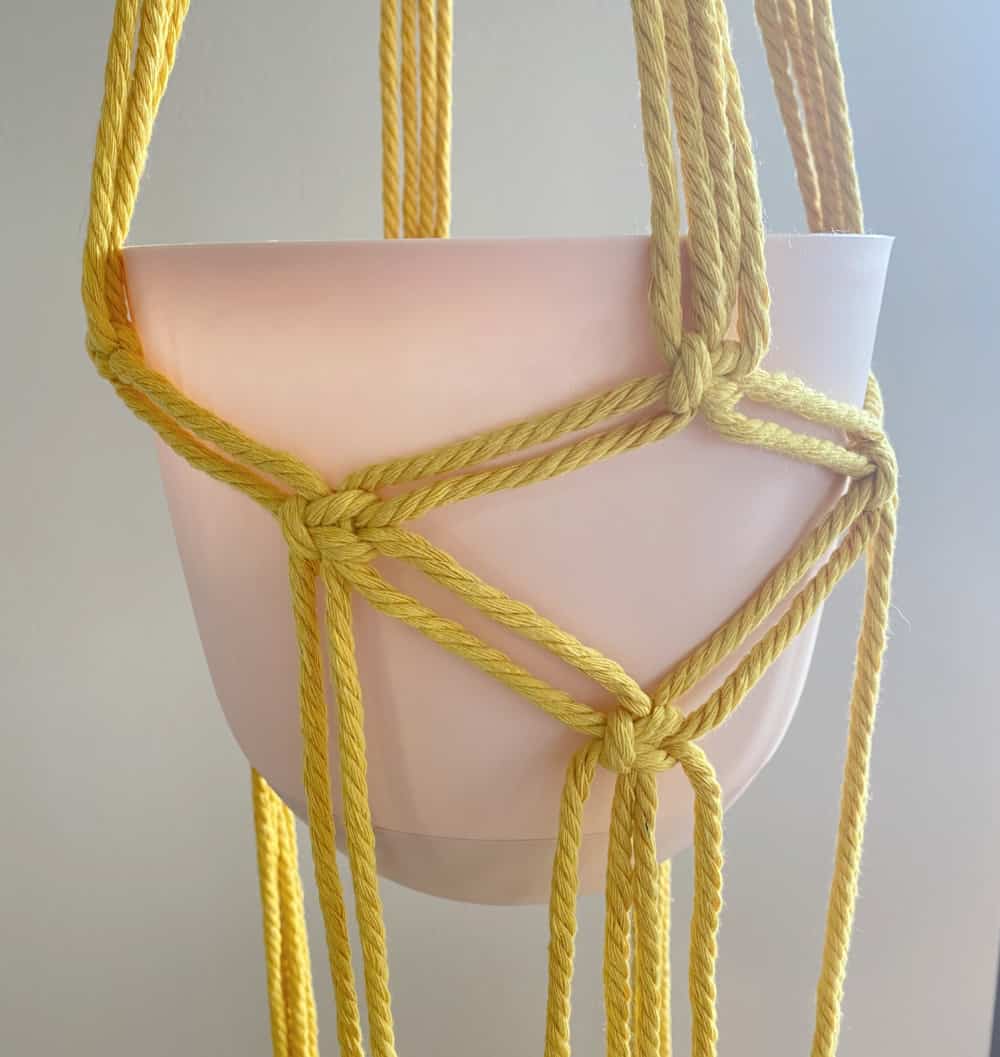
step 3 – body
Skip about 6 inches down from each wooden bead and create a Square Knot.
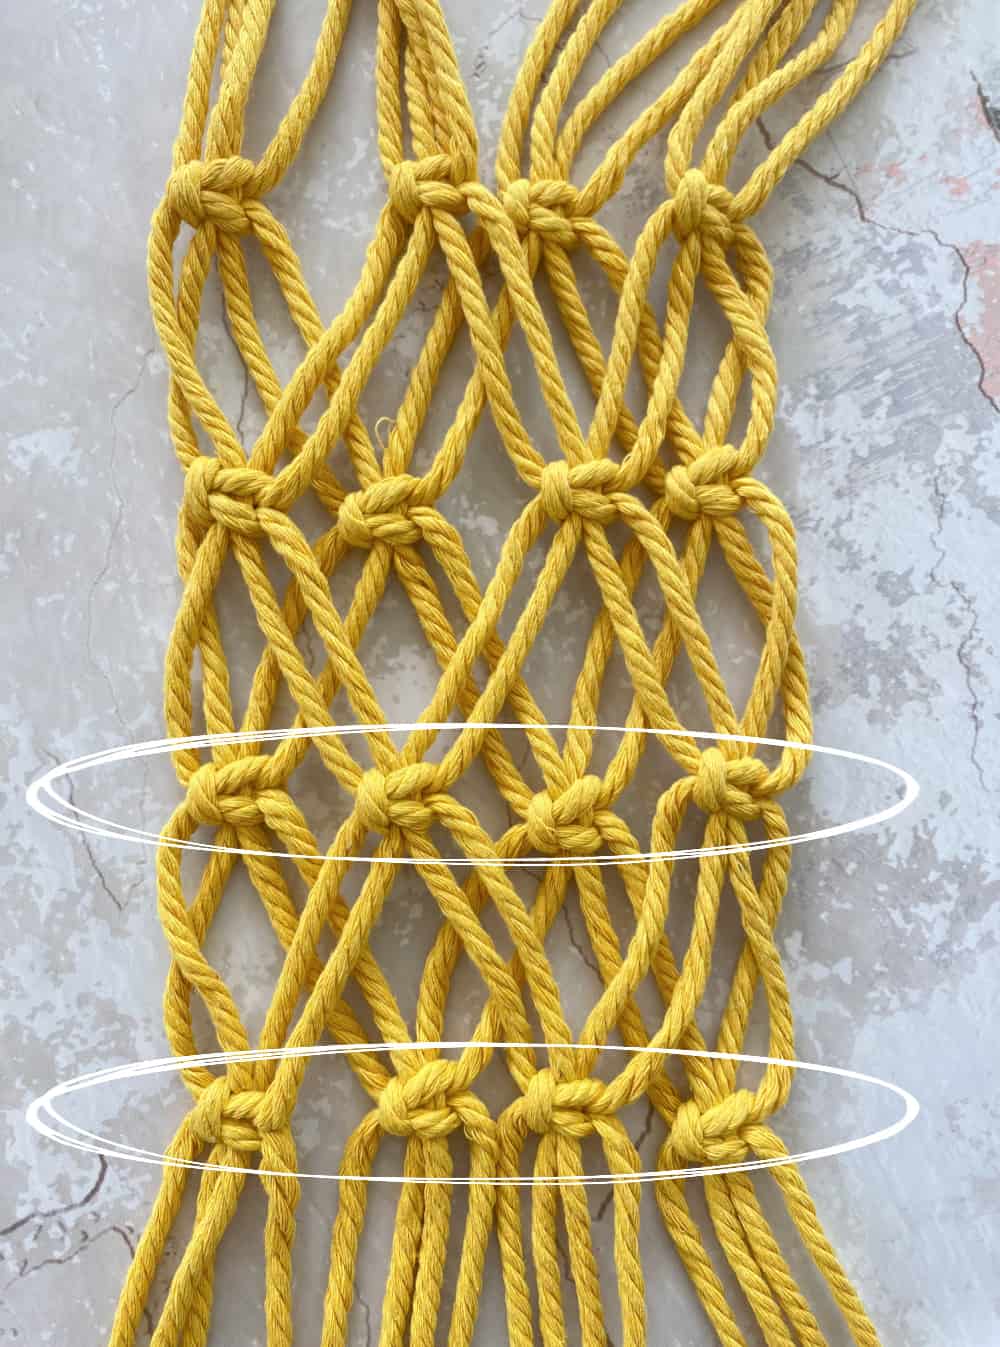
Now about 3″ beneath the previous row of Square Knots, create another row of Alternating Square Knots (circled in black in photo below.)
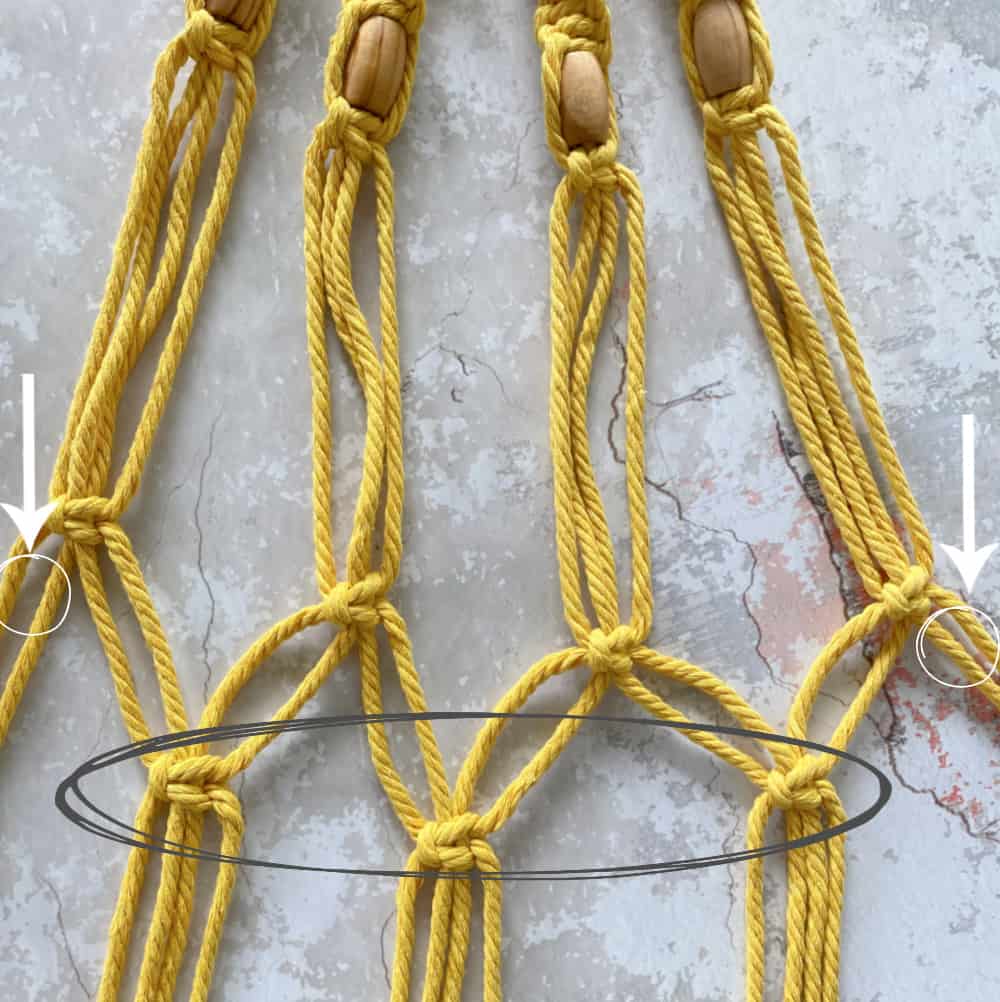
With the two cords on each side (see white arrows in photo above) make a fourth Alternating Square Knot. This completes this row and begins to form the “basket” to hold a flower pot.
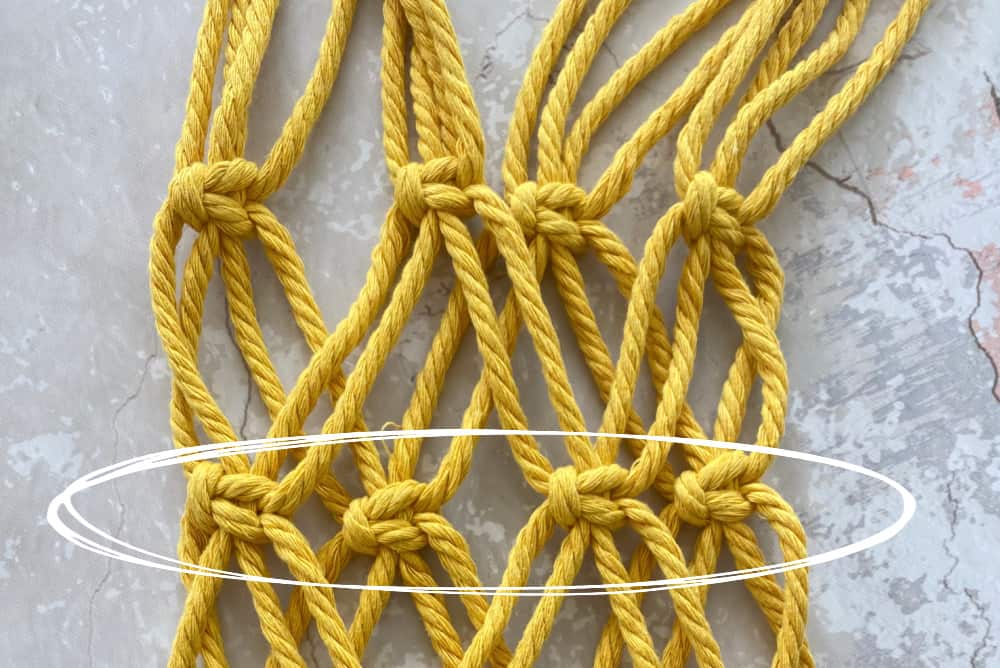
Skip down 3 more inches and make another row of 4 Alternating Square Knots. Then skip another 3″ to make a final row.
TIP: You may find placing an actual pot into the “basket” you are creating makes tying the rows of Square Knots easier.
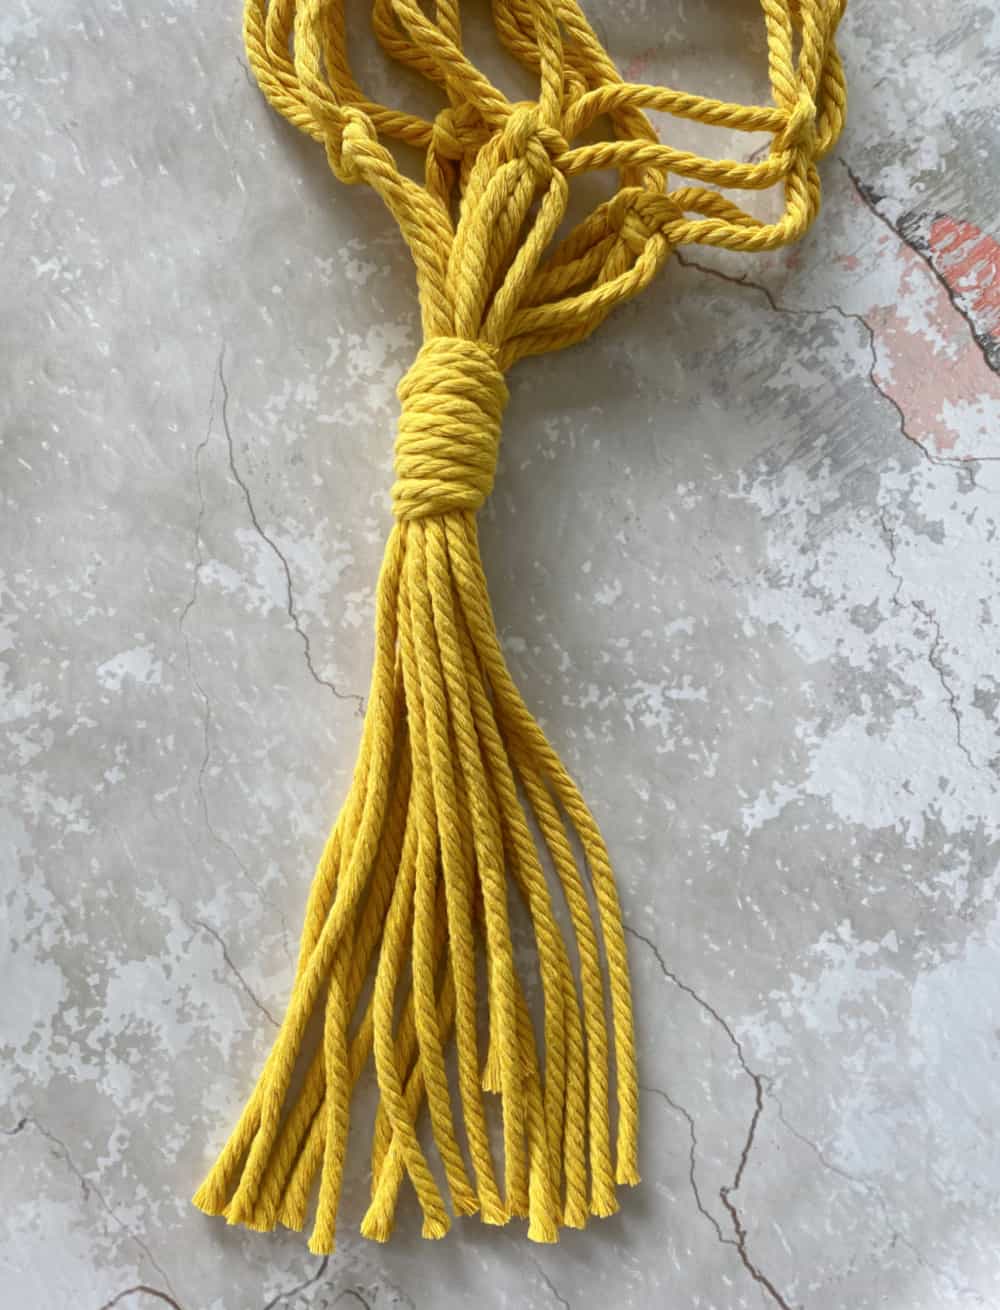
step 4 – wrapped knot
About 2″-3″ beneath the last row, make a Wrapped Knot, using a piece of cording cut from the surplus length at the bottom. Once tied, trim the bottom to create an even tassel.
finishing touches
I tend to overestimate the amount of rope to use, because there’s nothing worse than working diligently on a project just to run short at the end! For any left-over cords, here’s a suggestion – make a tassel! (Follow this tutorial.)
The biggest compliment is a little share – pin the photo below!
What size pot did you use?
This is so pretty. My sister used to make these, and we would give them for gifts way back in the day. I love that macrame is back. I love it. I’ll be featuring this tomorrow at the TFT party. 🙂
Thanks so much Pam!
I used to do macrame, like 40 years ago. I appreciate this tutorial as I have forgotten most of what I once knew. Pinning!
Glad you like it it Michelle!
The spiral and yellow color of your macrame takes me back to the 70s.
Congrats, you are being featured at the Friday with Friends Link party!
Thanks for sharing,
Rachelle
Thank so much Rachelle!
Hi there! Here from Team Creative Crafts Link Party and I love your blog 🙂 now following!
Thank you so much Tanya!
This is so fun!
Thanks Donna!