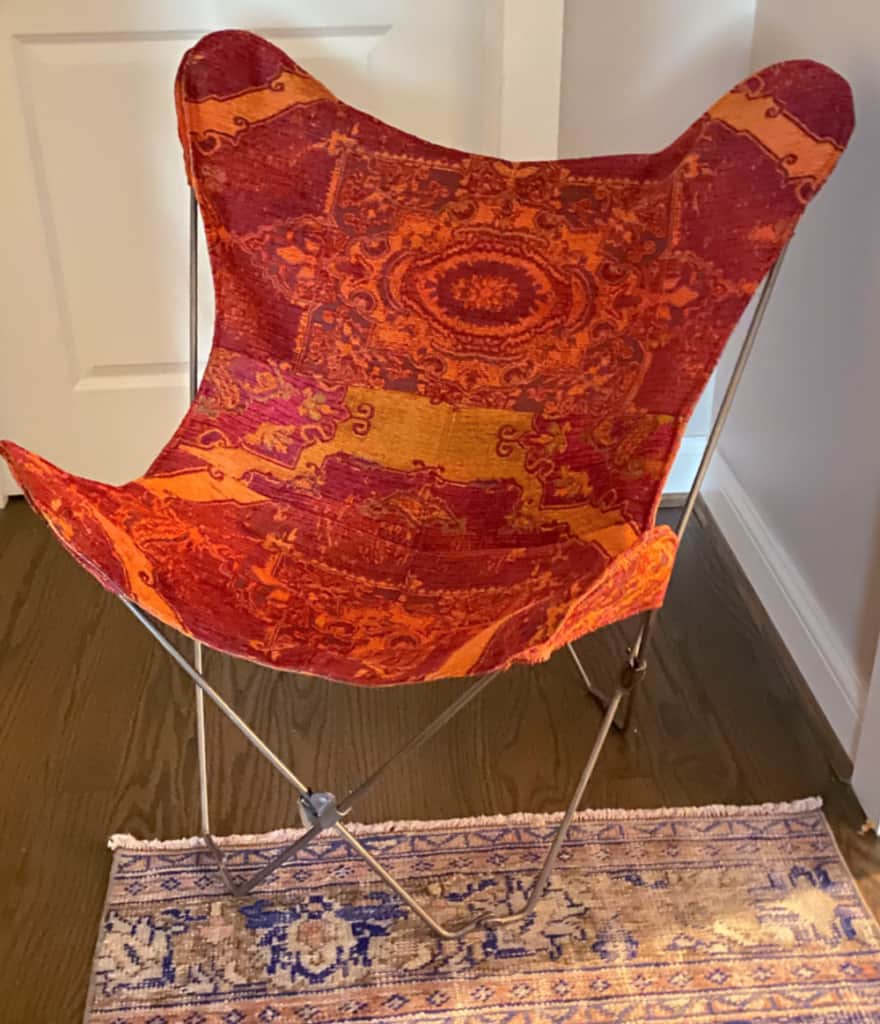
Years ago, I bought this butterfly chair from Urban Outfitters. I still love the design, but its canvas cover is sun-faded and worn. So with some upholstery weight fabric I had on hand, a sewing machine, and a bit of patience, I brought it to life with a new Butterfly chair cover.
(This post may contain affiliate links; as an Amazon associate I earn from qualifying purchases. See disclosure here.)
supplies needed:
- 54″ wide upholstery weight fabric – 1.5 yards for front & 1.5 yards for back
- chair frame
- sewing machine
for the front:
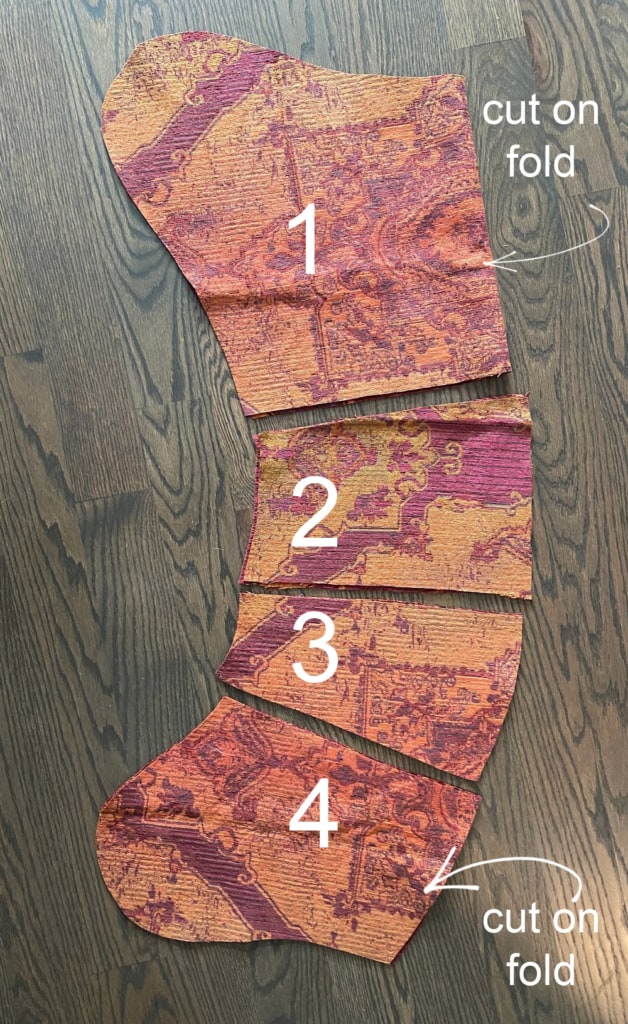
step 1 – cut fabric
To use the old cover as a pattern, first fold it in half. Place it on new fabric (which is also folded in half so that you will get 2 pieces of each shape). Using the old cover as a guide, cut new sections that replicate the way the original cover is pieced together. For example, my original cover was seamed into 4 sections in order to create a curve; so, I cut 4 matching sections out of my upholstery fabric. Make sure each section is cut with a 1″ margin around all the edges to allow for the seam allowance.
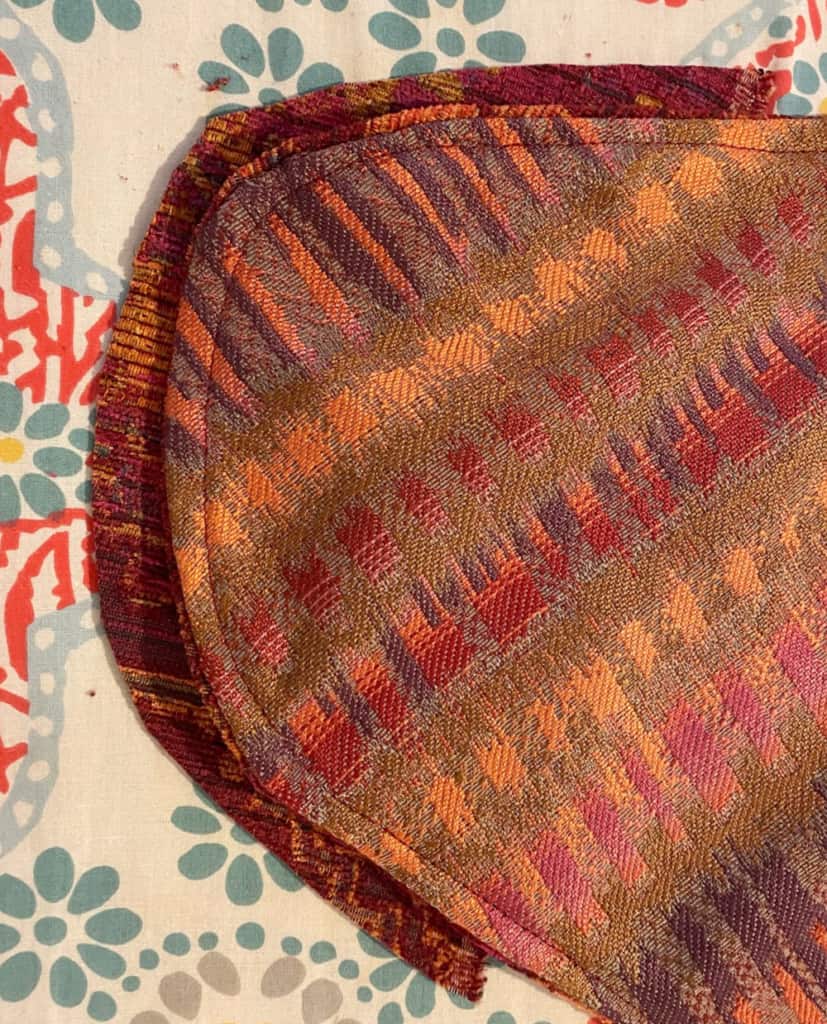
The photo below shows the pieces cut. Pieces 1 & 4 should be cut on the fold, but the inner sections 2 & 3 are not and will need to be seamed together.
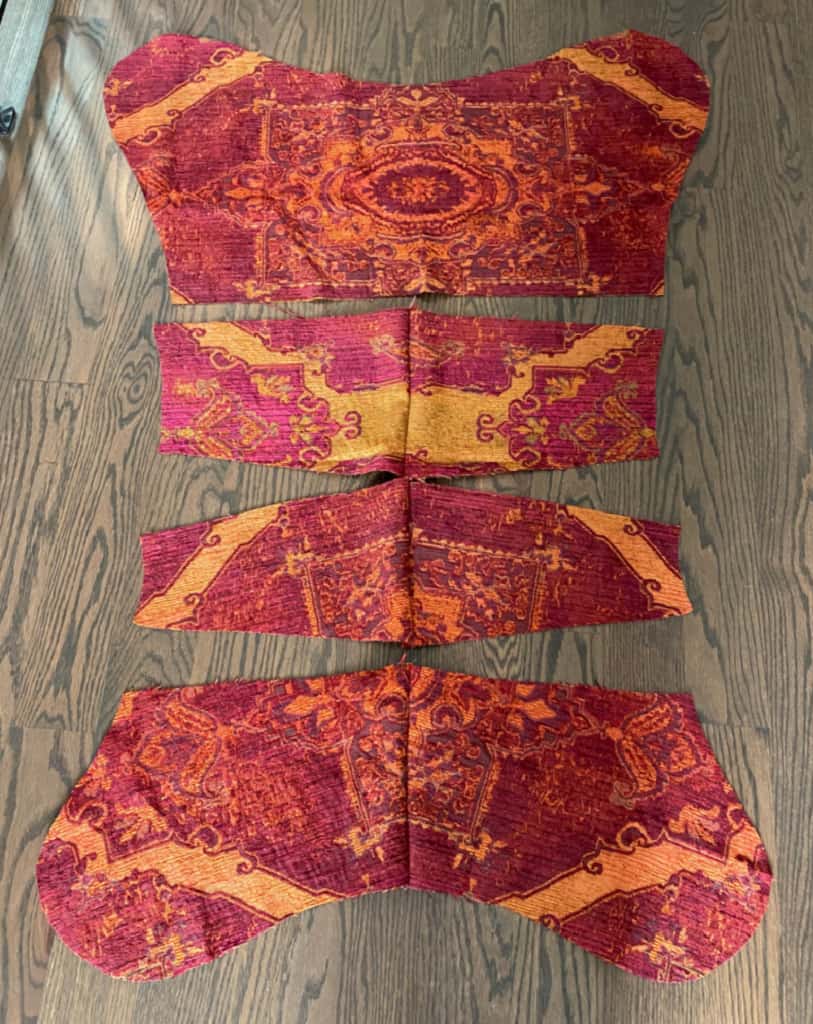
step 2 – sew center seams
For the sections not cut on fold, place right sides together and stitch a center seam. Press open.
The photo below shows all the pieces cut and seamed together. Note: I mistakenly cut the bottom section as two and seamed together. For better reinforcement, that piece should have been kept as one solid piece and cut on fold.
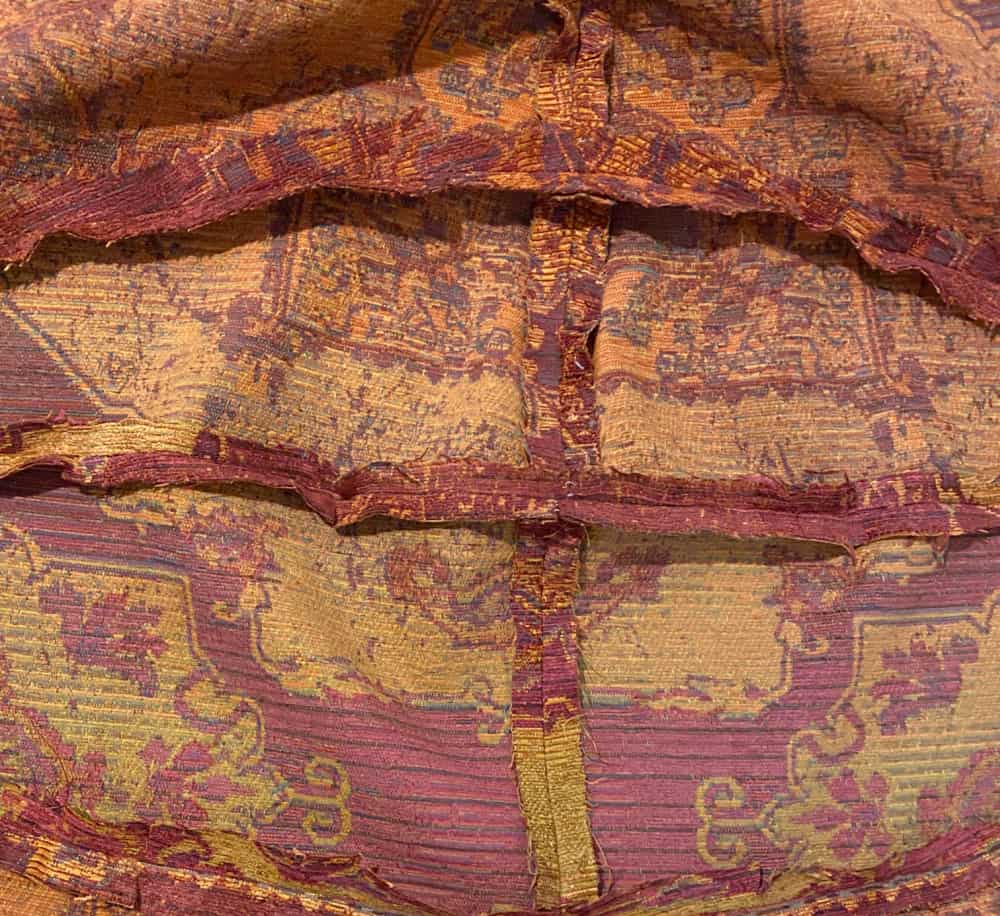
step 3 – stitch body together
With right sides together, stitch section A to B, then B to C, and C to D. When pinning together (before stitching) check against the old cover to make sure you are keeping it the same size.
Press all seams open.
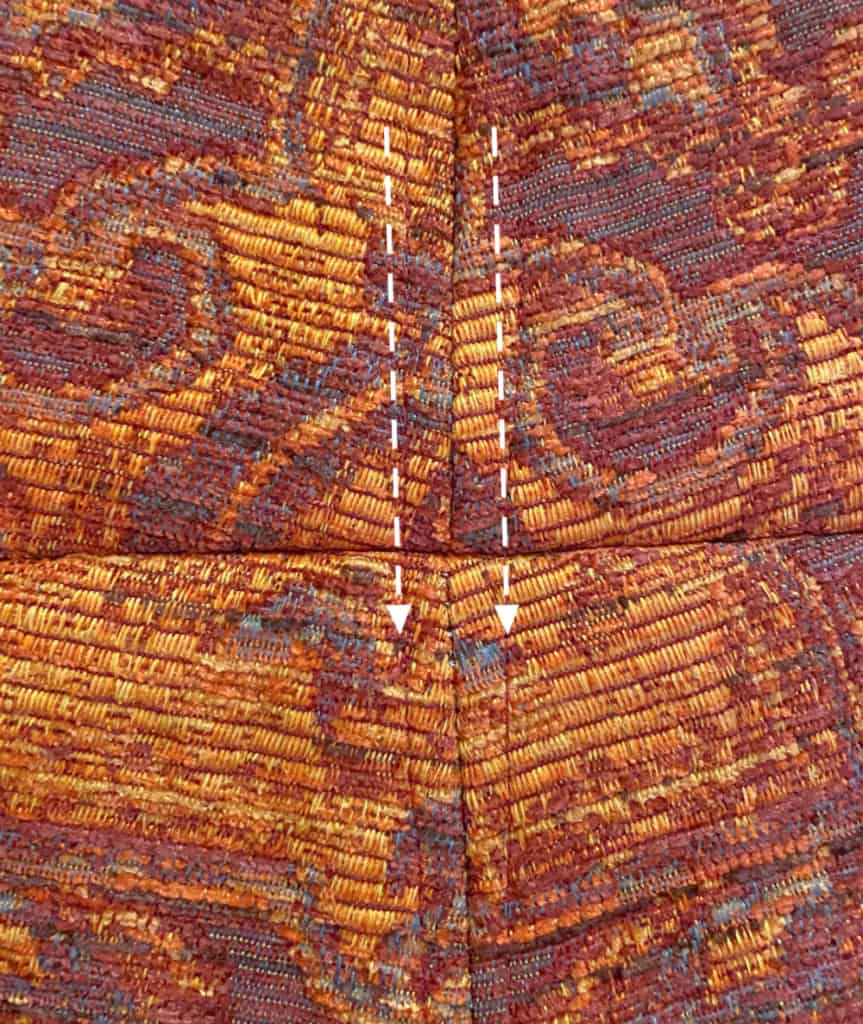
step 4 – topstitching
For both decorative purposes and reinforcement, topstitch two straight seams down the middle of the cover.
for the back:
With matching fabric or a complimentary one, repeat steps 1 through 4.
attaching front to back:
With right sides together, pin the front to the back. Stitch around the edges, using about a 1″ margin. Leave a small area on one side unstitched, so you can turn the cover right side out. Then press the cover and topstitch around all edges, stitching the open area closed while doing this.
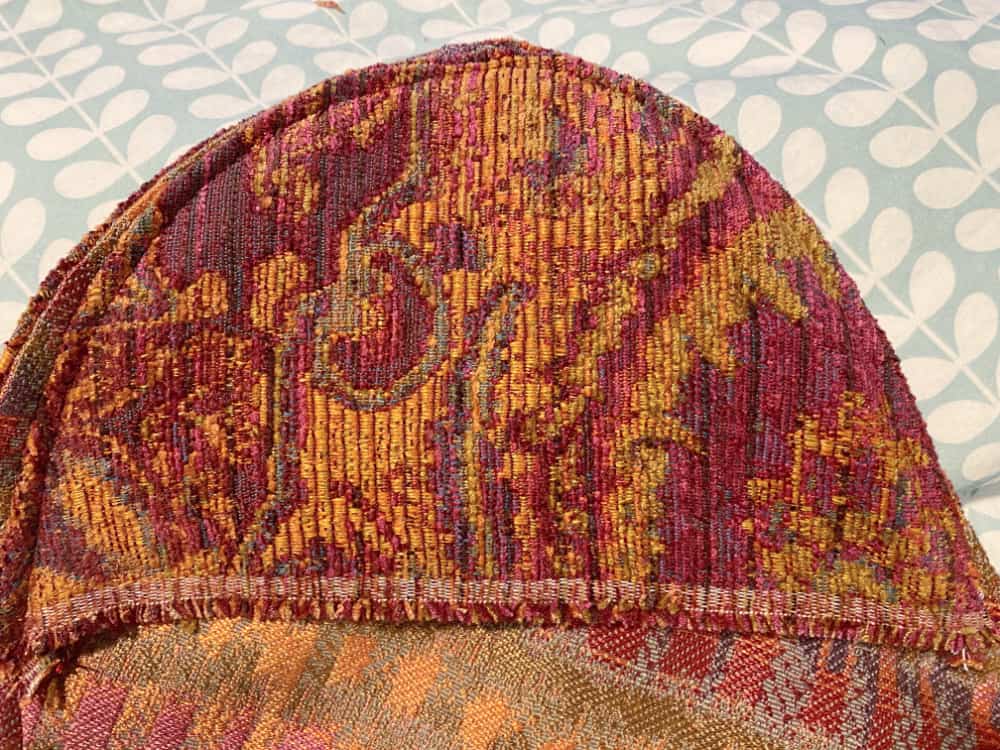
Next, cut two half circle pieces for each of the four corners.
Once two half-circles are cut, with right sides together, stitch together, leaving the straight edge open. Turn and press. Then stitch the pocket to the back of the cover. Do this for all four corners. Use a heavy-duty machine needle and stitch slowly, as the layers may be thick.
Slip the four pockets onto the frame and enjoy your new Butterfly chair cover!
The biggest compliment is a little share – pin the photo below!

Super job with the pattern cutting. That is my worst failure usually cutting it too small. Nice job sewing and showing us details. Love it! I could see this in leather as well at my house!
I wish I knew what my parents did with ours. We had 2 black framed ones back in the early 1960’s. I remember my grandma always sitting in the one with the orange cover. Memories.
great work! now your chair has new life <3