
I’ve been asked recently by some of my readers for instructions for a macrame belt. Easy, right? Well, it is easy to make, but it’s not so easy finding a well-written tutorial. So I decided to create two tutorials for macrame belts. This one uses only one type of knot (the square knot) for the beginner. It’s easy and will whet your appetite for a more advanced design as your next project. So let’s get started with this one, shall we? And in the next few weeks, I’ll be sharing the second tutorial for a more intricate belt. So check back often!
(Affiliate links included for your convenience. As an Amazon associate I earn from qualifying purchases. See disclosure here.)
supplies needed
- 3 mm cotton macrame cord
- scissors
- masking tape
- clipboard

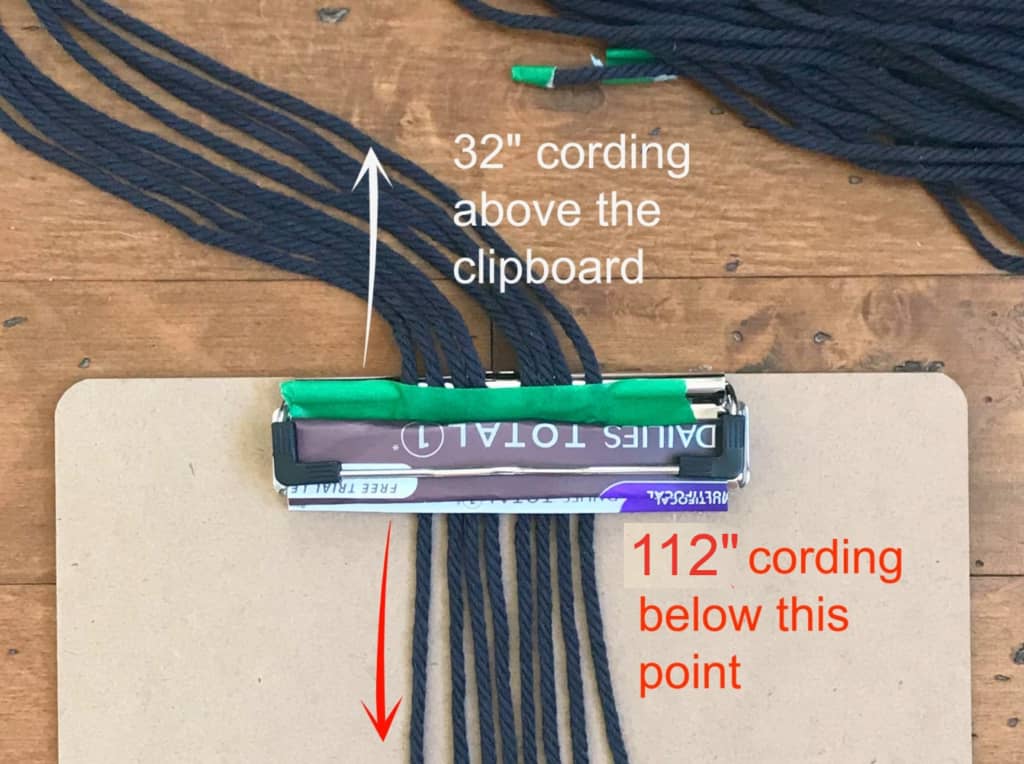
preparation
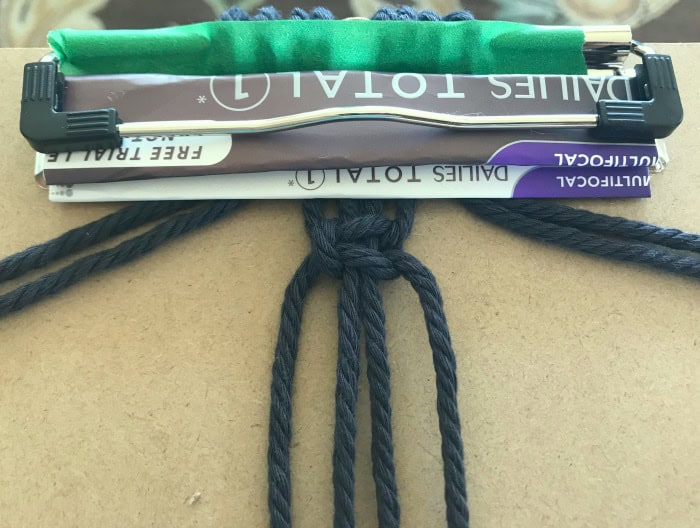
Cut 8 strands of macrame cord, each measuring 12 feet long. Tape both ends of each piece of cord with a small piece of masking tape to prevent fraying. Next, use a clipboard to hold the 8 cords secure, placing them through the clamp according to the lengths shown below.
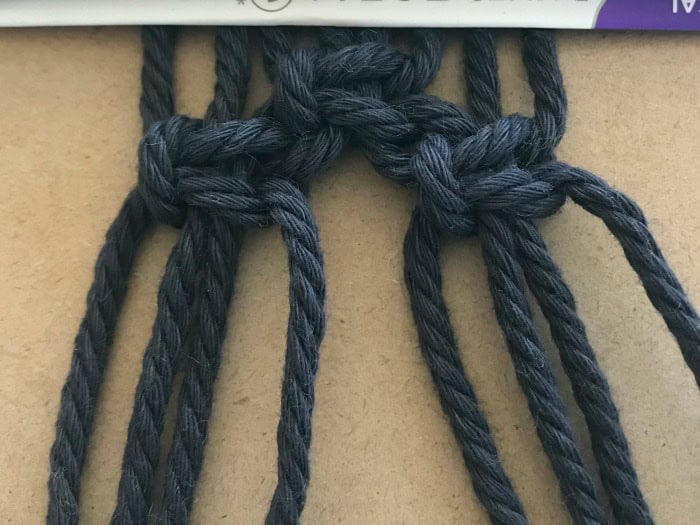
 step 1
To begin the first sequence of knots, using the middle 4 cords, tie a square knot, as shown below. (In case you’re wondering, I placed some folded cardboard underneath the clamp at the top of the clipboard to ensure the loose cords were stable. It’s called being resourceful!)
step 2
The second row will consist of 2 square knots. Using the first 4 cords on the left, make a square knot, as shown below.

Then, with the remaining 4 cords, make a second square knot. This completes the second row.
step 3 – complete the first pattern sequence
Continue repeating steps 1 & 2 seven more times, so that you end up with 16 rows in total. (The photo below shows only 10 rows; keep going until you have 16!)
important tip
As you begin to near the bottom of the clipboard, simply lift the clamp and move the belt higher. You will need to make this adjustment several times throughout the process to make your work easier.
step 4
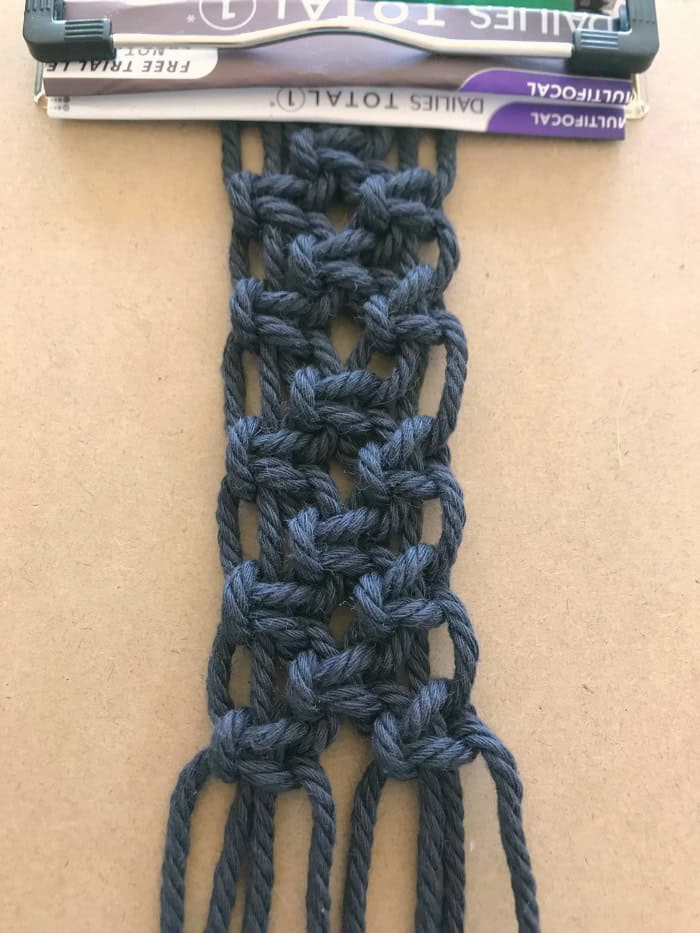
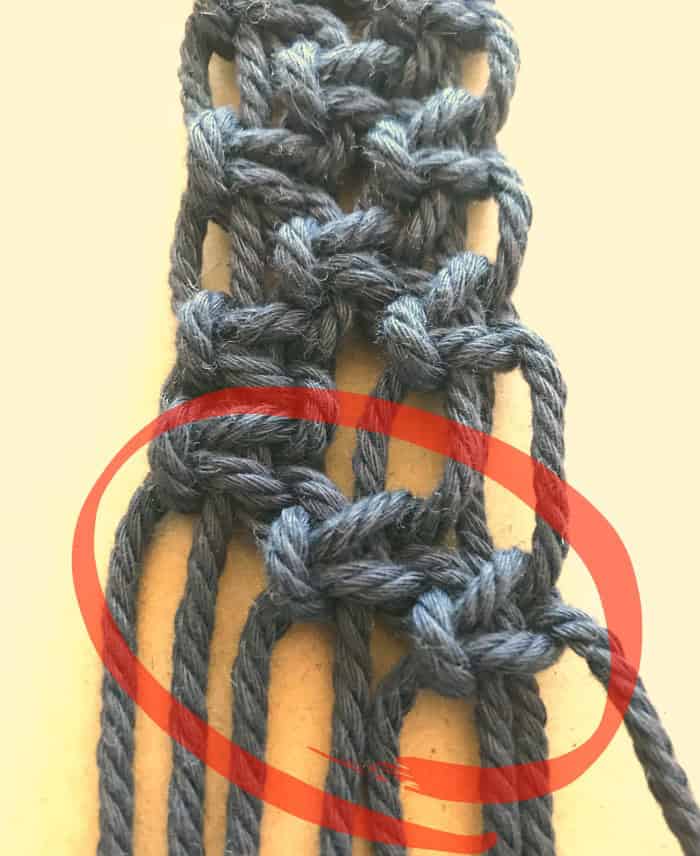
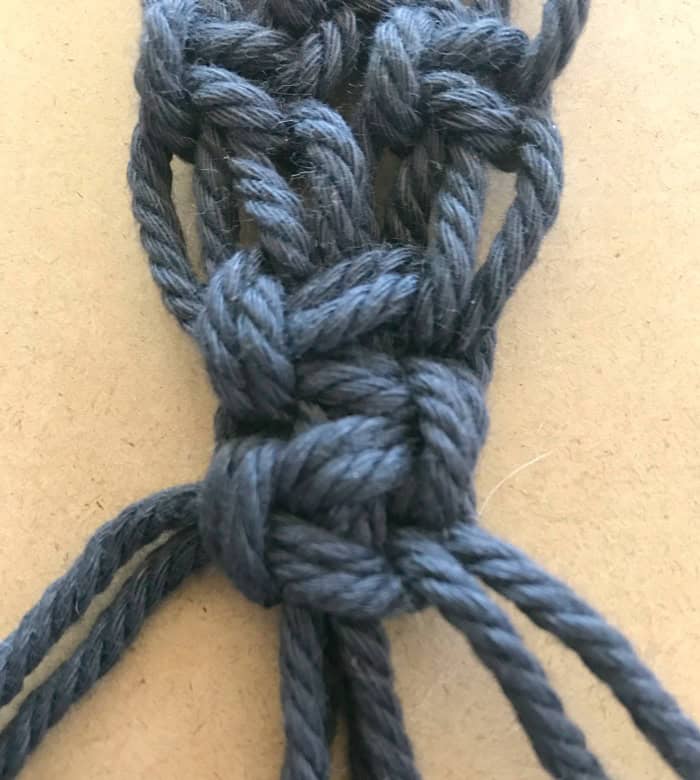
The next pattern sequence will consist of square knots woven from side to side, creating an “S” design. For the first row, use the first 4 cords on the left to make a square knot. For the second row, starting with the third cord from the left, make another square knot. Then for the third row, starting with the fifth cord from the left, make another square knot. This will create the diagonal design shown below.
step 5
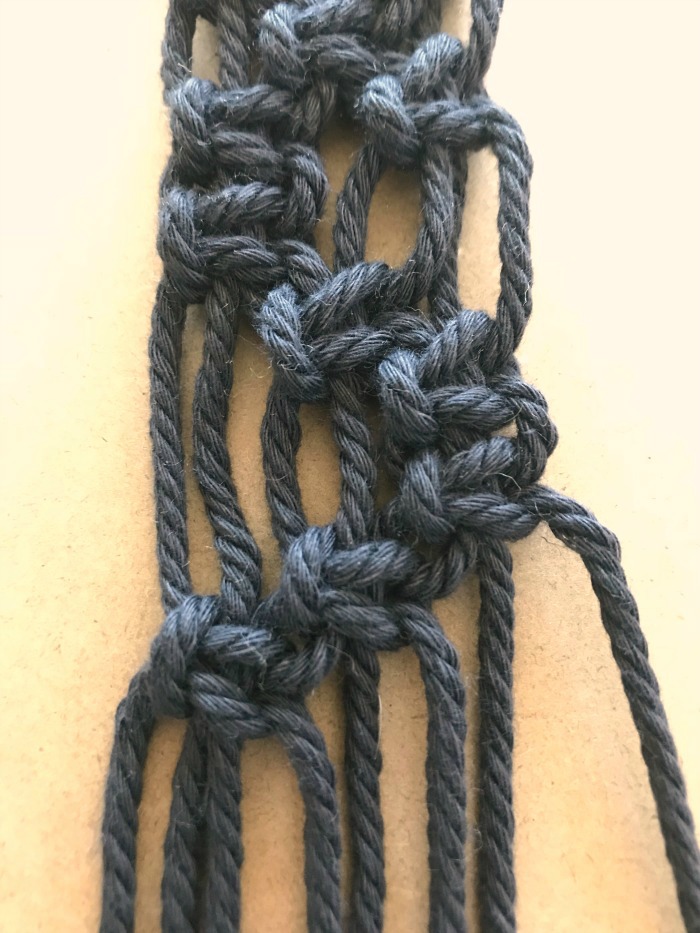
Now simply repeat that step, this time beginning with the first 4 cords on the right. You will end up with 3 rows of square knots forming a diagonal design from right to left.
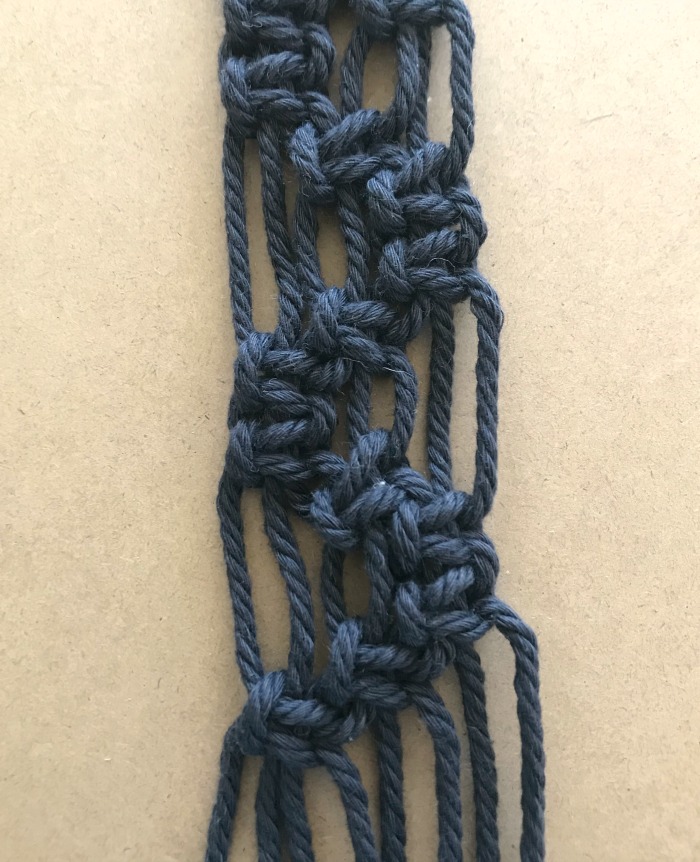
step 6 – complete the second pattern sequence
Repeat steps 4 & 5 two more times and you will end up with a total of 6 diagonal slants. This completes the second pattern sequence. (The photo below only shows 4 slants; keep going until you have 6.)
step 7
Repeat steps 1 & 2 five times, until you end up with a total of 10 rows of square knots. You will notice we are repeating these 2 pattern sequences for the duration of this belt.
step 8
Now repeat steps 4 & 5, resulting in 6 more diagonal slants.
step 9
For the last belt segment, repeat steps 1, 2 & 3.
step 10 – finishing the ends
To finish this end of the belt, simply tie a double square knot. Then immediately tie a second double square knot directly beneath the previous one.
Trim the rope approximately 20″ down from the last double square knot. Tie a knot near the bottom of each cord to prevent fraying.
step 11
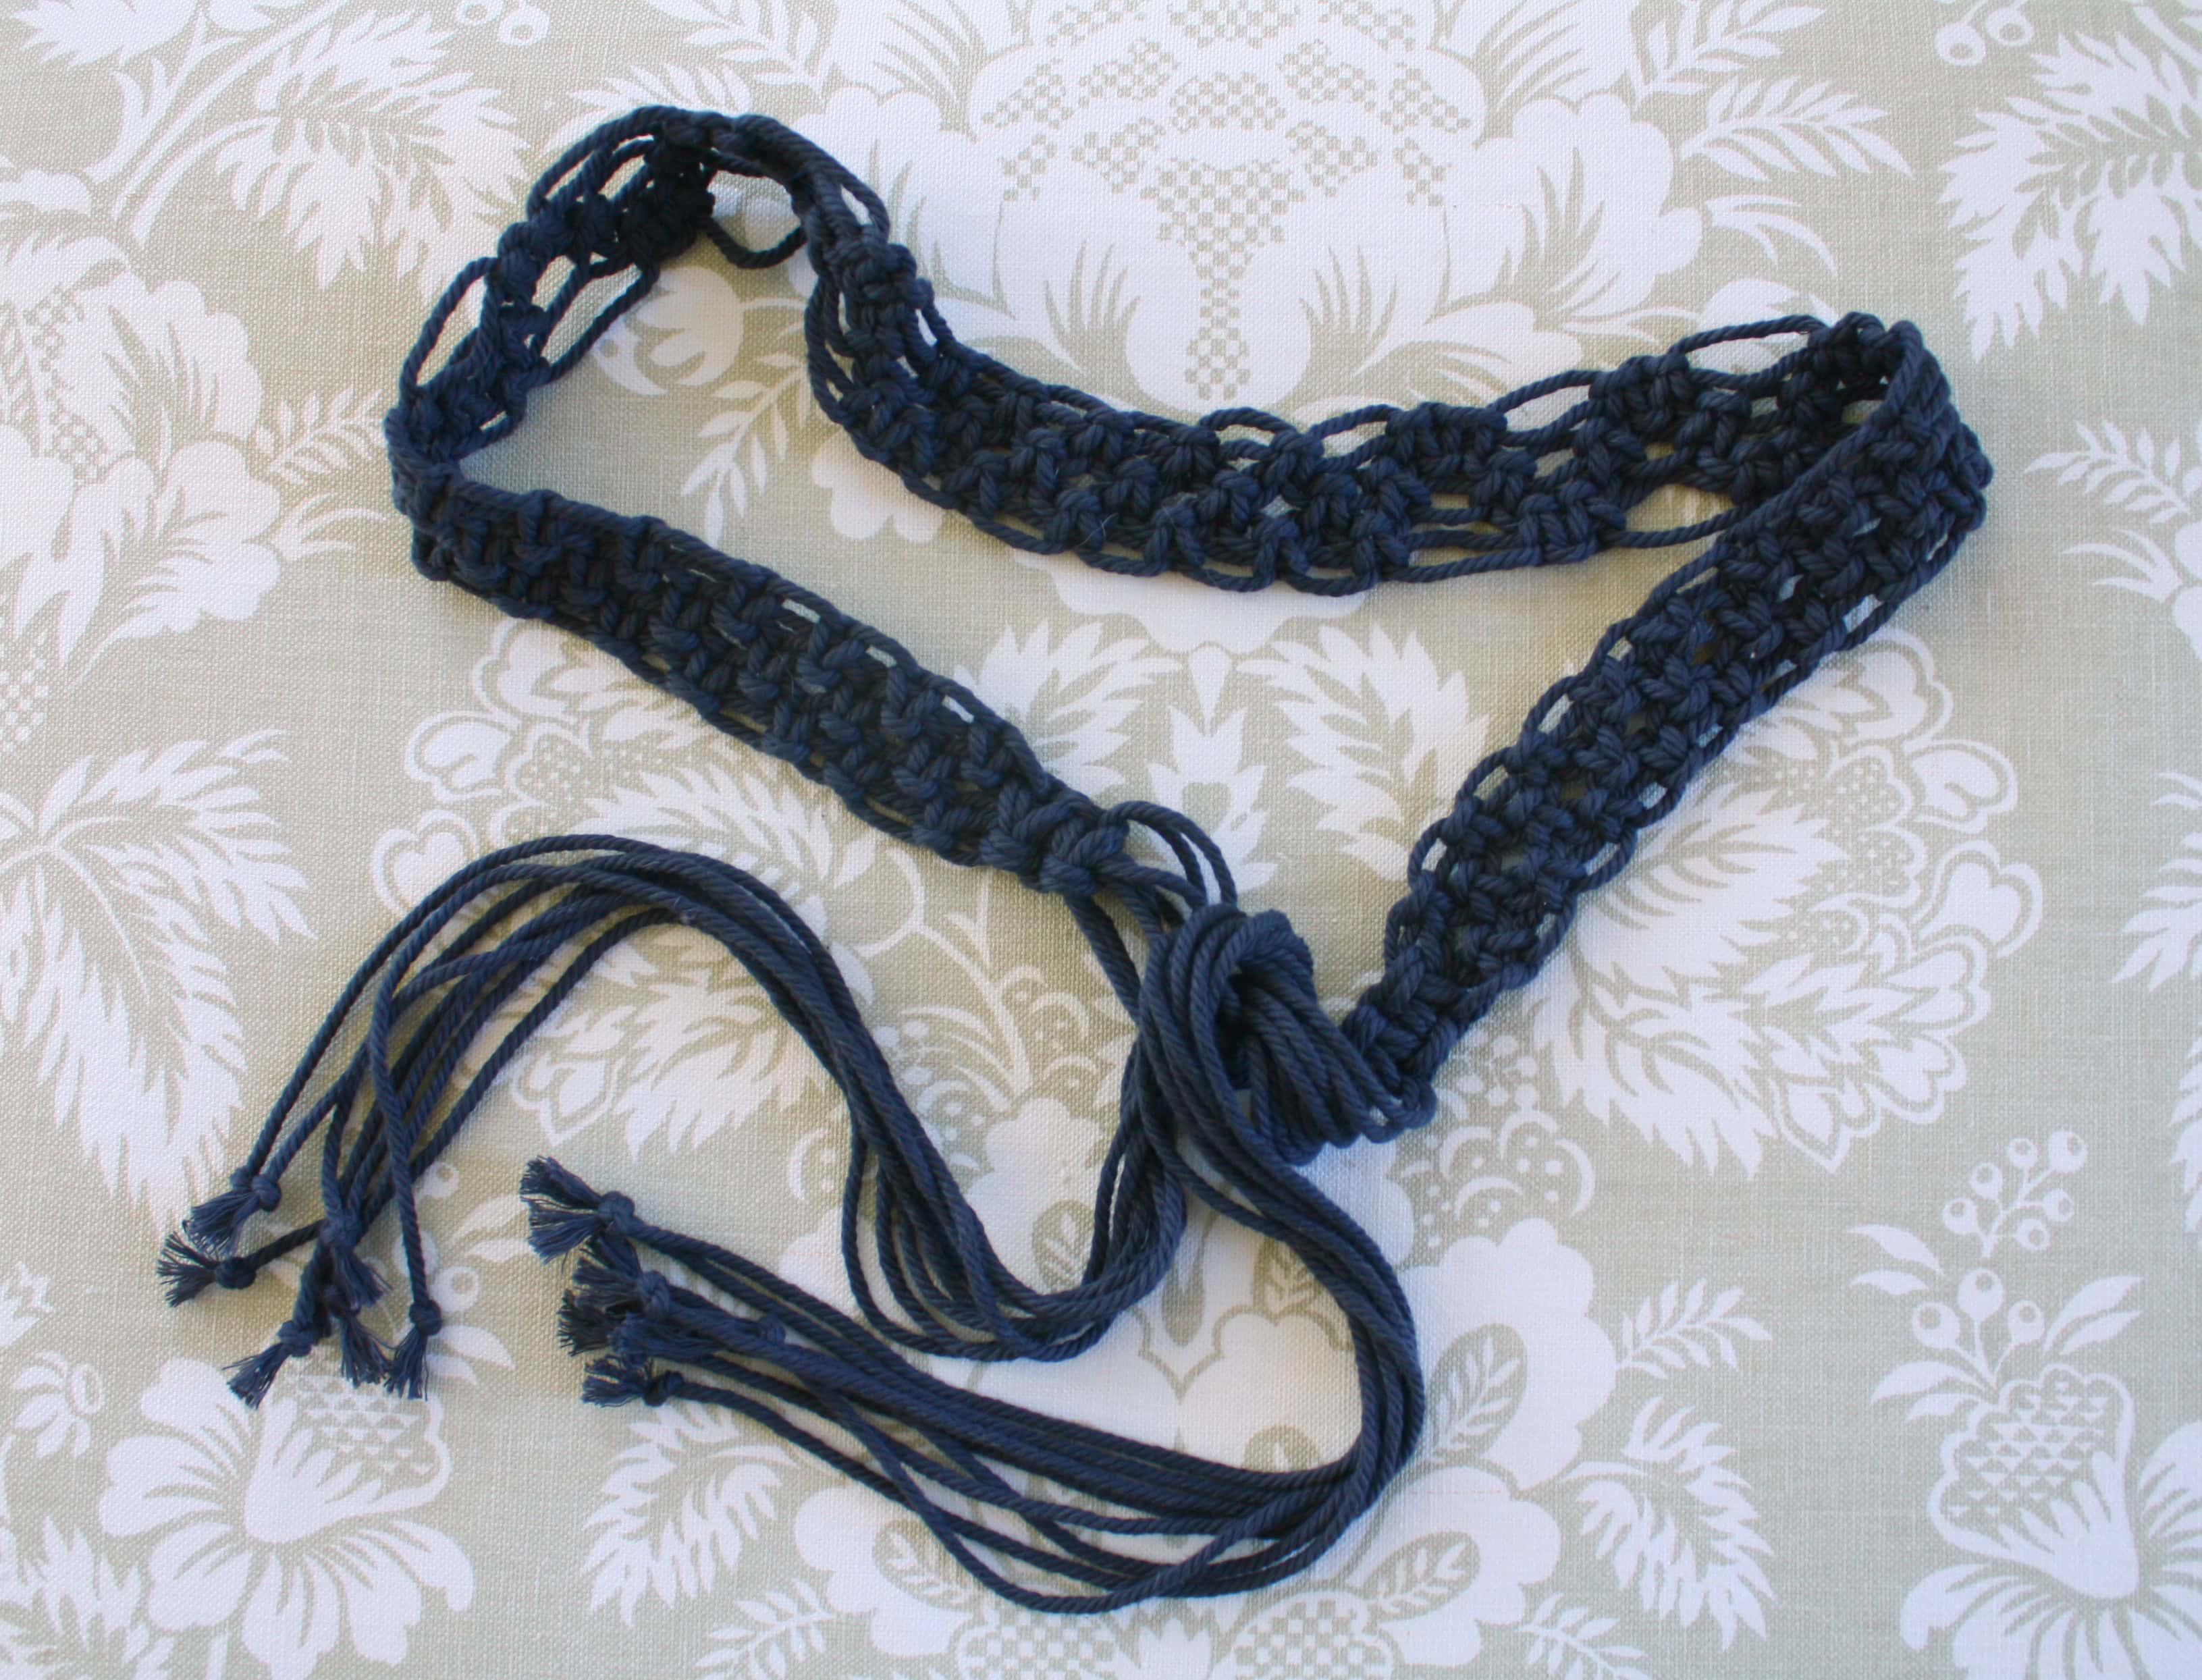
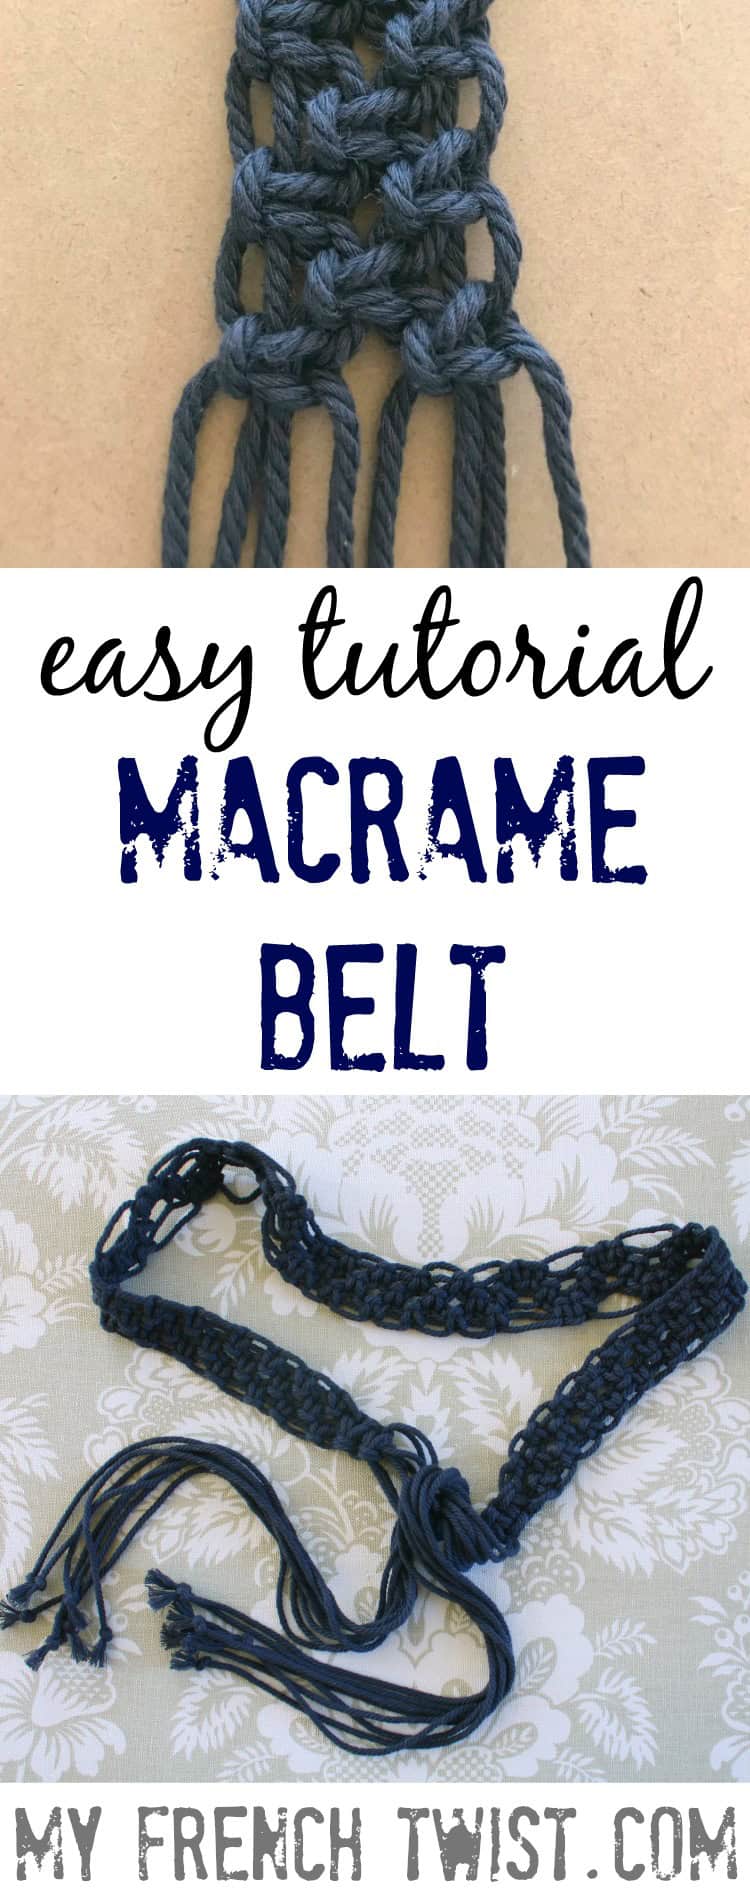
Repeat step 10 for the other end of belt as well. And guess what? You are finished! I love the simplicity of this belt, as you can wear it in so many ways – tied around the waist, hung loosely around the hips, with jeans or with a cotton peasant shift. It definitely adds a bohemian touch to your wardrobe.

Like this post? Please share to Pinterest!
Hi Wendy! Have you posted the tutorial for the more advanced belt?
Hi! It’s years later and I noticed in this pattern you had said in a few weeks you were going to post a tutorial for a more intricate macrame belt. Did you do that? Not seeing a second belt under macrame projects. Just this belt
Sorry about that. There are so many projects on my to-do list! I’ll try to get to it soon!
12 feet equals 144 inches. Your clipboard picture shows 245 inches. Which is correct ? Once i cut it I can’t add to it.
I can tell you that I did 12 feet and it is not long enough!! I’m so bummed, I’m down to one of the last steps and it is clear I don’t have enough left. 🙁 . Wendy, please fix the pattern.
I’m so sorry! I will definitely fix this!
I made it (all in one night!) using natural jute and added some beads to the fringe. Since jute not as bulky, I had to add some extra of the patterns.
Glad you figured it out. Sounds like you’re a natural. Would love to see a photo! Good job.
I have a pic, but not sure how to post it
Hi,
I like this! Haven’t done macrame since the 80’s. For step 8, you need to do steps 4,5 and 6 to get 6 diagonal slants, right? Cuz there are only 2 in step 4 and 5… Thanks for clarifying!
Hi,
I like this! Haven’t done macrame since the 80’s. For step 8, you need to do 4,5 and 6 to get 6 diagonal slants right?
How do 213 inches plus 32 inches equal 12 feet? Which measurements are correct?
This is beautiful! I have been searching for patterns all over and finally found what I was looking for. While I like the belt you have created, the ends which use step 1-3 are my favorite. If you used it for the whole belt instead of inserting the S-shaped technique, do you think it could work?
As an aside, I just got interested in macrame after falling in love with a belt from the 70s I saw in a museum. I remembered that my parents used to macrame when I was a kid (late 70s early 80s) and texted them asking if they happened to have any macrame cord left over. They gave it away LAST MONTH. I thought that was a funny coincidence considering they haven’t used it in nearly 40 years. I might ask for some of it back (a good family friend has it) if the recipient doesn’t plan to use it all.
Hi! So sorry for the delay in answering you. You mentioned making adaptations to the belt weave – I think that would work fine! That’s the fun part of macrame, just creating as you go. Would love to see pics when you’re done!
Thanks for posting…really appreciate it. What size of waist would this fit? To make for little children or larger women how much would you add or minus? I would love to make one for my granddaughter 🙂 Thank you very much!!
This belt, depending on how it’s worn and tied, will fit waists anywhere from 36″ to 60″. For a young girl, I would make it a bit smaller. The actual woven part measures 36″, and the excess is just a matter of preference.
Oh I love this! Way way back in college, my roommate made me some macrame chokers, and I still have them. I wonder if I have the patience to make this belt…. I love it, so I might try! Stopped by from Try It, Like it.
Thanks!