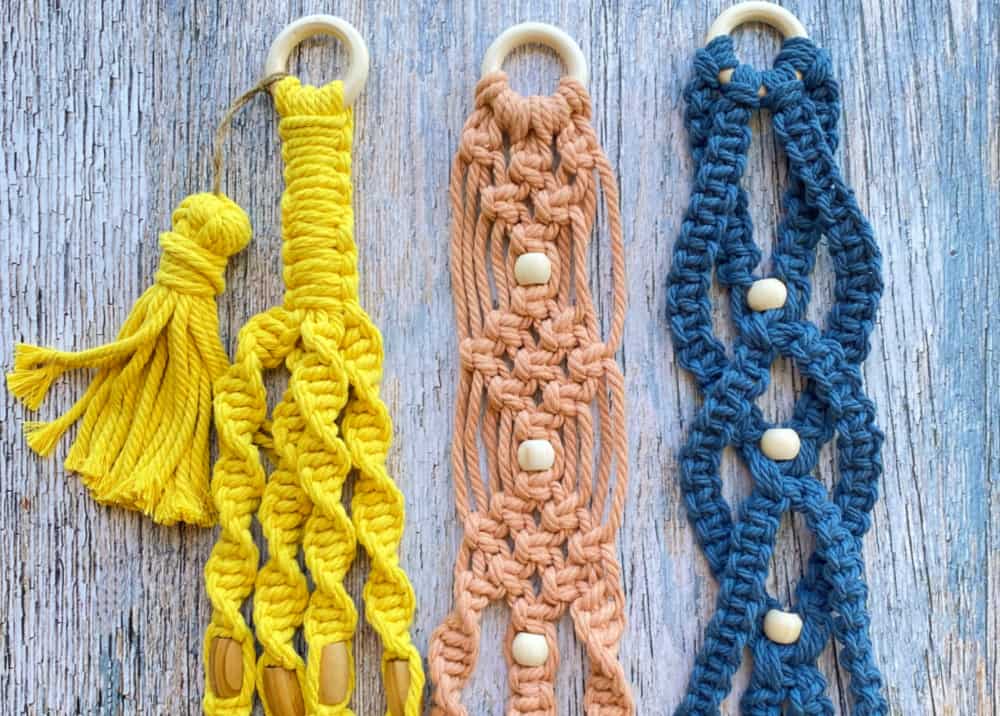
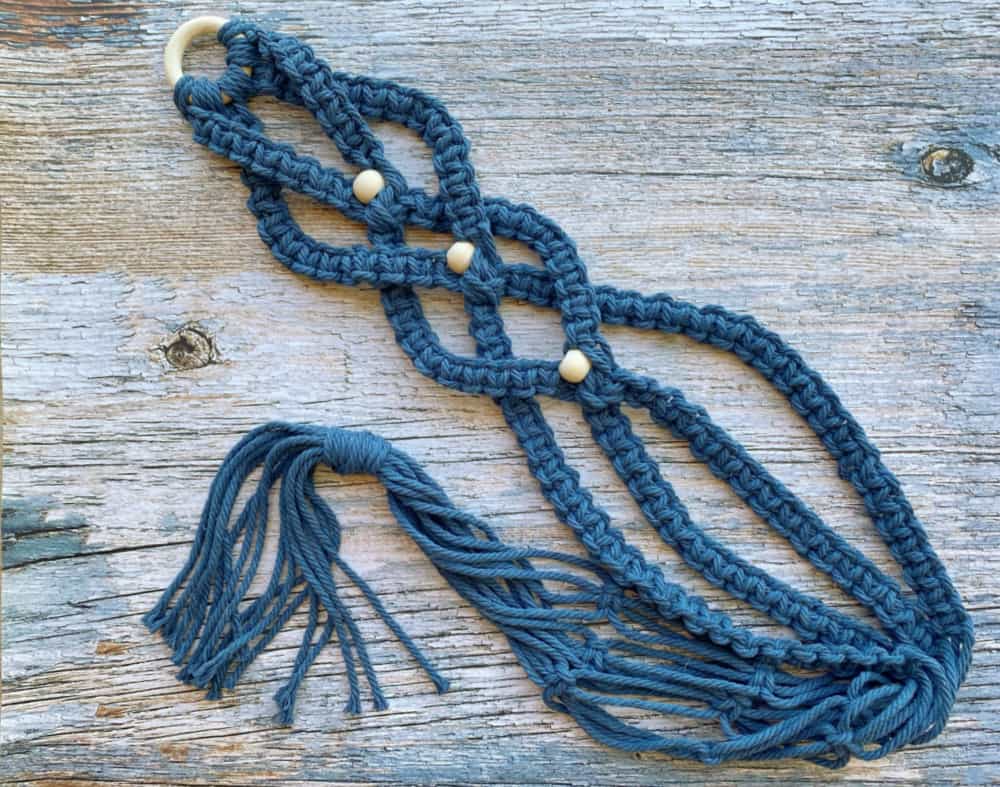
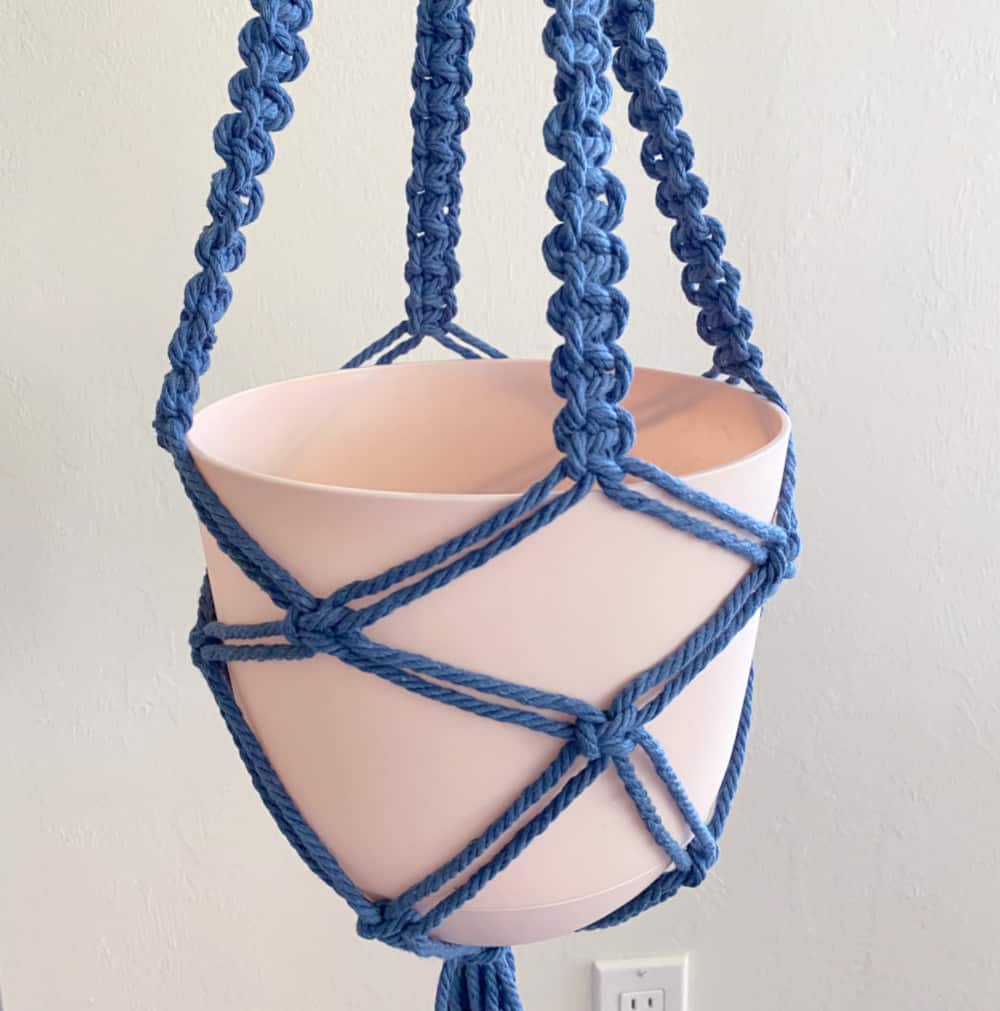
My daughter-in-law has a large sunny window in her kitchen just begging for plants. She also has the coolest mid-century set-up in her breakfast nook – a small round table with four modern chairs, each upholstered in a different color. It is from these chairs that I drew my inspiration for these decorative planters to fill her window. I especially love this indigo macrame and bead planter!
I posted two planter tutorials earlier, and this is the third and final one in the series. It’s such a fresh & fun design. I used rope from Nook Theory in indigo. Such a fun color! And until June 30th, enjoy a special discount on all Nook Theory rope for My French Twist readers exclusively! (see promo code at bottom of post)
(This post may contain affiliate links; as an Amazon associate I earn from qualifying purchases. See disclosure here.)
supplies needed:
- cotton macrame rope
- wooden beads
- painters’ tape & scissors
preparation
Cut 8 pieces of cotton rope, each measuring 20 feet. Wrap all ends with painters’ tape to prevent fraying while working.
lark’s head knots
Using two pieces of rope held side by side, tie onto a wooden ring using a Lark’s Head Knot.
With two more pieces of rope, tie a second Lark’s Head Knot onto the ring. Continue using this process to make two more Lark’s Head Knots. (Eight pieces of rope in total are needed to make these four knots.)

square knot sennits
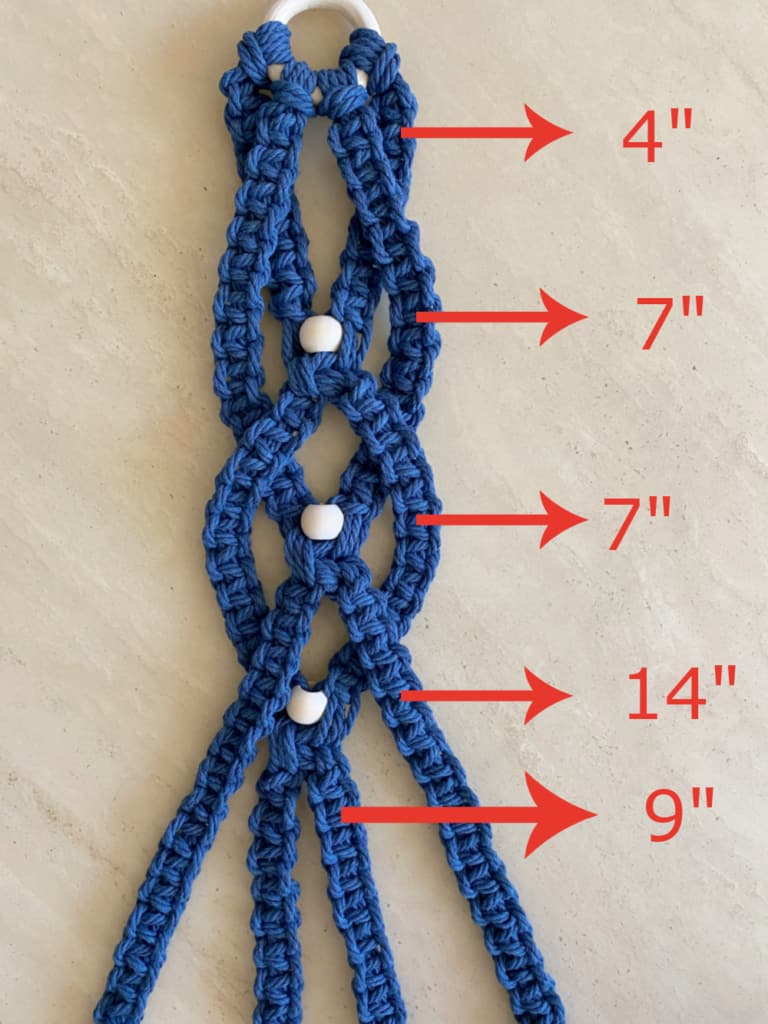
Using the four cords under the first Lark’s Head Knot, make a Square Knot Sennit. (This is simply a vertical chain of Square Knots.) Do this under all 4 Lark’s Head Knots. Extend the two center chains to 7.5″ in length; extend the the two outside chains to 4″.
Once all four chains are done, pull the two outside chains together behind the inner chains. Thread the inside cord from each chain through a wooden bead (as shown in photo below.)
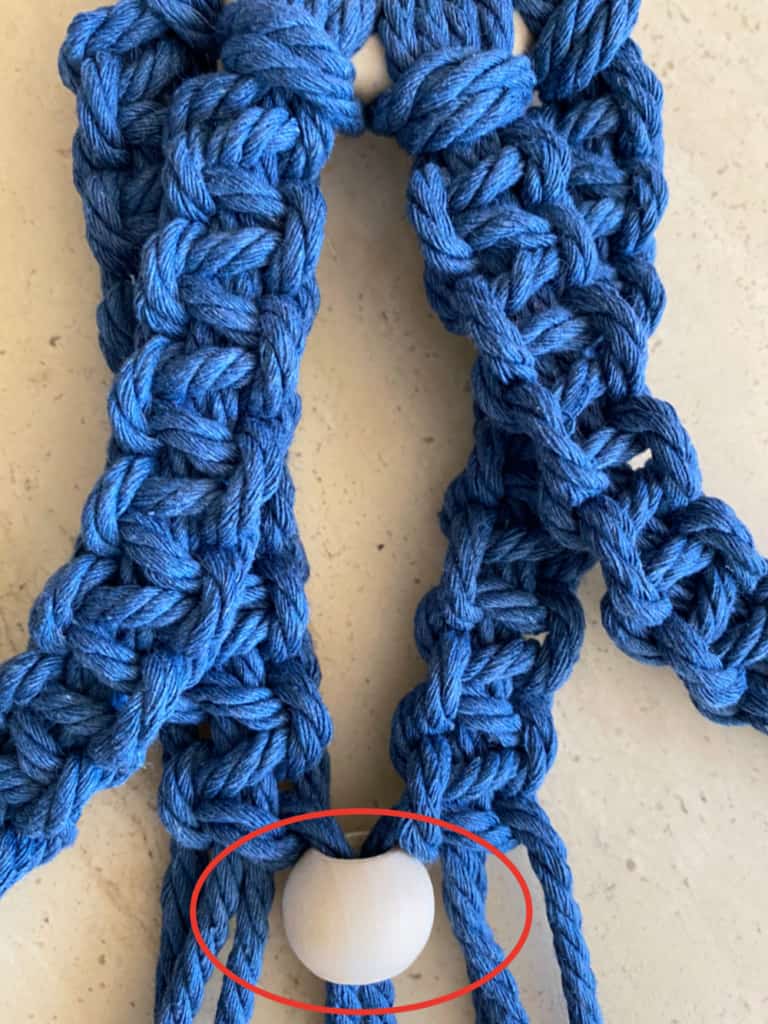
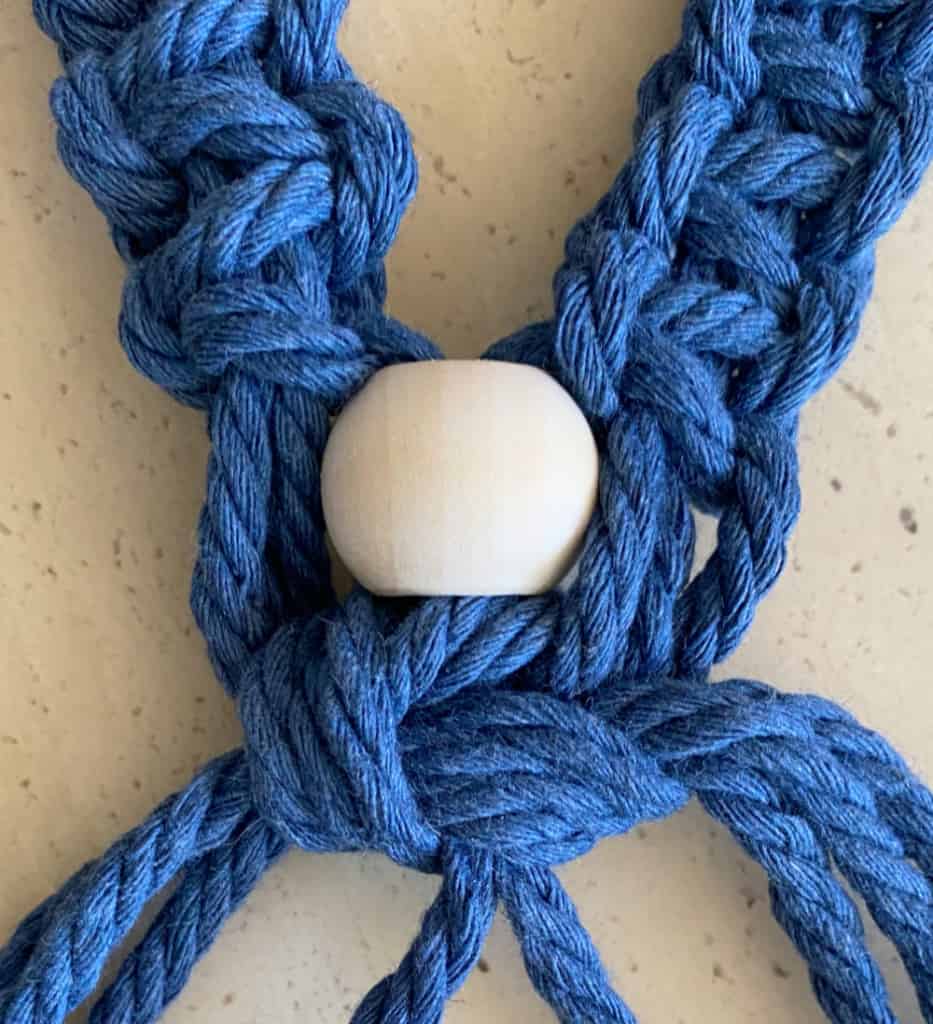
Now, using all 8 cords, tie a Square Knot beneath the bead. (See below.)
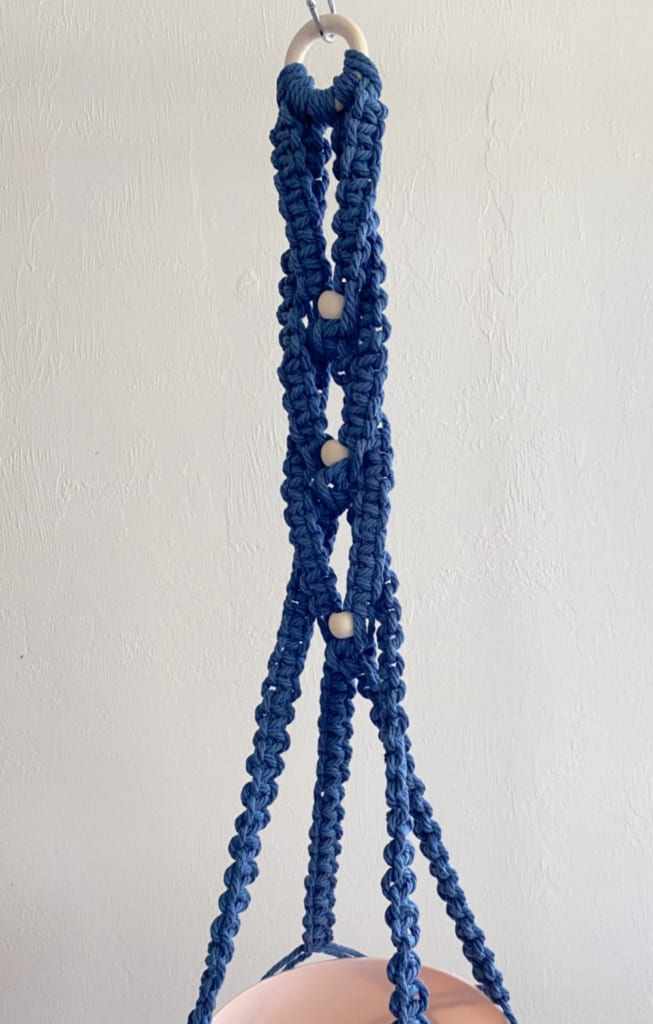
Now that you know how to make Square Knot Sennits and to add beads, use the photo below as a guide for how to weave the sennits (chains) in and out to construct the design for this planter. (Sometimes a picture really is easier to follow than written instructions!)
Once you have finished making the four chains, skip about 3 inches down from the end of the chains and begin making a horizontal row of Square Knots.
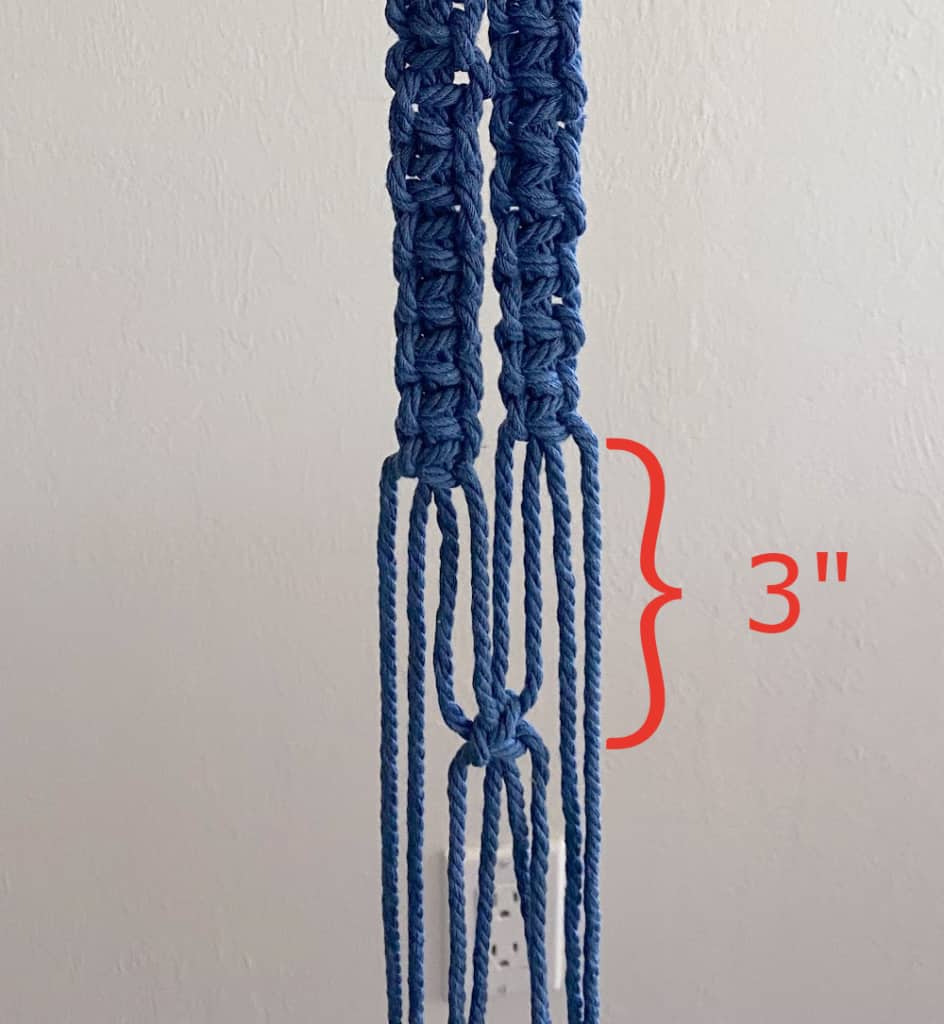
(It may be easier to use the actual actual pot as a guide.) Continue making two more horizontal rows of Alternating Square Knots.
Skip about 7″ down from your very last row of Square Knots and make a Wrapped Knot. Trim the ends evenly.
And here’s the fun part! Enjoy 10% off all Nook Theory ropes until June 30th with the promo code below! I freakin’ love their rope and the colors are very cool.
The biggest compliment is a little share – please pin the photo below!
I’m having so much fun with Nook Theory’s beautifully colored ropes, so check back next week for another project in another luscious color!
Wendy–how long is the finished project?
So beautiful! I’m a beginner,and I found these patterns to be fairly easy ( my knots are not as neat as yours, but I’ll get there!) Thank you!
Came out so cute! And the length was enough that I ended up adding a second tier below for another plant!
My cords came up way too short in some places and I measured exactly before beginning. I even tried to pay attention to which cords I was using- longer or shorter- to start each new knot but it didn’t work. These lengths just aren’t accurate
I’m so sorry. I’ll make another one and make any corrections if needed.
I love the planter but I am finding some of my cords to short after weaving in the beads. Any suggestions?
My cords also came up too short, but my issue could have been attributed to bad measurements at the start.
Thank you for putting this out there. All 3 are so gorgeous, I love the color mixture.
I like all 3 of them! Nice designs, beautiful colors!