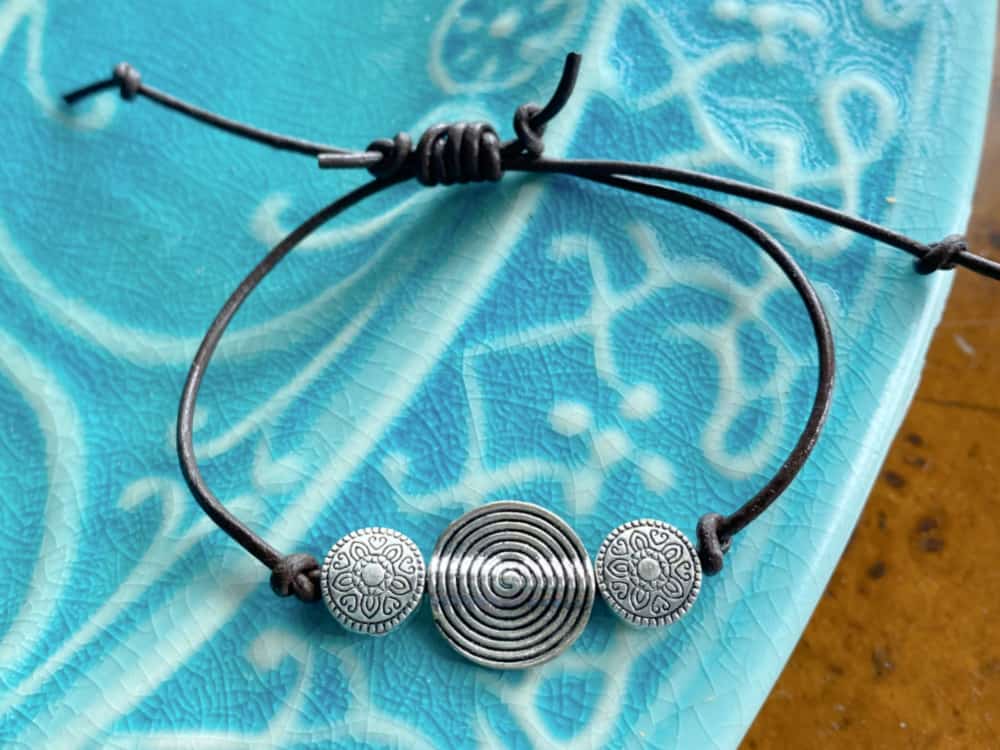
The exciting aspect of jewelry making is that many of the techniques used are quite basic and easy to learn. Once skilled in the fundamentals, you can enjoy the fun challenge of bringing your visions to life! Take a look at this easy leather bracelet with sliding knot.
A useful technique for bracelet making is the sliding knot. I don’t know where I was when my 4th grade besties were all making friendship bracelets and tying sliding knots, but apparently I was absent that day. Which is a pity, because I would have made some crazy colorful bracelets to match my bell-bottomed jumpsuit I made when I first learned to sew. The fabric had pink and orange peace signs with MAKE LOVE NOT WAR slogans. My mother always allowed me to wear the outfits I made myself to encourage my sewing pursuits, but she probably should have censored this one. At the very least, she should have taught me how to make sliding knot bracelets so I could have accessorized it properly.
(This post may contain affiliate links; as an Amazon associate I earn from qualifying purchases. See disclosure here.)
supplies needed:
- leather cording
- beads
step 1 – prepare the bracelet
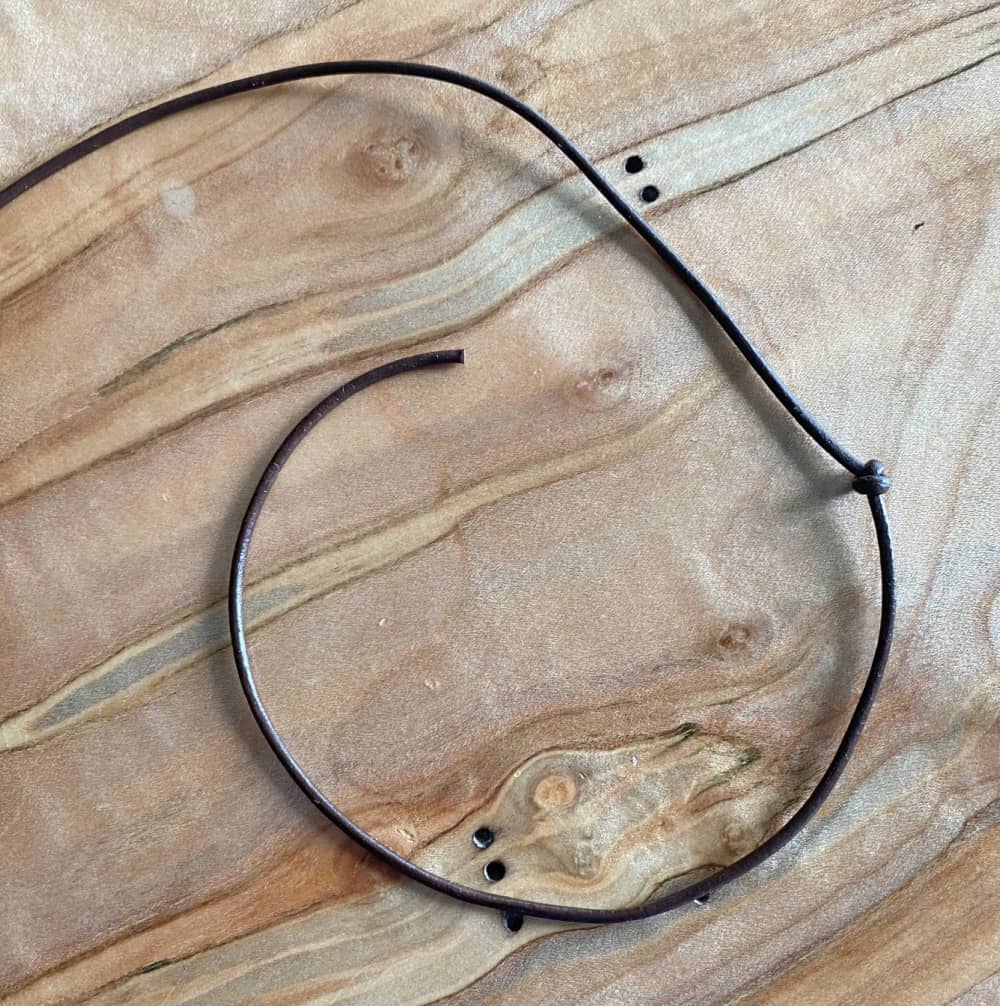
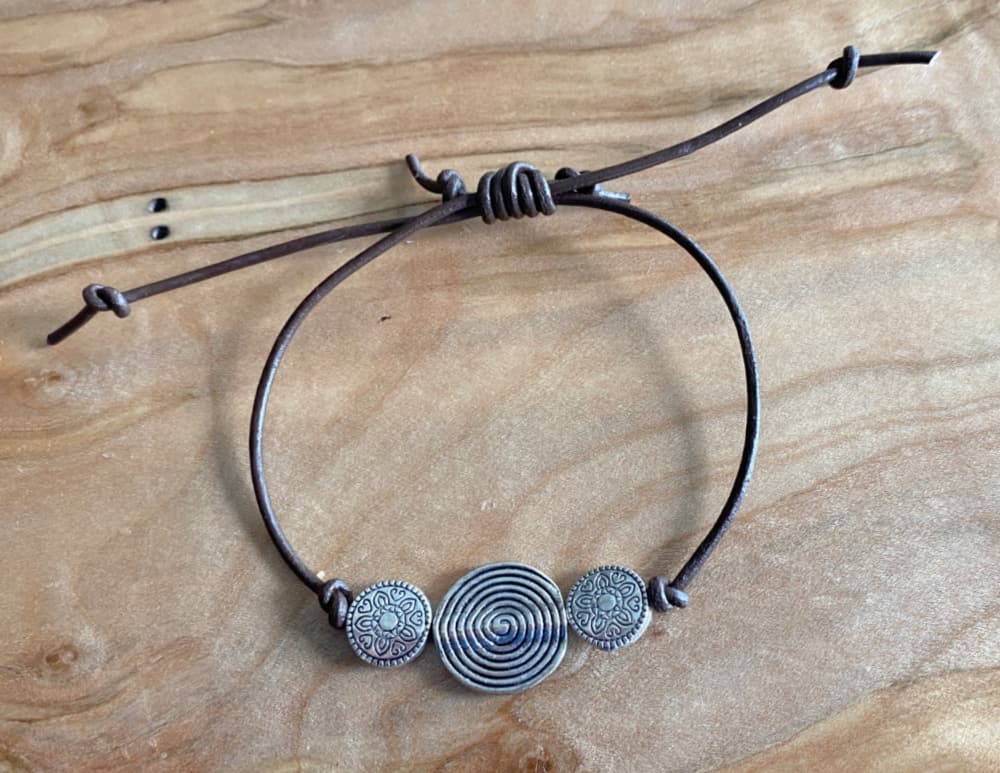
Cut one piece of leather cording long enough to fit around your wrist 2 times. .

Close to the center of the cord, make a simple knot, as shown below.
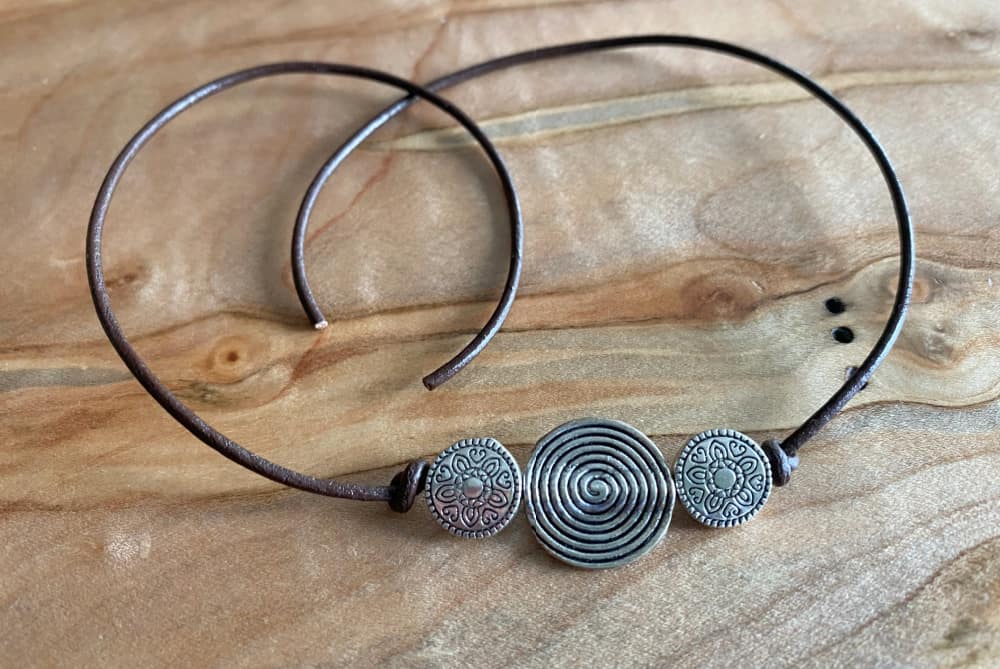
Add several beads in a decorative arrangement. (When buying your supplies, make sure you select beads with openings large enough for the cord to go through.) After beads are added, make another knot, as close to the beads as possible, to keep them in place.
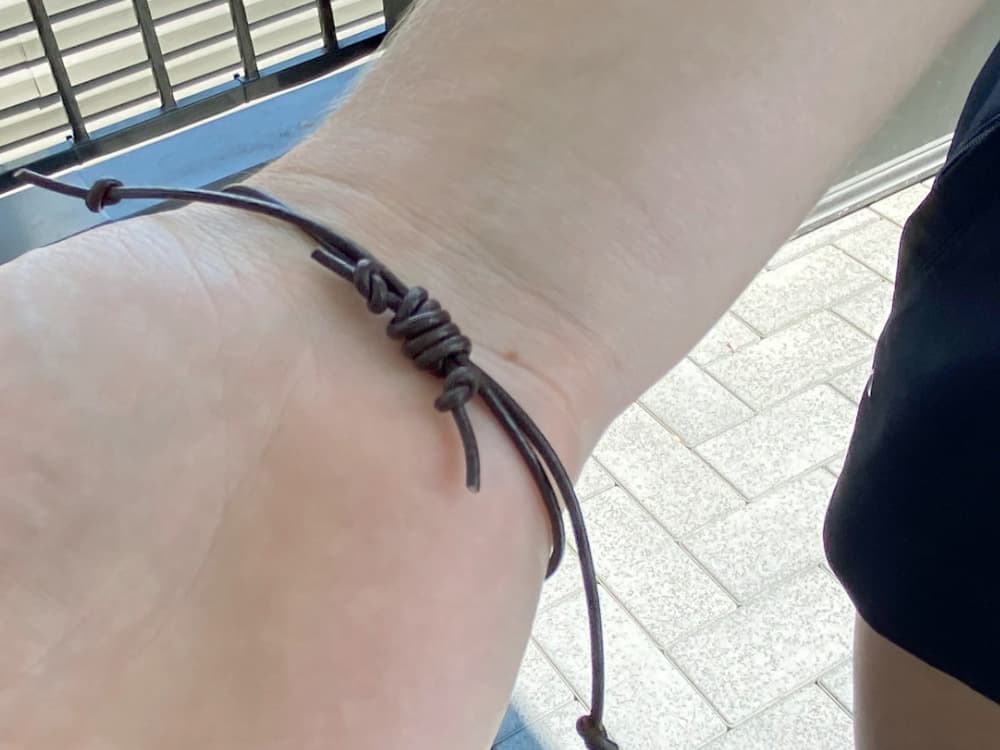
step 2 – add a sliding knot
The video below demonstrates how to make an easy sliding knot.
Now that you’re familiar with this technique, cut a piece of leather cording about10″ long. Use this cord to make the sliding knot.
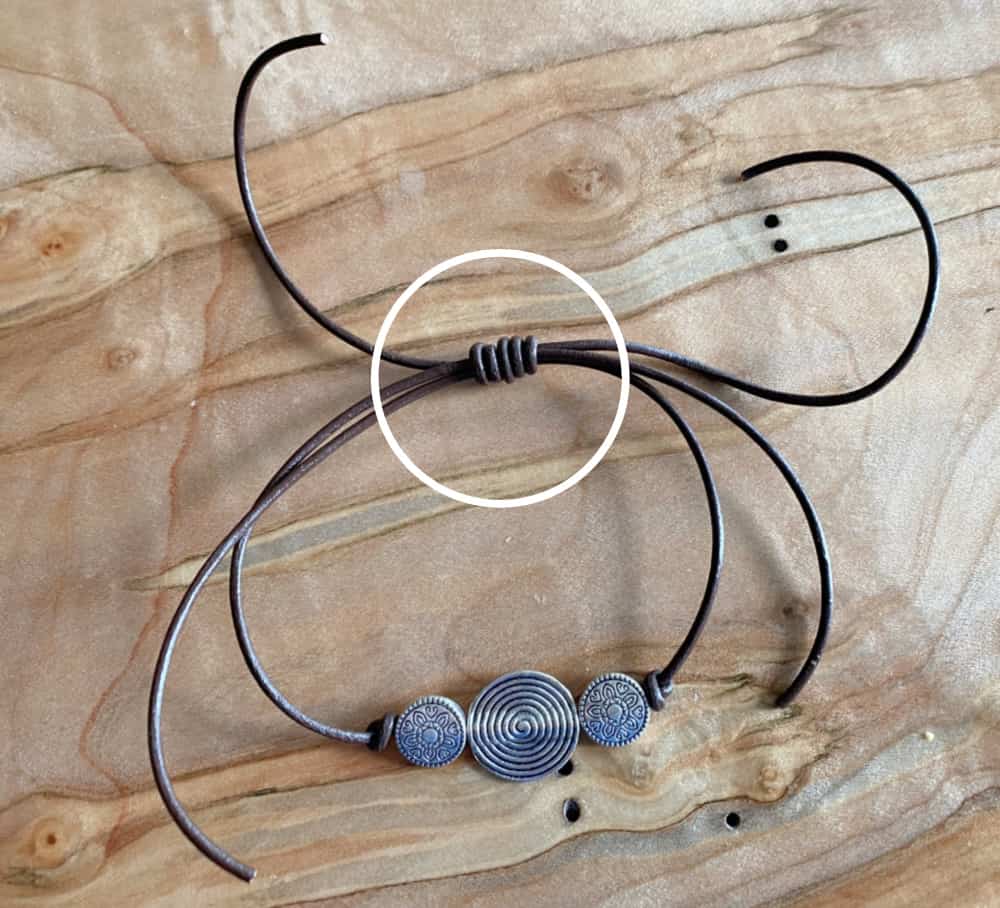
When completed, make a regular knot on both sides of the sliding knot, as shown in the photo below. Trim the loose ends.
step 3 – finishing touches
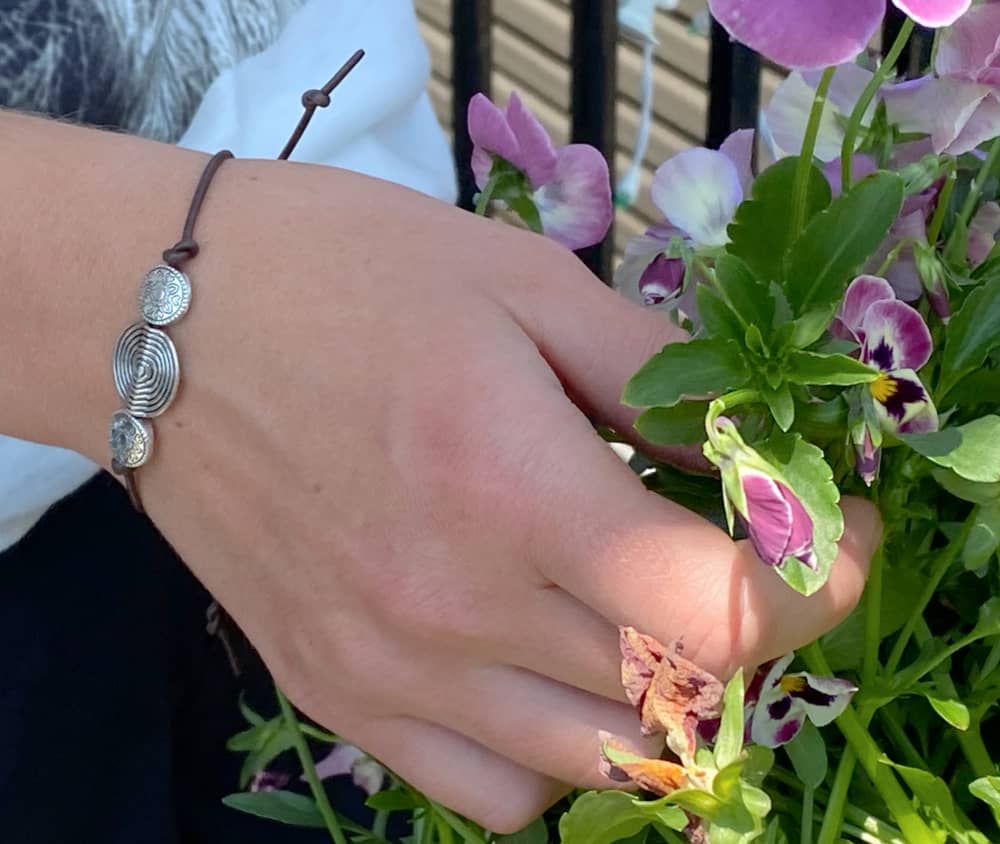
Now try your bracelet on and decide the length you want for the bracelet ends. Cut the ends to desired length and knot, as shown below.
The biggest compliment is a little share – pin the photo below!