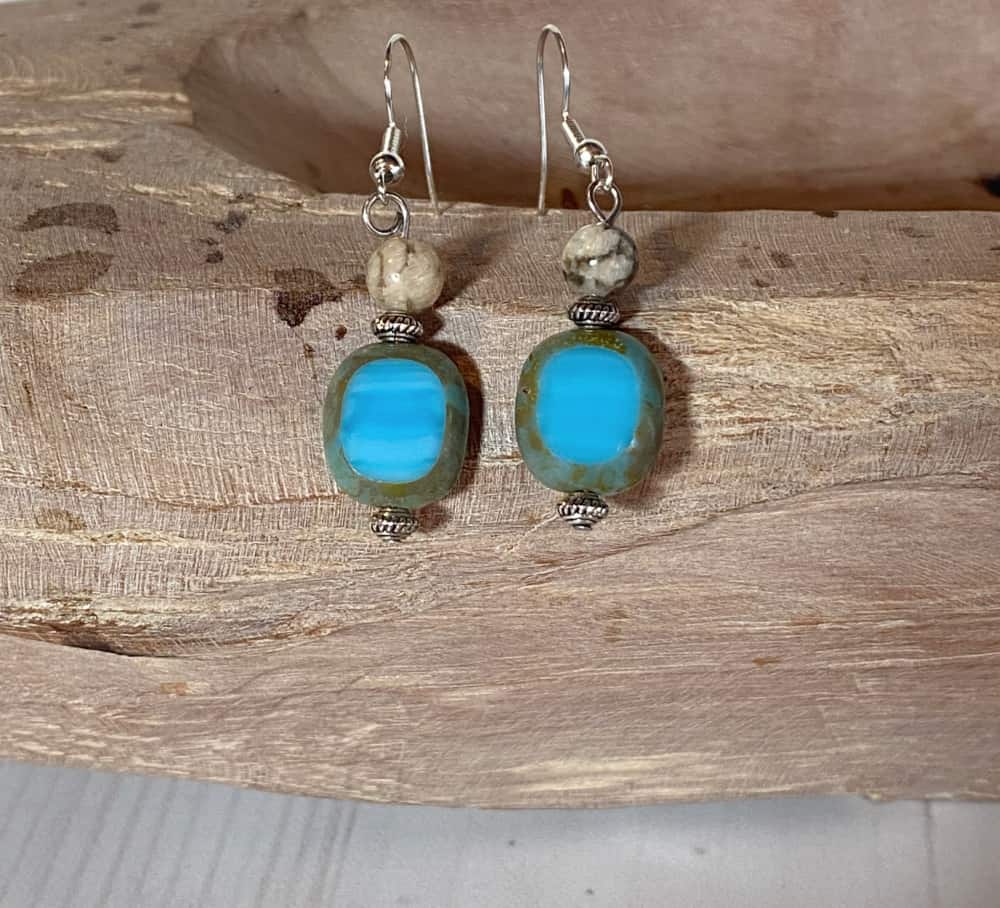
When strolling through flea markets and artisan fairs, I’m always drawn to the jewelry, and simple dangle earrings are my favorite. Recently I decided to learn a few jewelry making techniques so I could craft my own. It’s not hard, but there are a few trade secrets that make the process even easier.
(This post may contain affiliate links; as an Amazon associate I earn from qualifying purchases. See disclosure here.)
basic tools
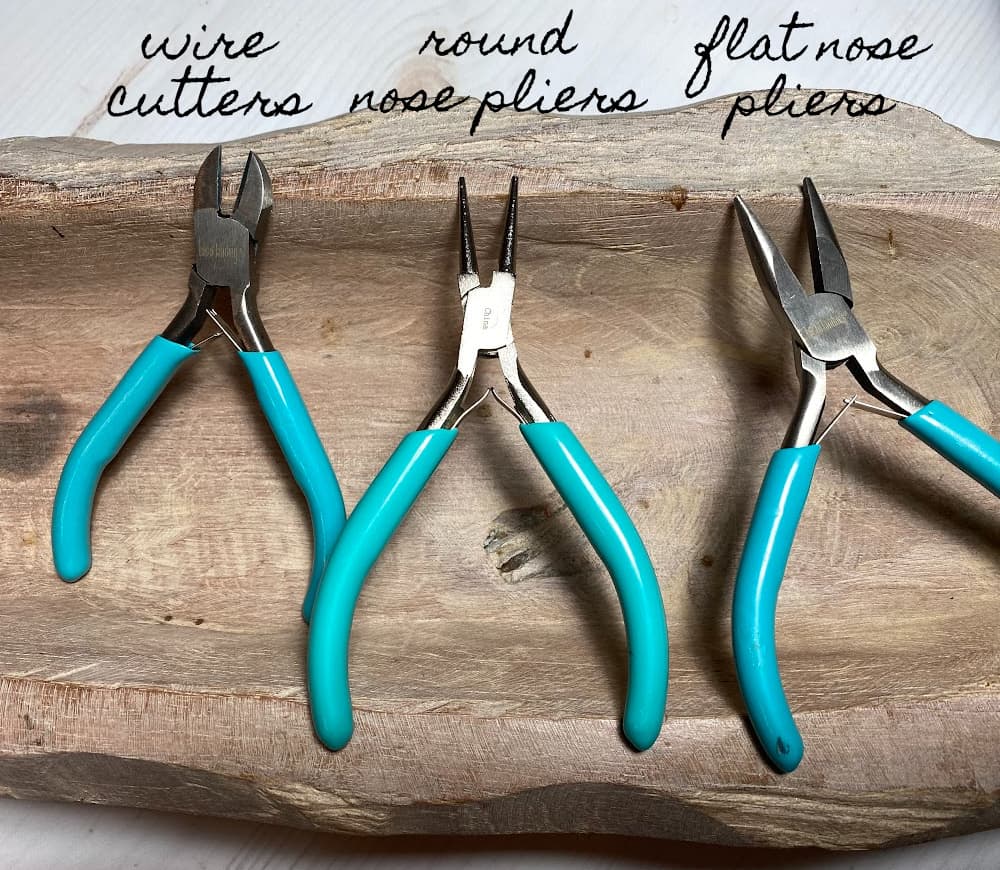
The tools shown in the photo above, from left to right, are wire cutters, round nose pliers, and flat nose pliers. Although there are many different tools for jewelry crafting, these are the absolute basics every beginner needs. Wire cutters are obviously used for snipping wires. Round nose pliers are used to curl wire into small loops. And flat nose pliers are used to hold, flatten, and manipulate wire in different ways. This will all make more sense as we begin to fashion our first earrings.
A fourth optional tool is a set of flat nose pliers with a serrated edge, used for gripping small components such as jump rings.
basic findings
- earring hooks
- flat head pins
- beads
Findings is simply another word for jewelry components. Once again, the findings listed above are the absolute basics needed for the beginner. Earring hooks, sometimes called shepherd hooks, are designed for pierced ears. The body of the earring is attached to this hook. Flat head pins are straight pieces of wire with a flat head on one end. They come in different wire sizes (gauges) and lengths.
When venturing into the world of beads, it is easy to become overwhelmed. There are so many different types, it is difficult for a beginner to know where to start. If you’ve never tried making earrings before, I suggest browsing the jewelry section of Michaels for beads that catch your eye. They are usually sold on a string.
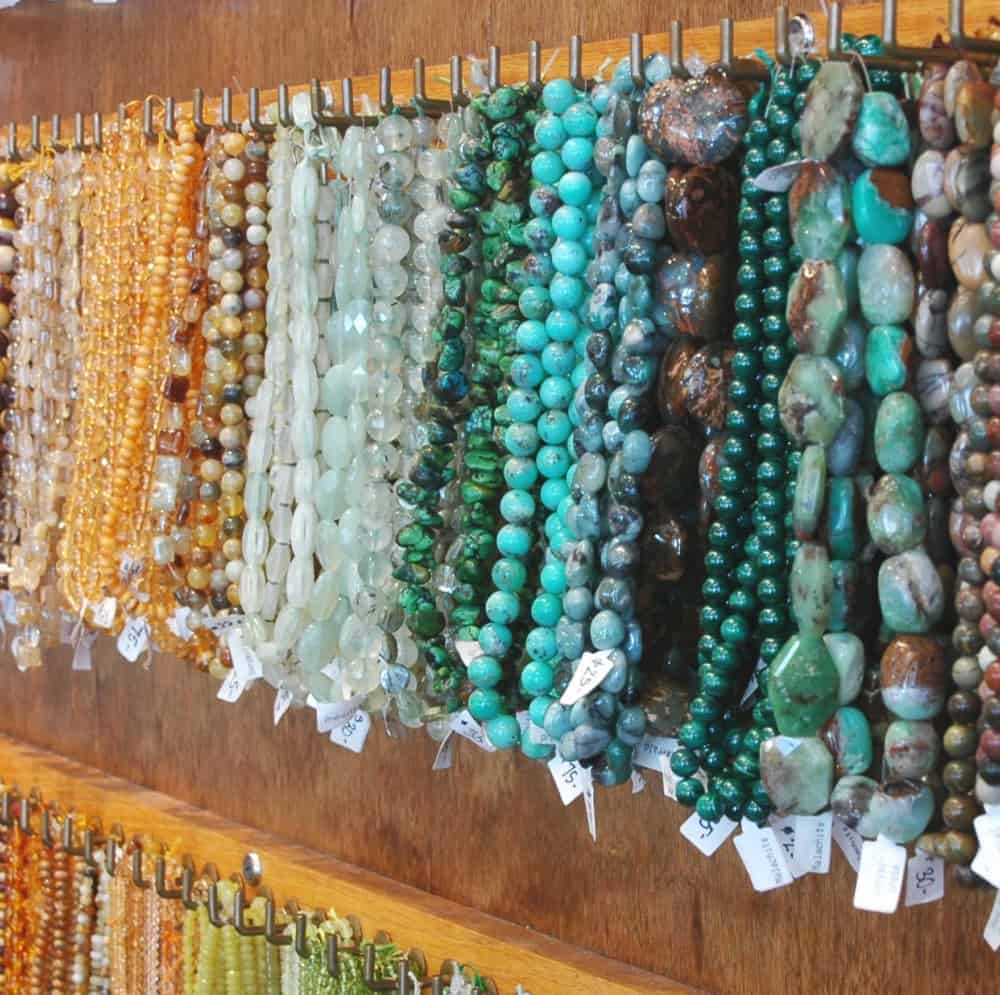
In addition to decorative beads, you should also buy some spacer beads. These are usually a bit smaller and in silver or gold metal tones. They are used to accent or “frame” the more colorful decorative beads.
basic steps
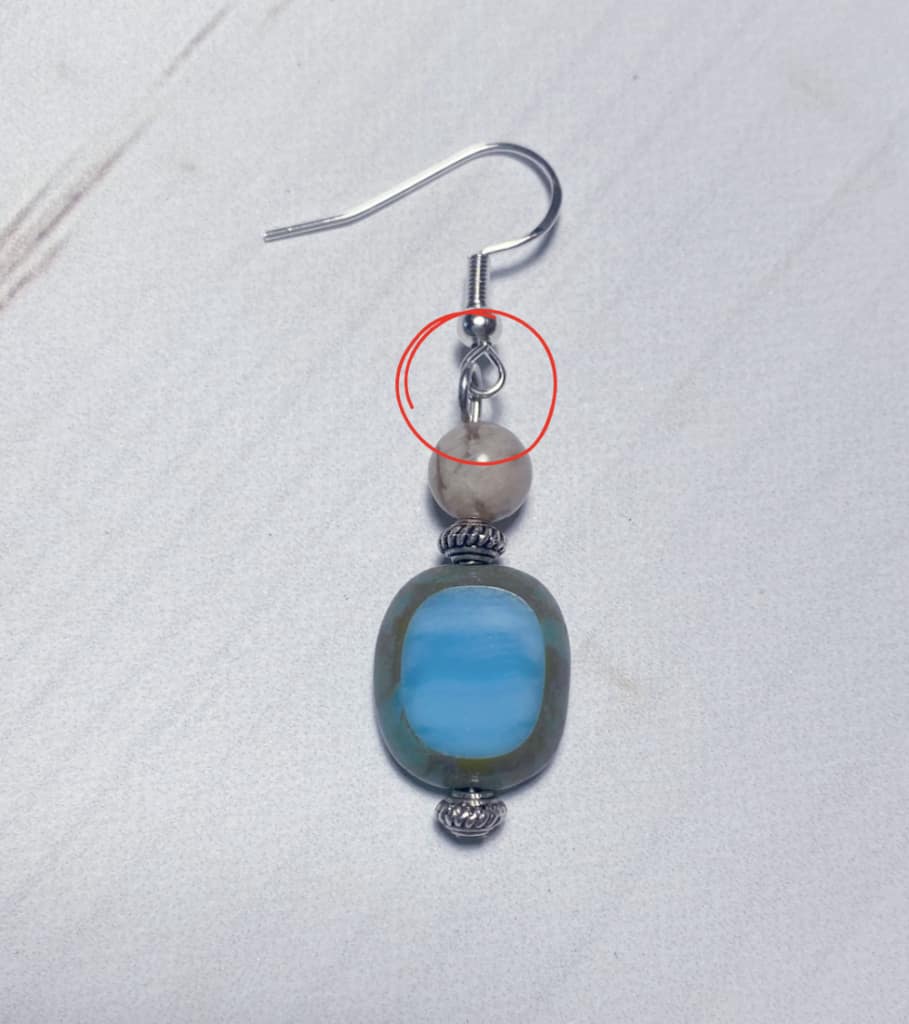
- Thread beads onto the flat head pin in the sequence you desire.
- Bend the head pin to the side.
- With wire cutters, shorten the head pin to about 1/4″, as shown in bottom left photo above.
- With the round nose pliers, clasp the end of the head pin tightly and gently roll away from you into a small loop. Do not yet close the loop entirely.
Lastly, attach the earring body to an earring hook. Slide the partially open loop at the top of the earring onto the loop at the bottom of the earring hook. Then, gently close the loop completely.
Below is a short video demonstration of this process.
The biggest compliment is a little share – pin the photo below!
Lovely clear instructions for a beginner. Thanks for sharing with us at Handmade Monday 🙂
Thanks Julie!
I’ve been making jewelry for years now, and I love doing it. You did a fabulous job with the instructions and your earrings! Featuring when my party opens.
thank you Carol!
I luv this but this but this site is glitching for me anybody else having this problem
so useful i wish there was more about what each plier dose and what is used for or shopping list but still cool!
This tutorial is so clear and concise. Thank you!
I combined some of my own steps but it still worked out really well
I have sooooooo many beads. What do you suggest as the best gauge head pin for most beads.
For most jewelry projects, I like either 22 or 24 gauge.
This tutorial is really interesting. Being a fan of everything horse-related, I would love to make my own equestrian earrings using your shared instructions.
These are lovely, Wendy! Thanks for sharing at Vintage Charm!
Thanks for sharing, love to get started.
Beautiful earrings and a great tutorial. Featuring when my party opens tomorrow.
Great tutorial! I began making my own earrings in high school. I’m thinking I need to pull out my pliers and beads!
I have simple dangle earrings on my to-do list, which I’ve not made before, so this was a timely tutorial. Not sure why but wire intimidates me, haha. Pinned it for reference! Visiting you from Happiness is Homemade.
Bending the wire is the hardest part. It takes practice, but I guarantee your technique improves quickly each time you practice!