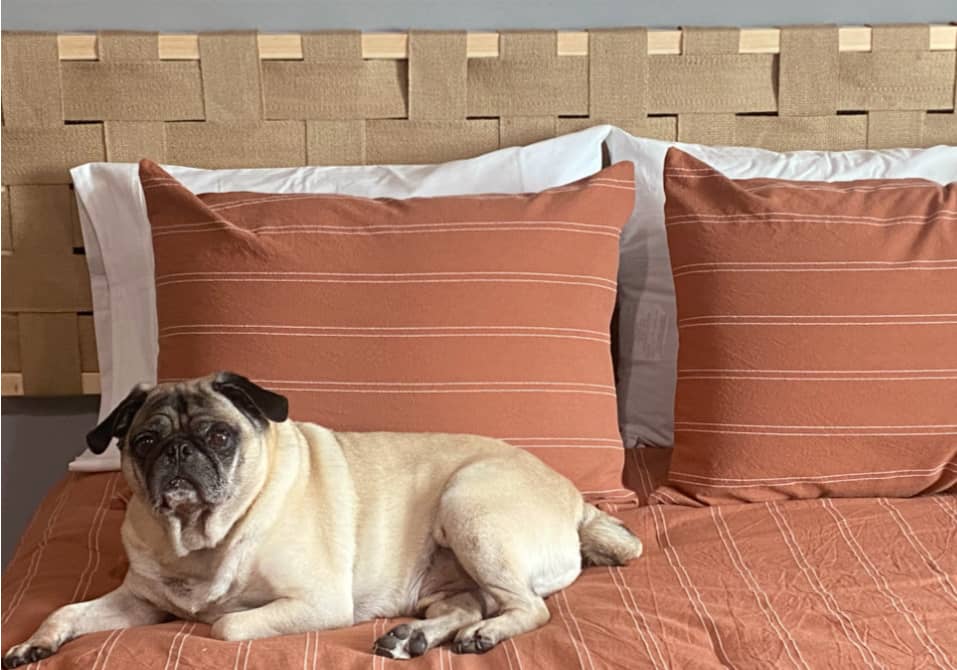
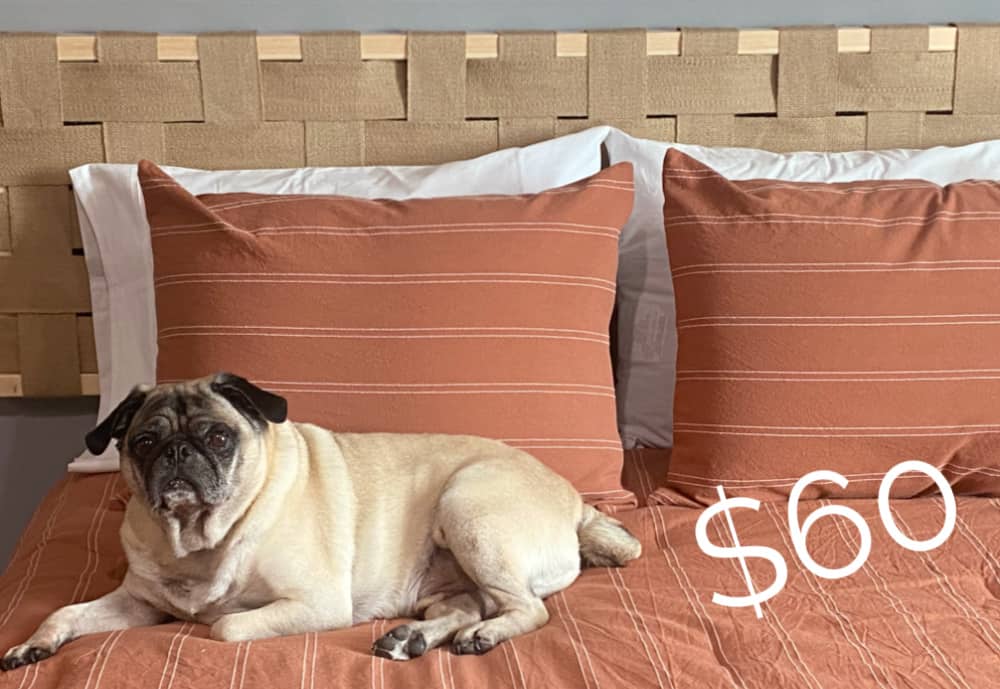
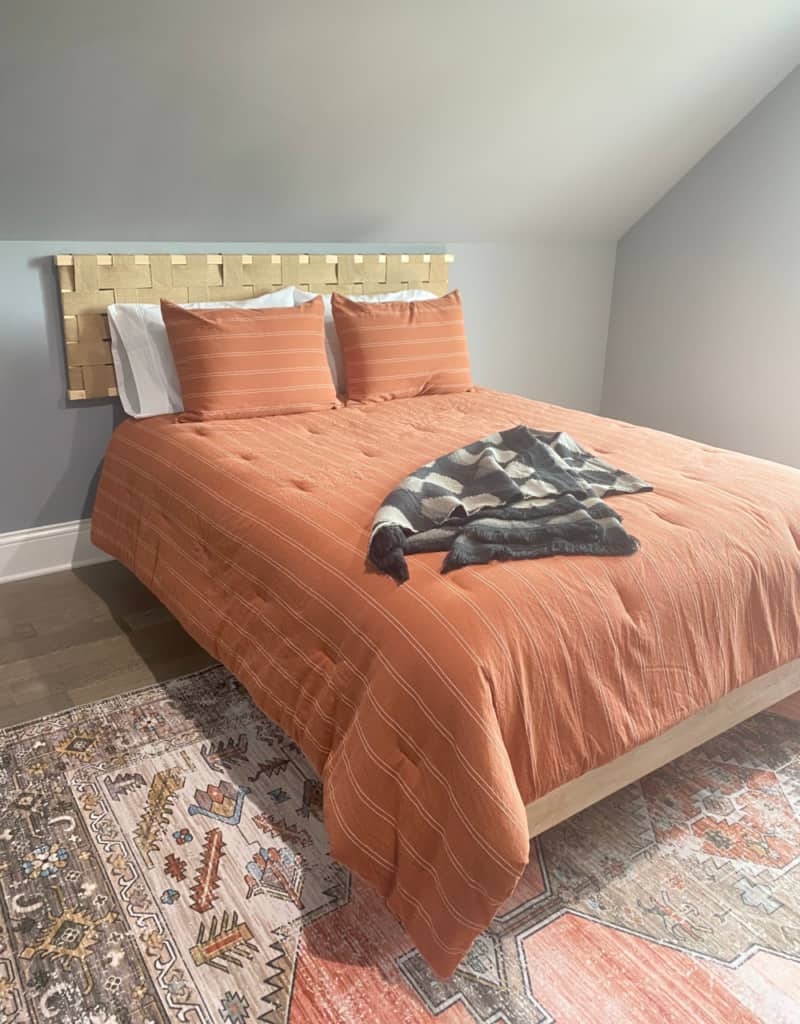
You gotta love Ikea. Even if you buy most of your furniture from high design stores, there’s still a need to periodically saunter through the aisles of this Swedish retail giant. Especially if you’re a DIYer. Case in point – I bought this Ivar side unit for $30 and turned it into a trendy woven headboard.
I added some jute webbing and ended up with a stylish open weave headboard for less than $60. Now you tell me, isn’t Ikea cool?
others…
mine…
(Affiliate links included for your convenience. As an Amazon associate I earn from qualifying purchases. See disclosure here.)
supplies needed:
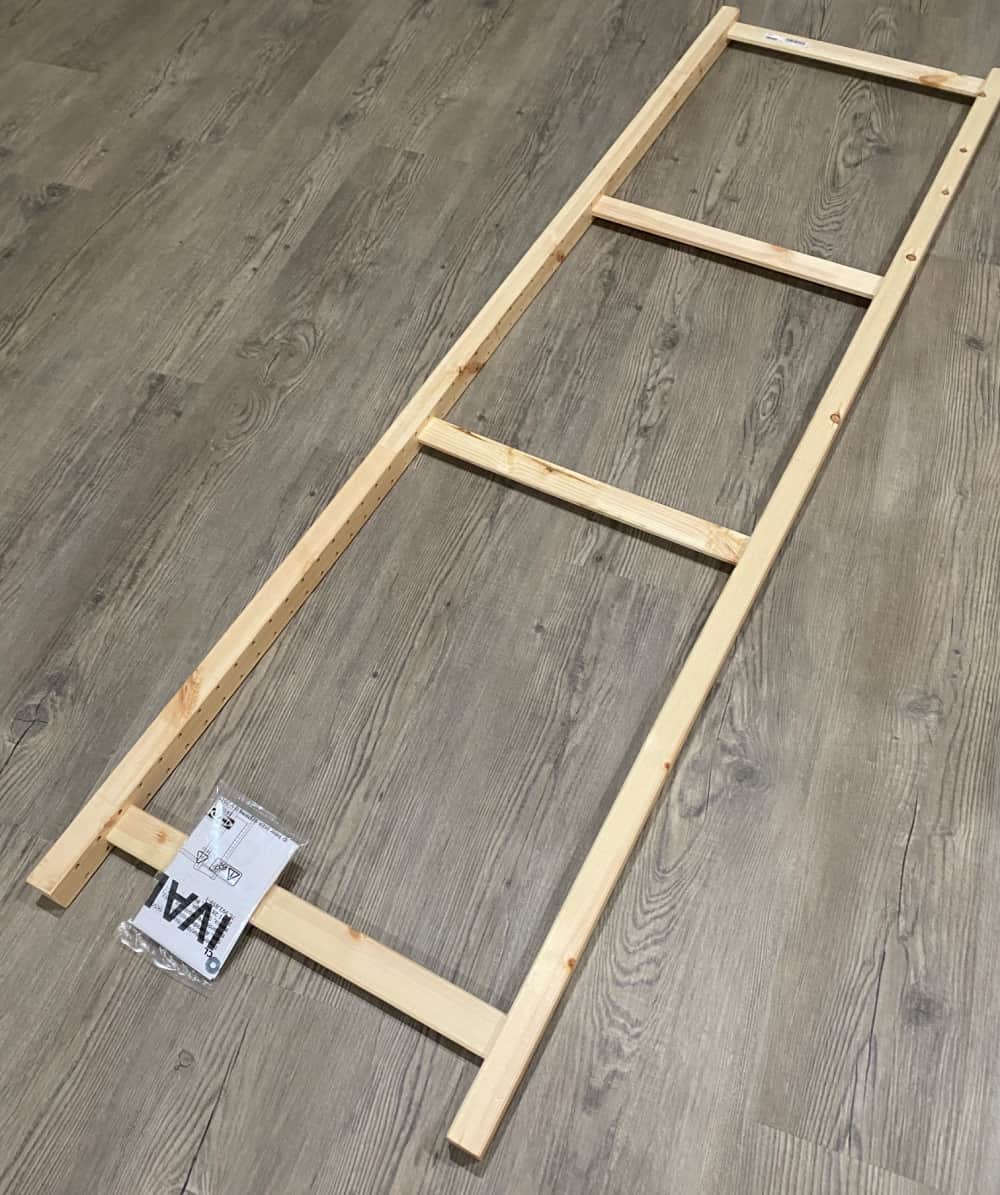
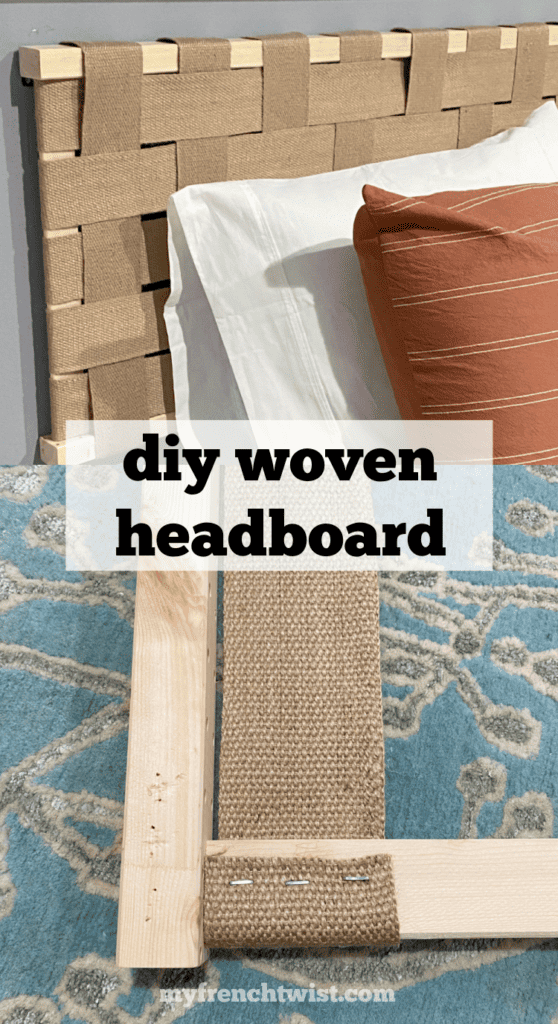
- Ivar side unit – 20″ x 70″
- 3.5″ webbing – 20 yards
- staple gun
- mounting brackets
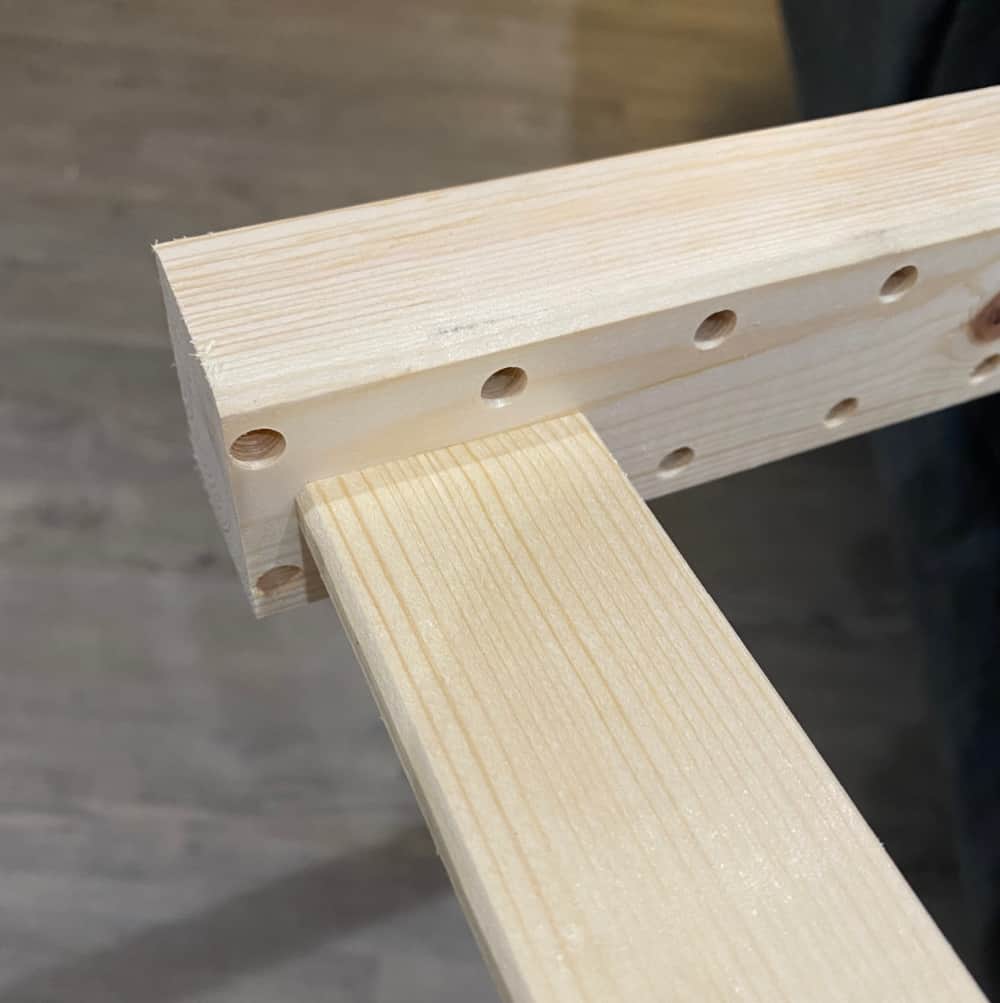
step 1 – prepare frame
When you turn the Ivar side unit horizontal, you’ll notice that the two ends are not symmetrical (the legs on one end are longer). You can use it as is; or if you have access to a saw, you can shorten the longer legs.
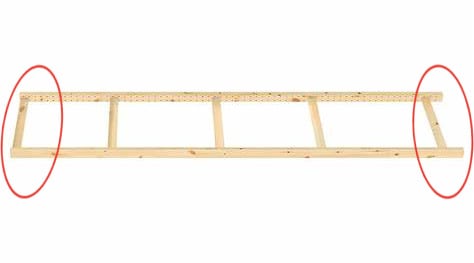
I shortened them so the sides looked the same; I think it looks more polished.
step 2 – weaving
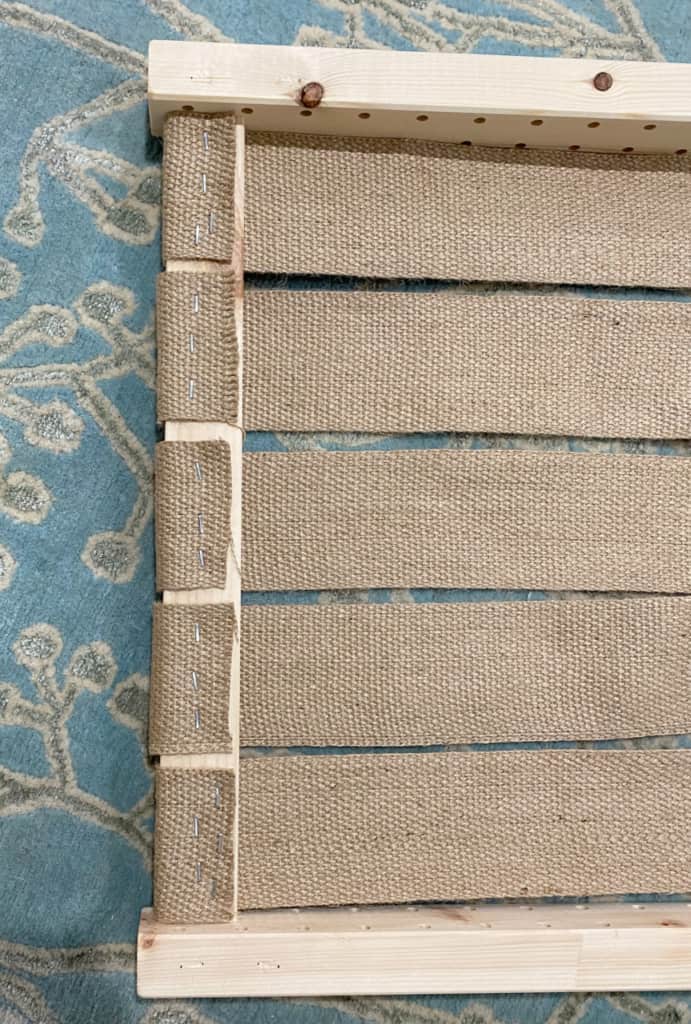
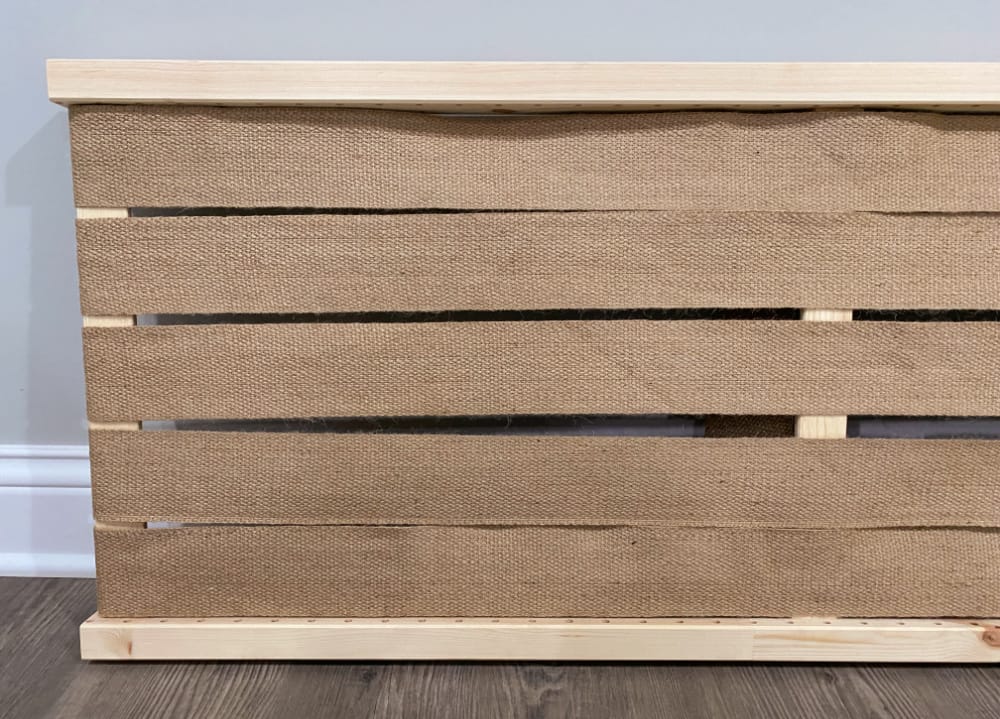
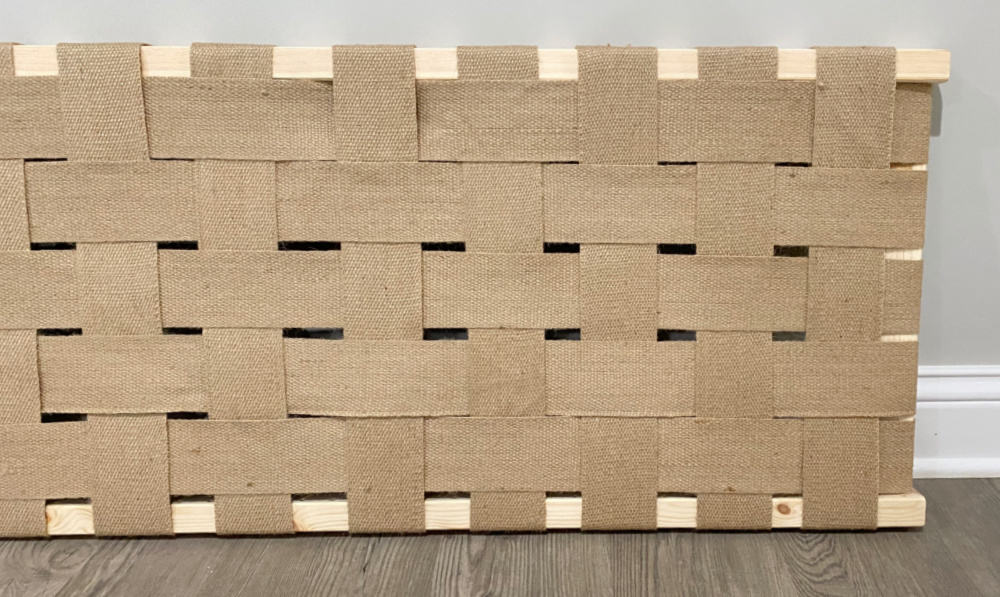
I used 3.5″ wide webbing, but smaller widths will work also. Determine how many strips of webbing you’ll need to stretch horizontally across the frame. I used 5 but if you use a thinner width webbing you may need more. Staple the webbing to the back of one side board, pull over the frame to the other side, tighten and staple to back.
Once the horizontal strips are stapled in place, cut strips for the vertical weaving. Before stapling, arrange the strips onto the board beginning with the center strips. Space evenly. Once placement is determined, staple the ends of the strips to the back of the top board, as shown below.
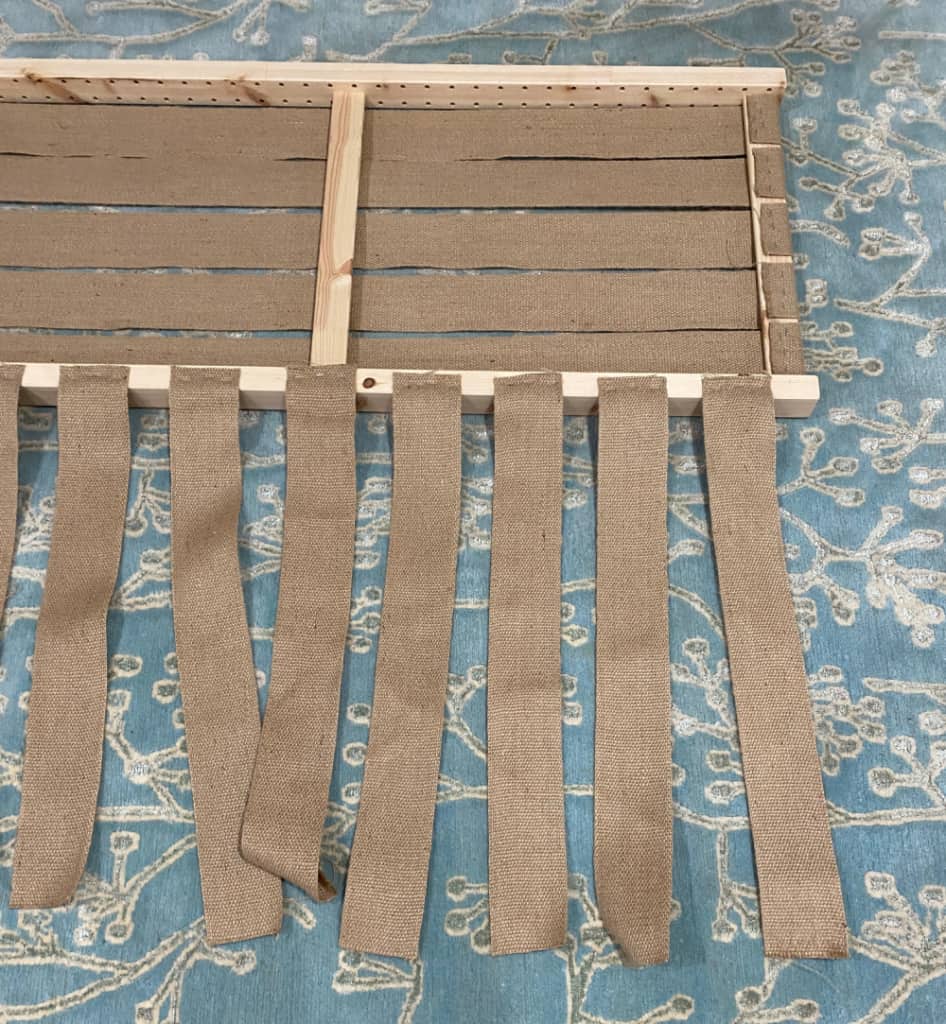
Bring each strip over the frame and weave it through the horizontal strips, alternating going over and under, as shown below.
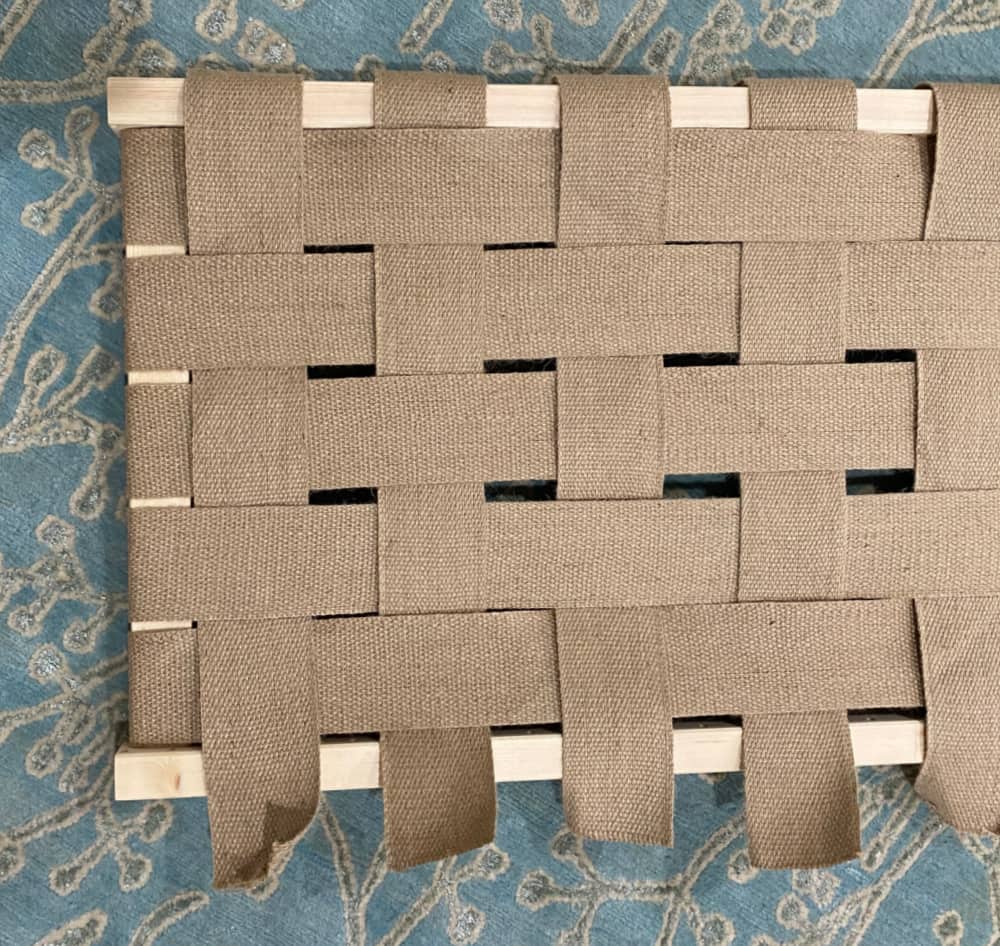
Once the weaving is complete, pull each strip tightly and staple to the back of the bottom board.
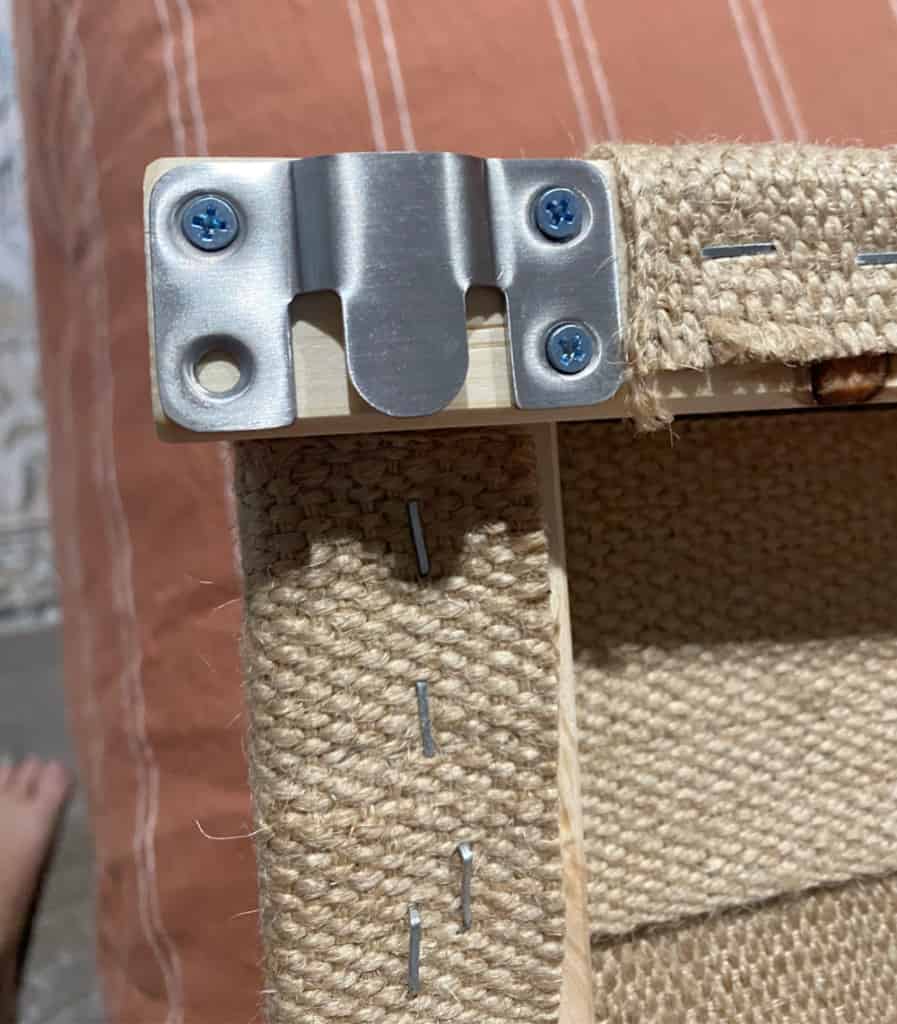
step 3 – attach mounting brackets
Attach mounting brackets to the back of the headboard, one at each top corner. Attach the corresponding brackets on the wall, measuring carefully. Slide the headboard in and voila! It really is just that easy.
I thought this DIY woven headboard would be relatively simple to make, but it was even easier than I suspected. I needed a headboard for one of the guest rooms at our lake house. But after purchasing bed frames, mattresses and linens, I didn’t want to spend a fortune on headboards. I also wanted something simple yet on trend for this bohemian attic room, and I love the earthy texture of the jute webbing.
The biggest compliment is a little share – please pin the photo below.

Thanks so much for sharing this at Tuesday Turn About, Wendy. I’m delighted to be featuring your DIY woven headboard at the party this week! Pinned!
So cute and creative Wendy. I am happy to feature your diy woven headboard at Love Your Creativity.
Thanks so much Linda!
I love it, so creative! Great step-by-step tutorial! You did a great job. When I saw the finished product behind the bed, I’m inspired to put 2 together so it comes close to the floor. Thank you for inspiration!
That’s a great idea!
This is a great Ikea hack! So creative:)
Thanks Tanya!
Definitely easy and a perfectly executed tutorial. Well done
Thanks so much!