
I’ve been wanting to make a large macrame hanging herb garden for my balcony for some time but just wasn’t sure where to start. Finally, I took a deep breath and began. My first step? Get out my drill.
Yep, that’s what I said. I had to get out my drill and learn how to drill holes into brick. Pretty easy, actually. I bought some hooks from Home Depot and asked an employee what type and size drill bit was needed. A few dollars and a one masonry bit later, I was ready to give it a try. (Oh, I did watch a You Tube video beforehand and learned it is best to drill into the grout.) Steps: drill hole, insert anchor, screw in hook.
(Affiliate links included for your convenience. As an Amazon associate I earn from qualifying purchases. See disclosure here.)
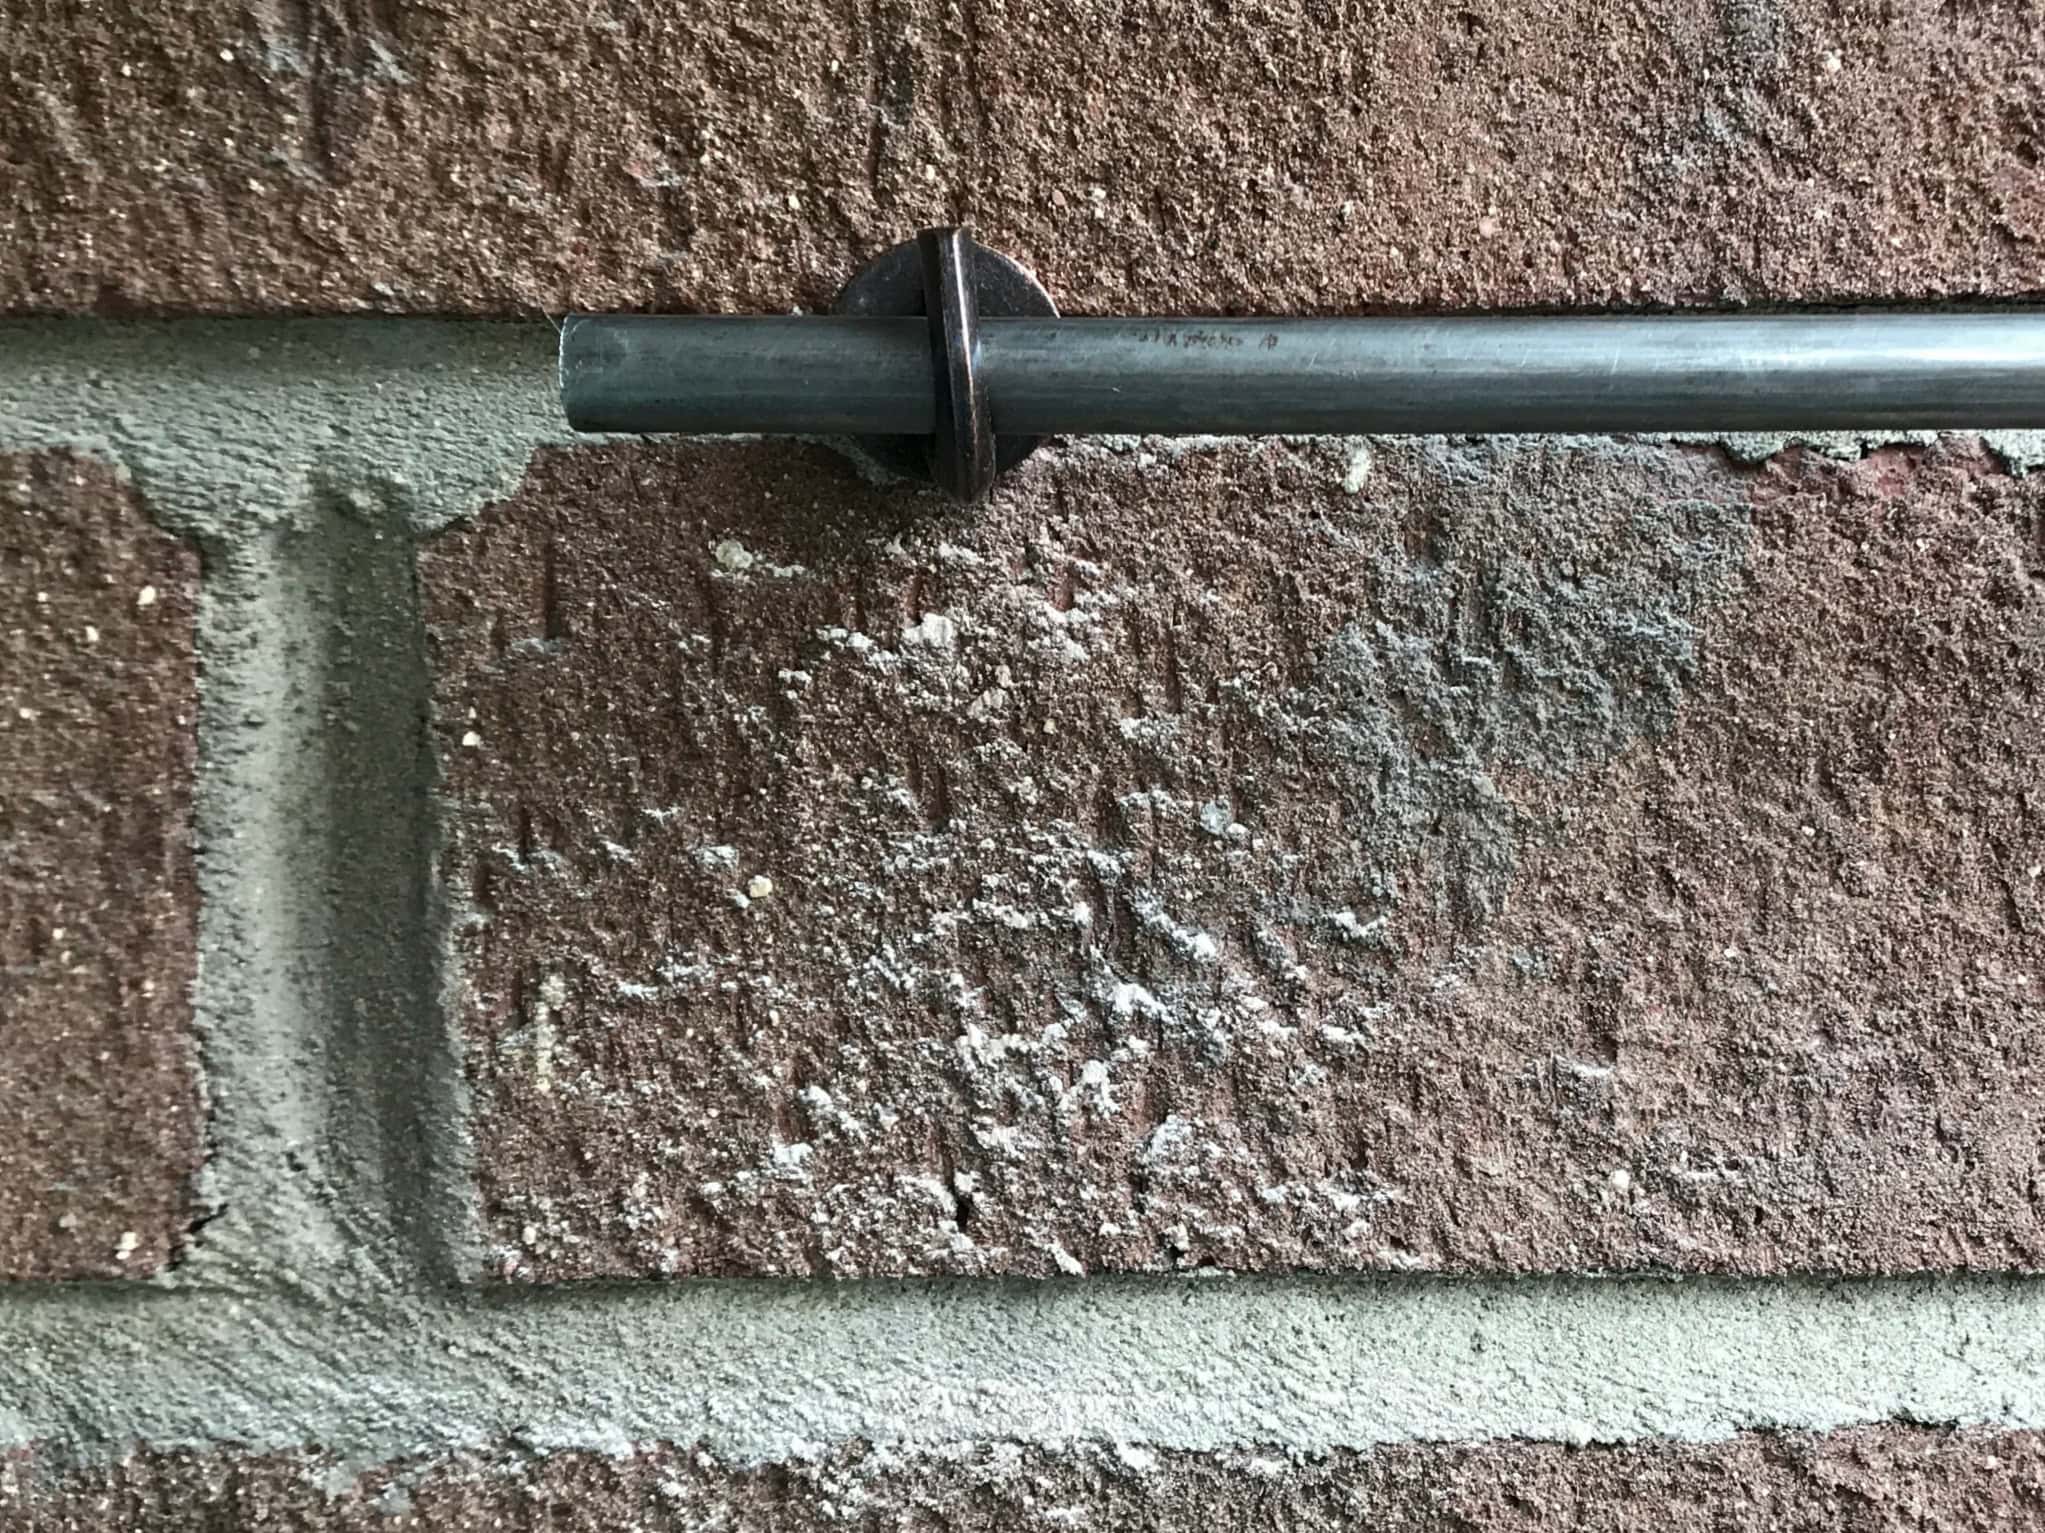
I needed a sturdier pole than a wooden dowel, so I opted for a thin metal dowel, 48 inches long. Now to begin the weaving…
For this wall hanging, I used 5/16″ wide nylon rope, as it will withstand weather better than cotton. It took nearly 4 rolls of 100′ nylon rope.
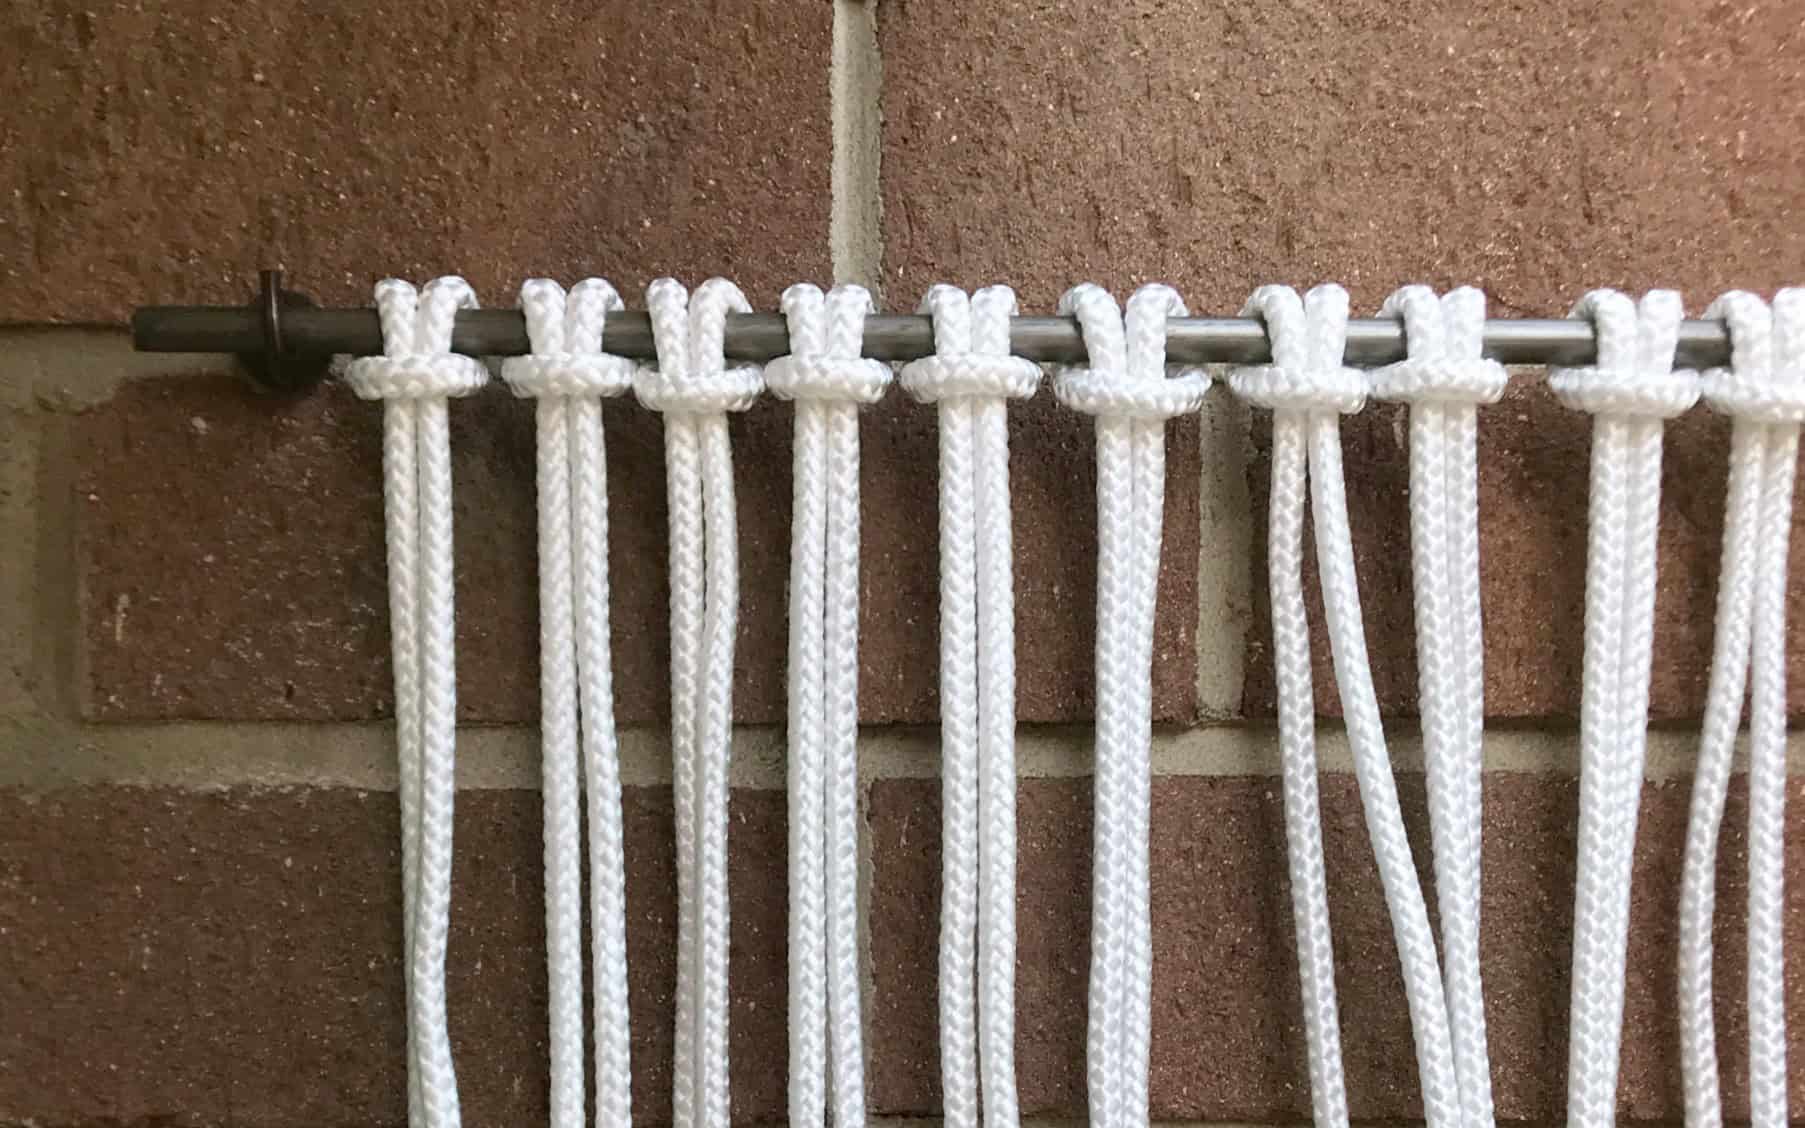
step 1
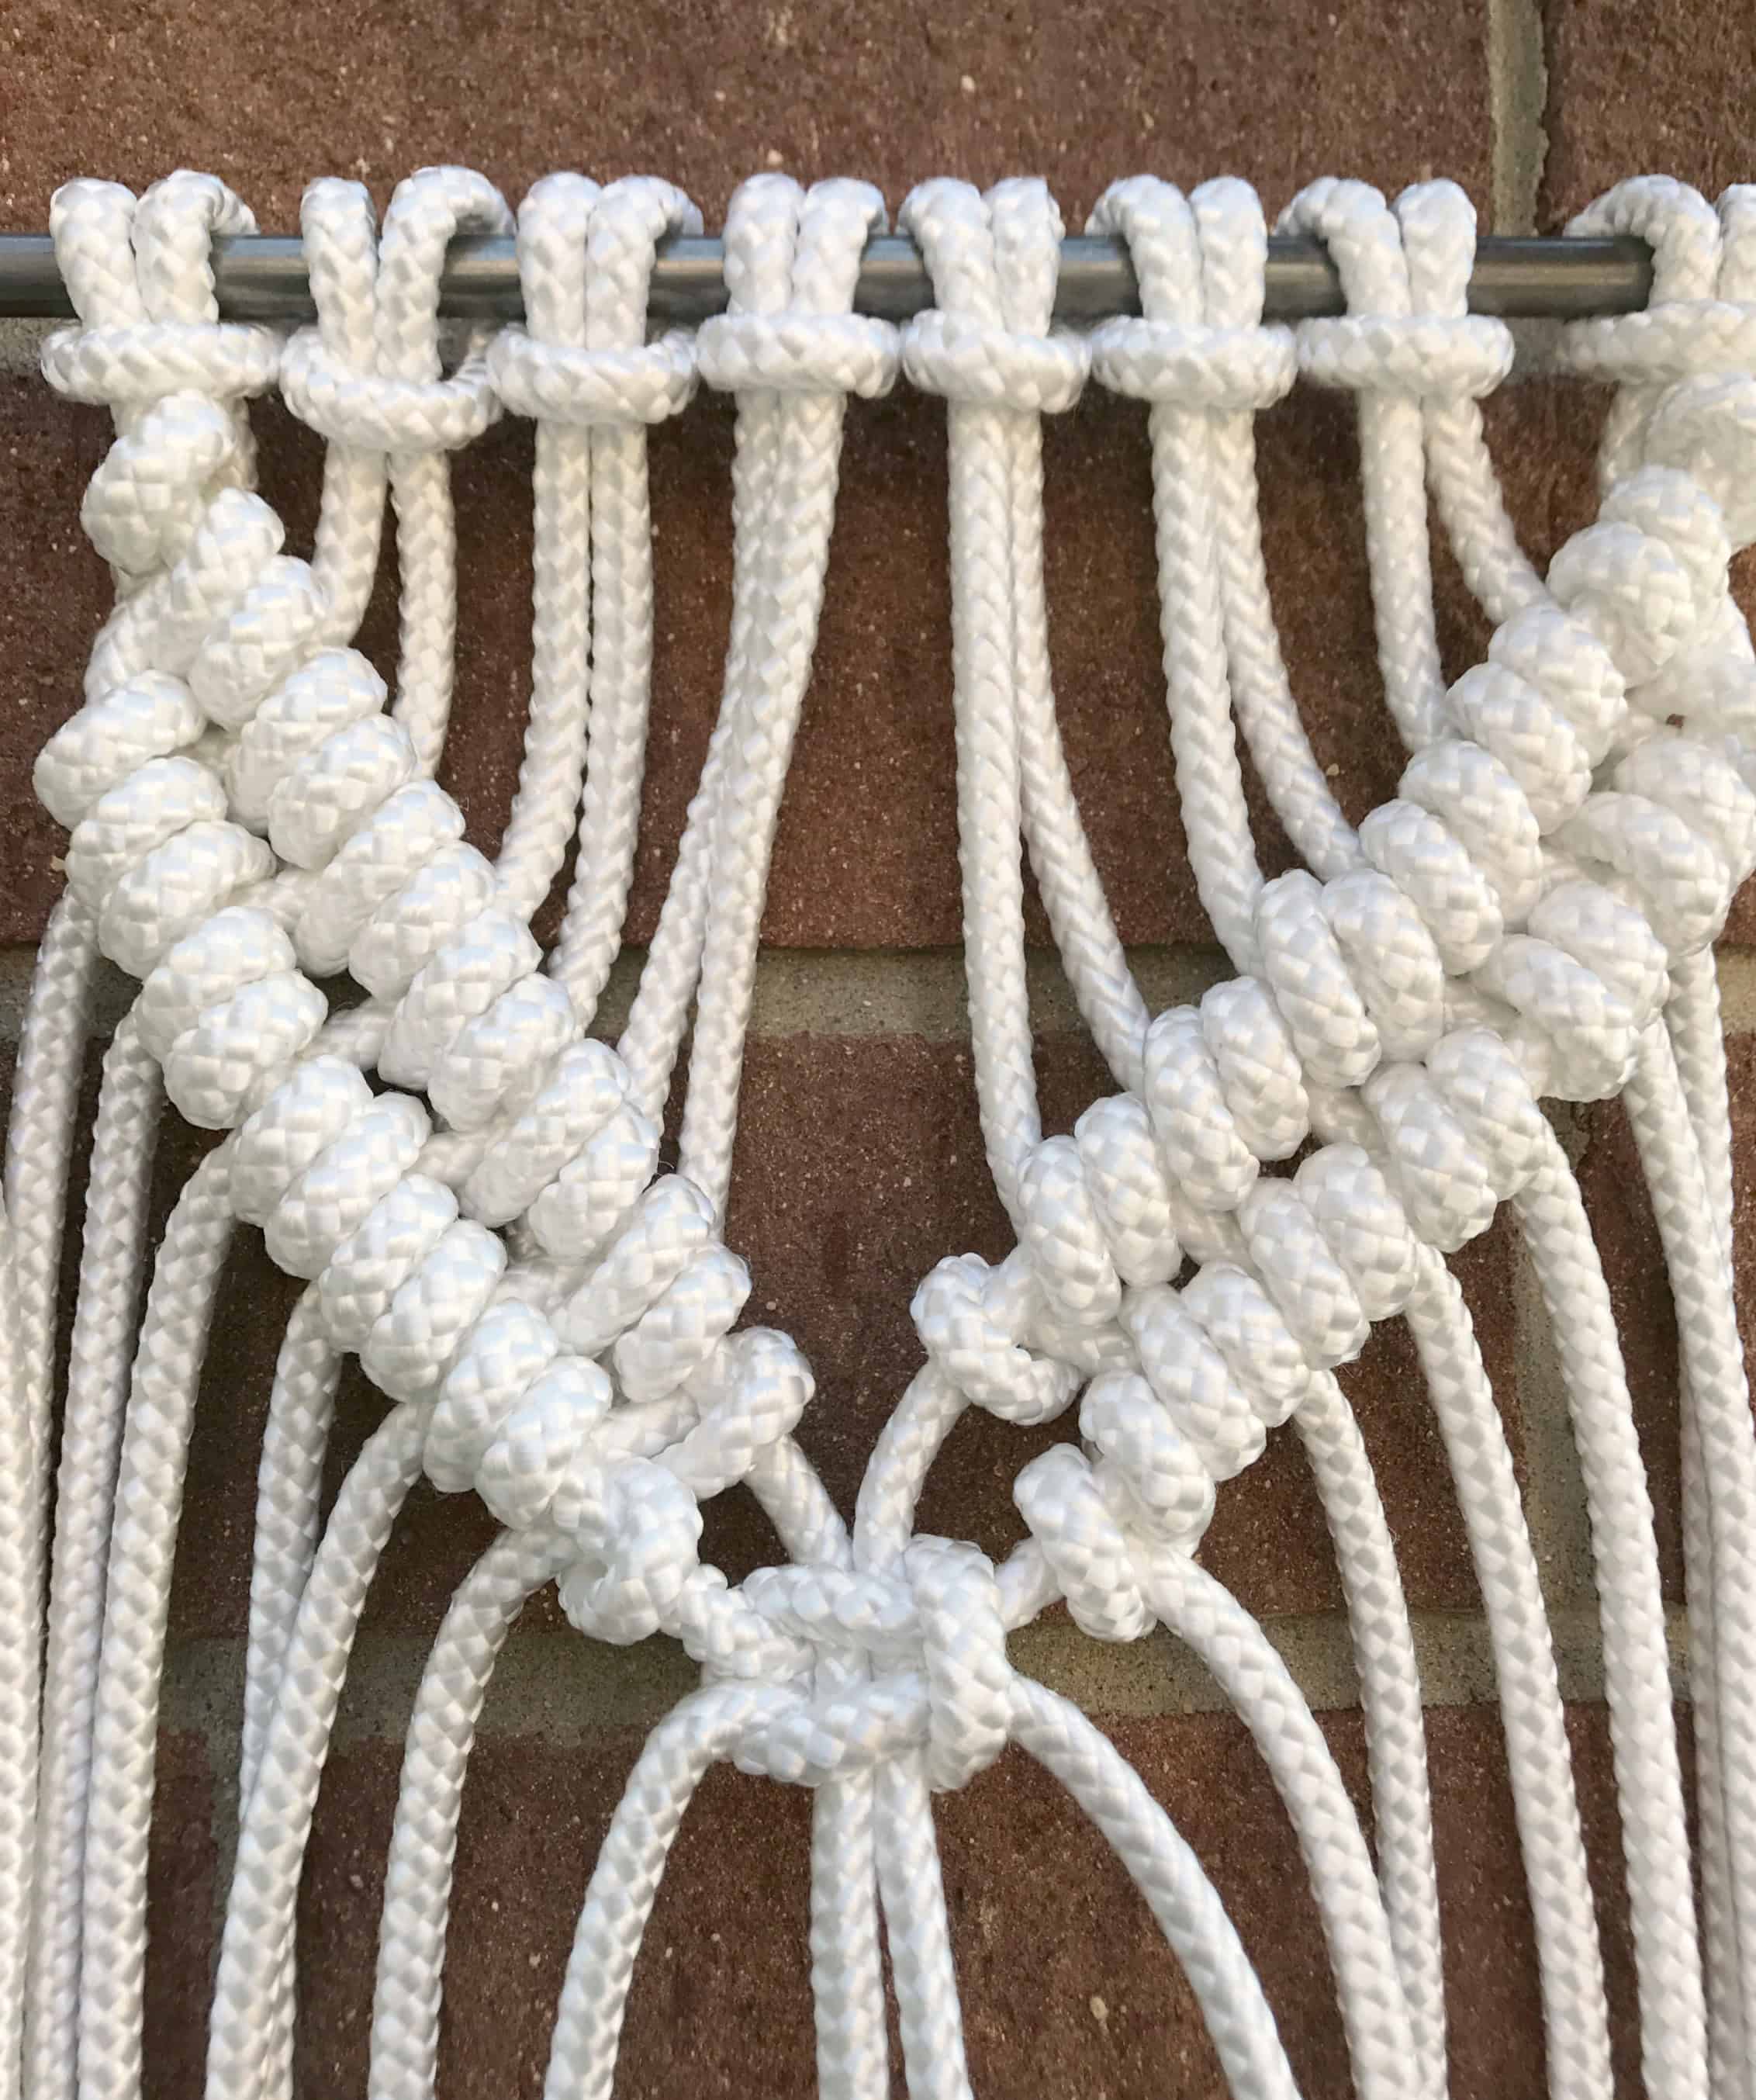
Cut 32 pieces of rope, each measuring approximately 120 inches. Tie them onto the pole as shown below, using the Lark’s Head Knot.
step 2
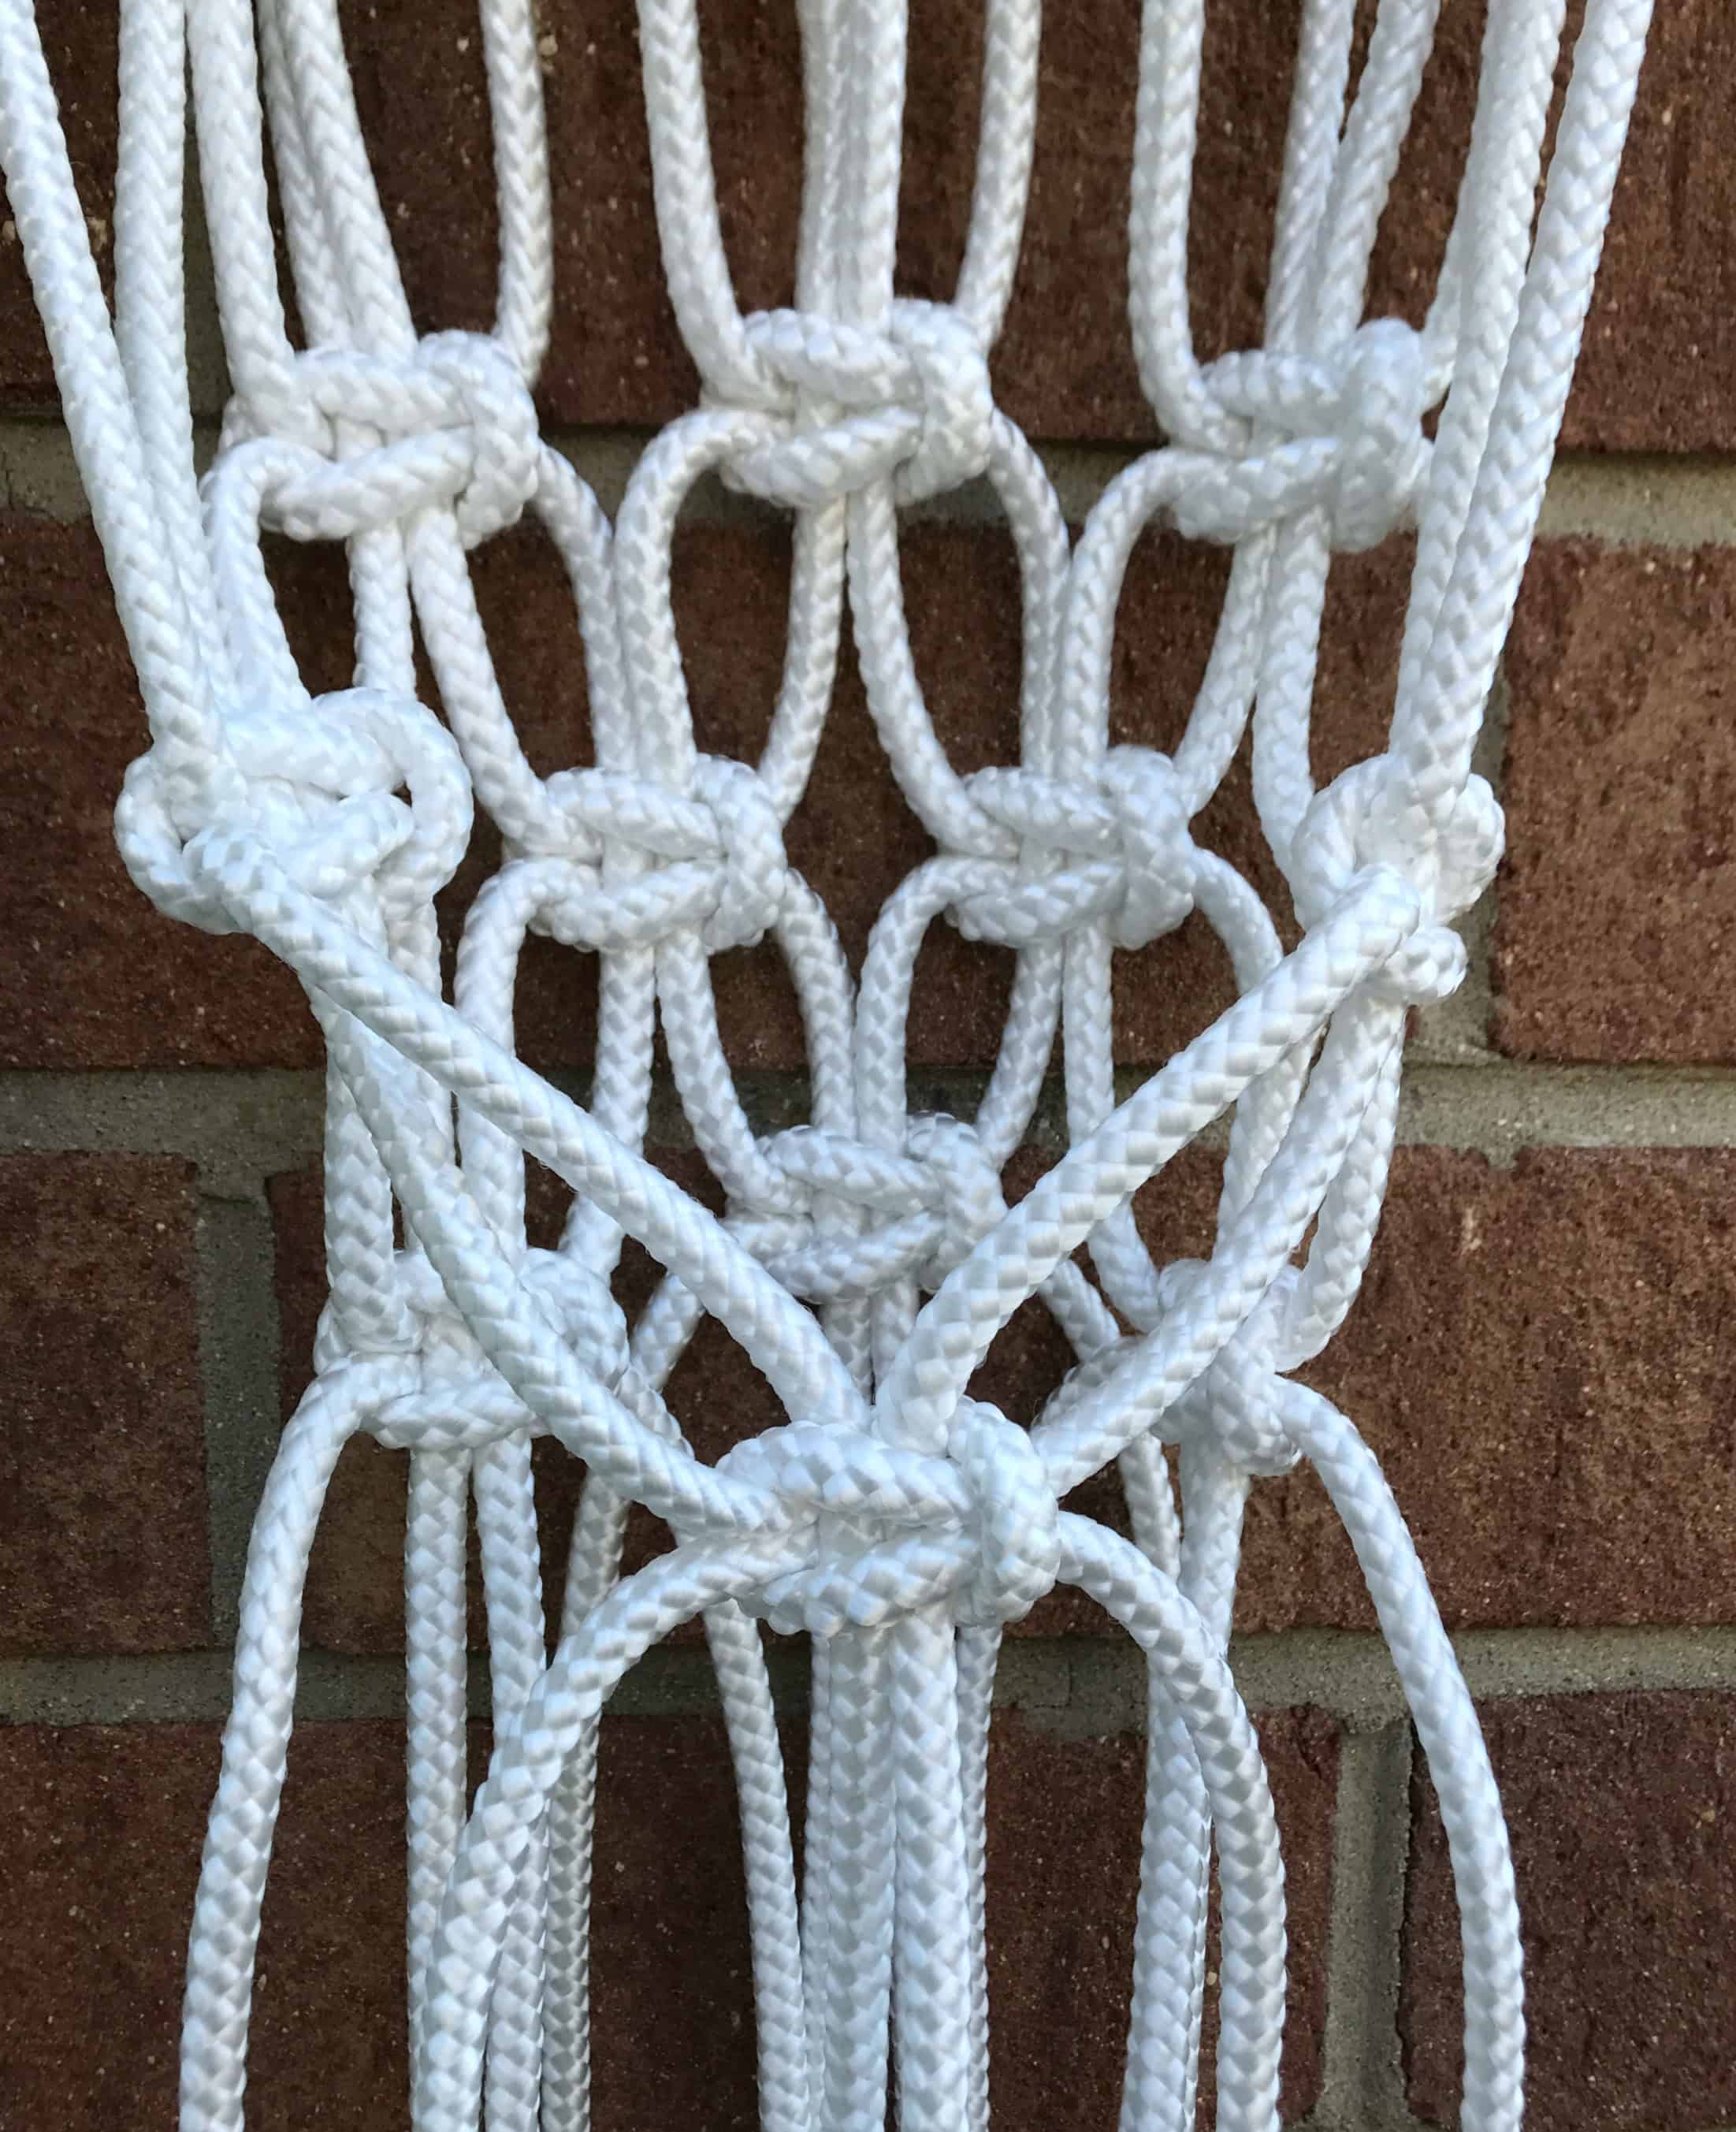
Group the cords into 4 sections of 16 (individual cords). Using the Half Hitch Knot, weave a “V” shape into each section.
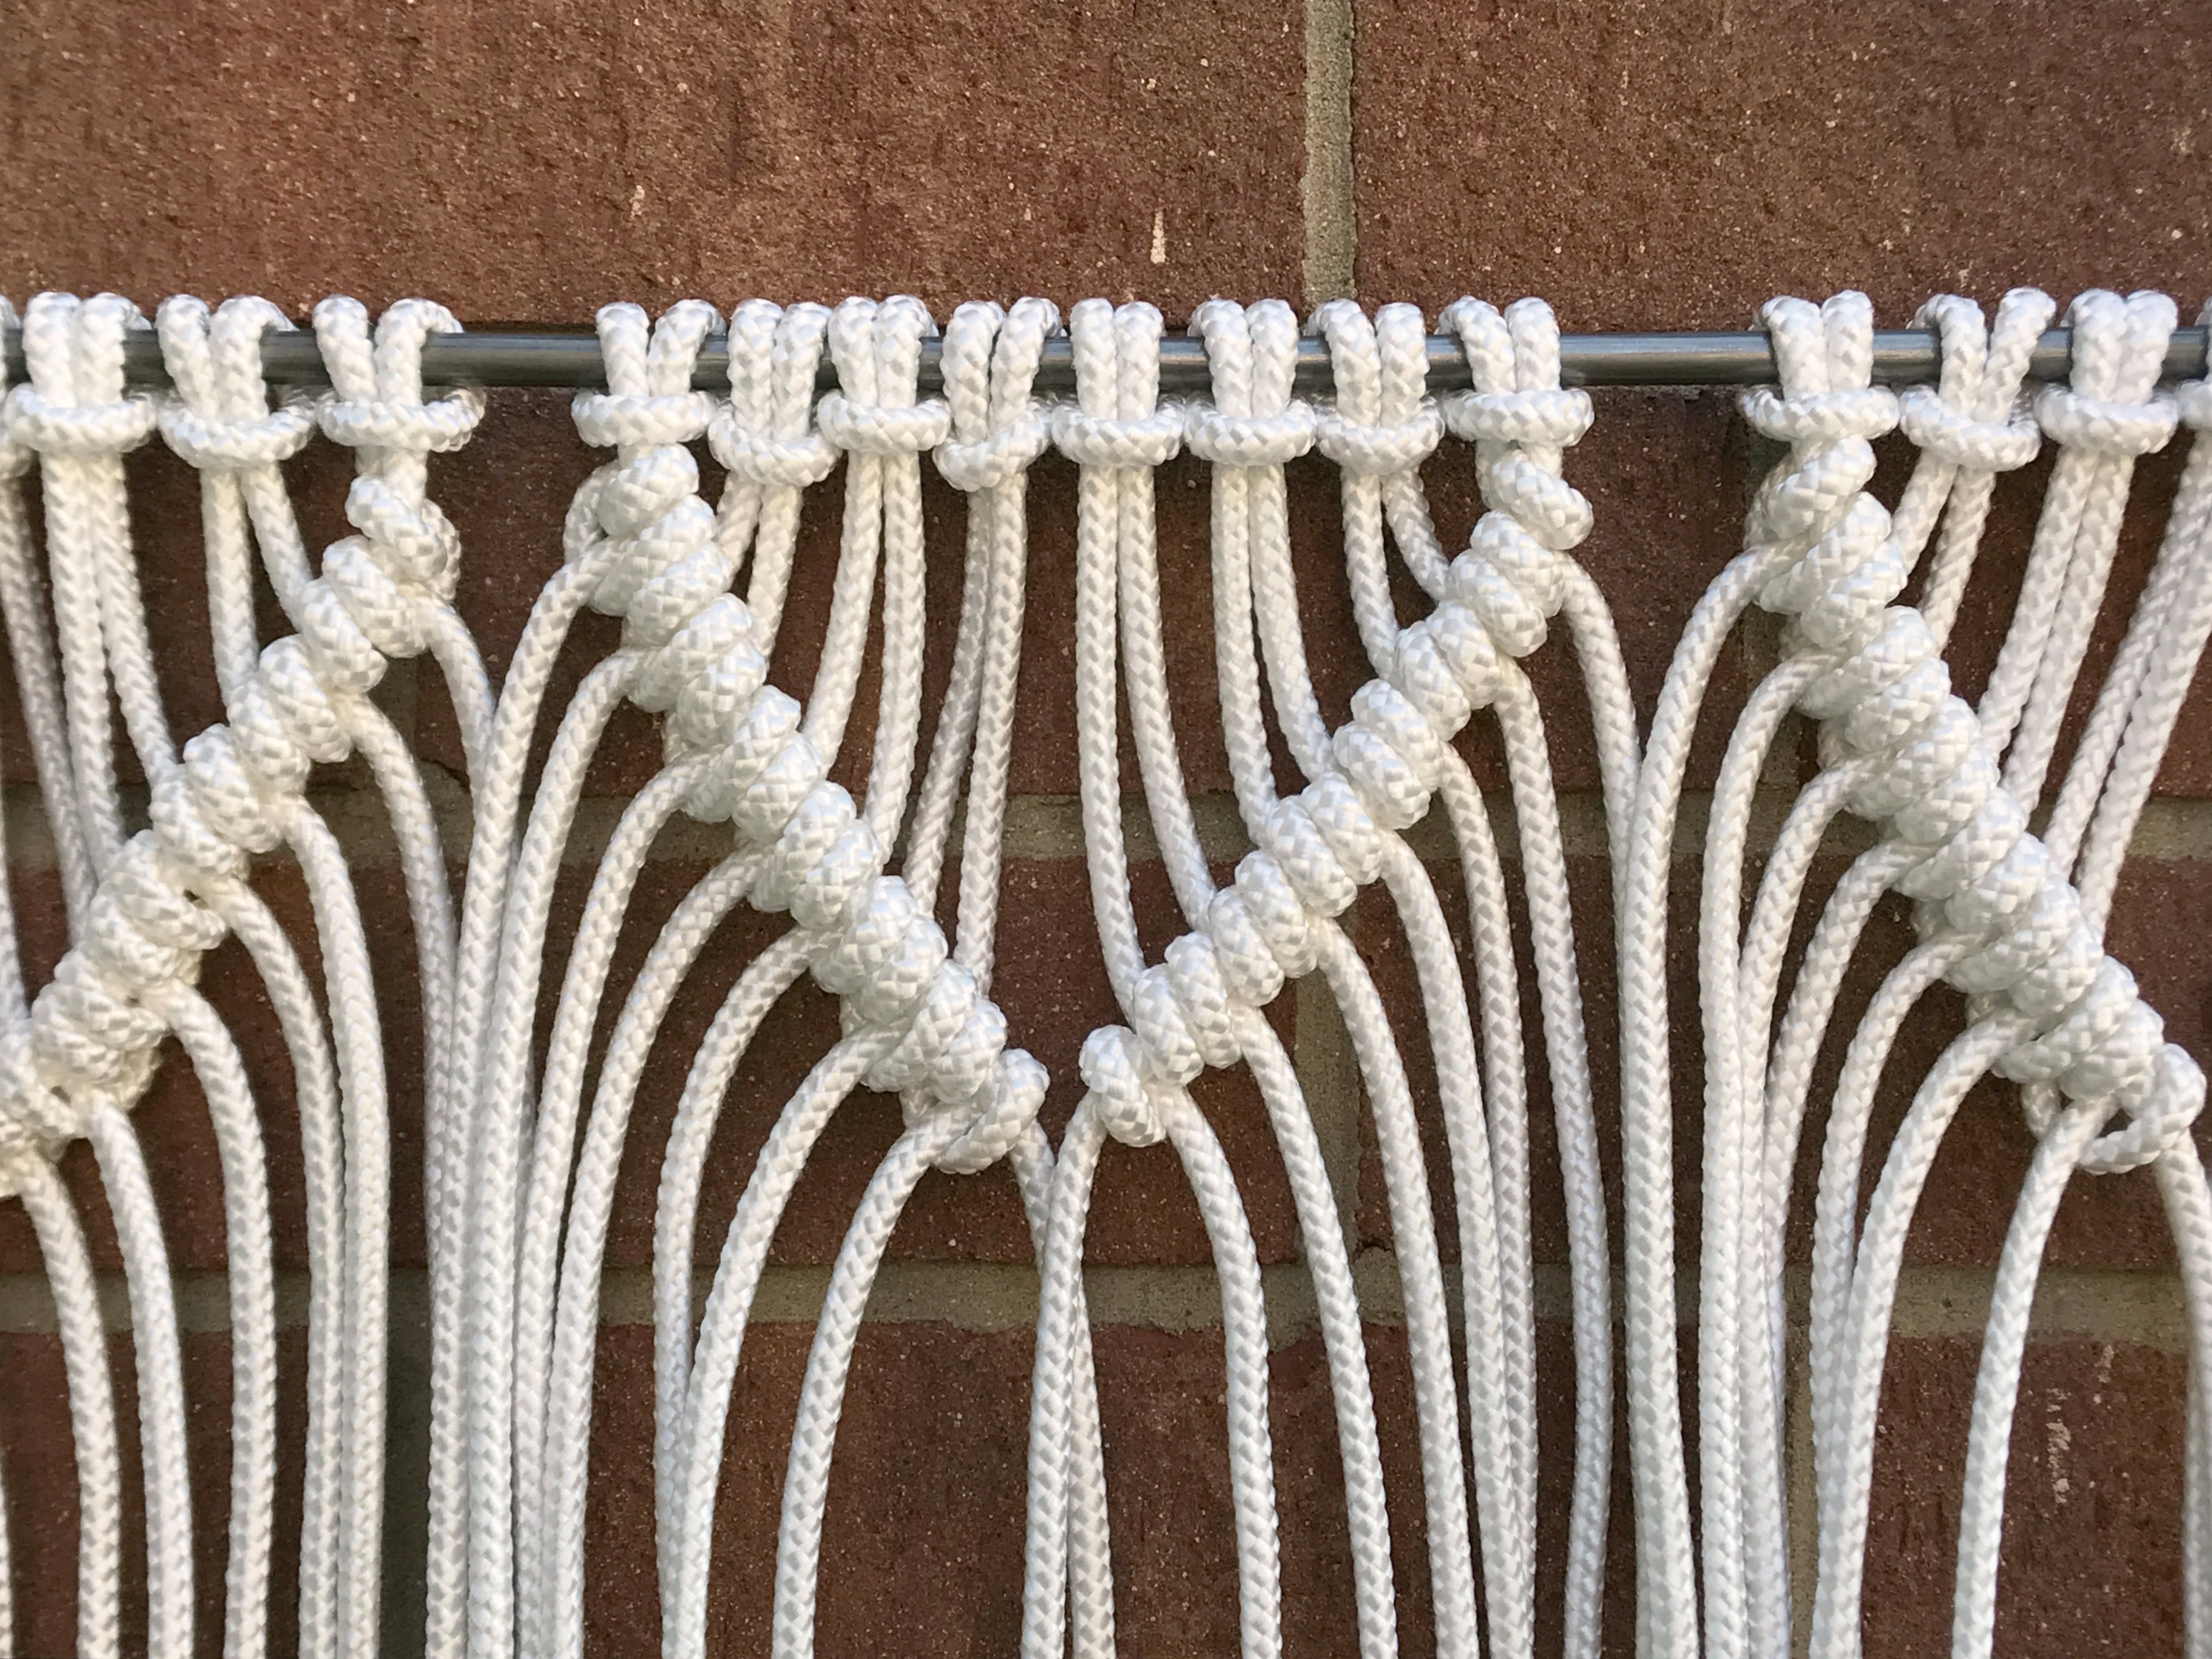
step 3
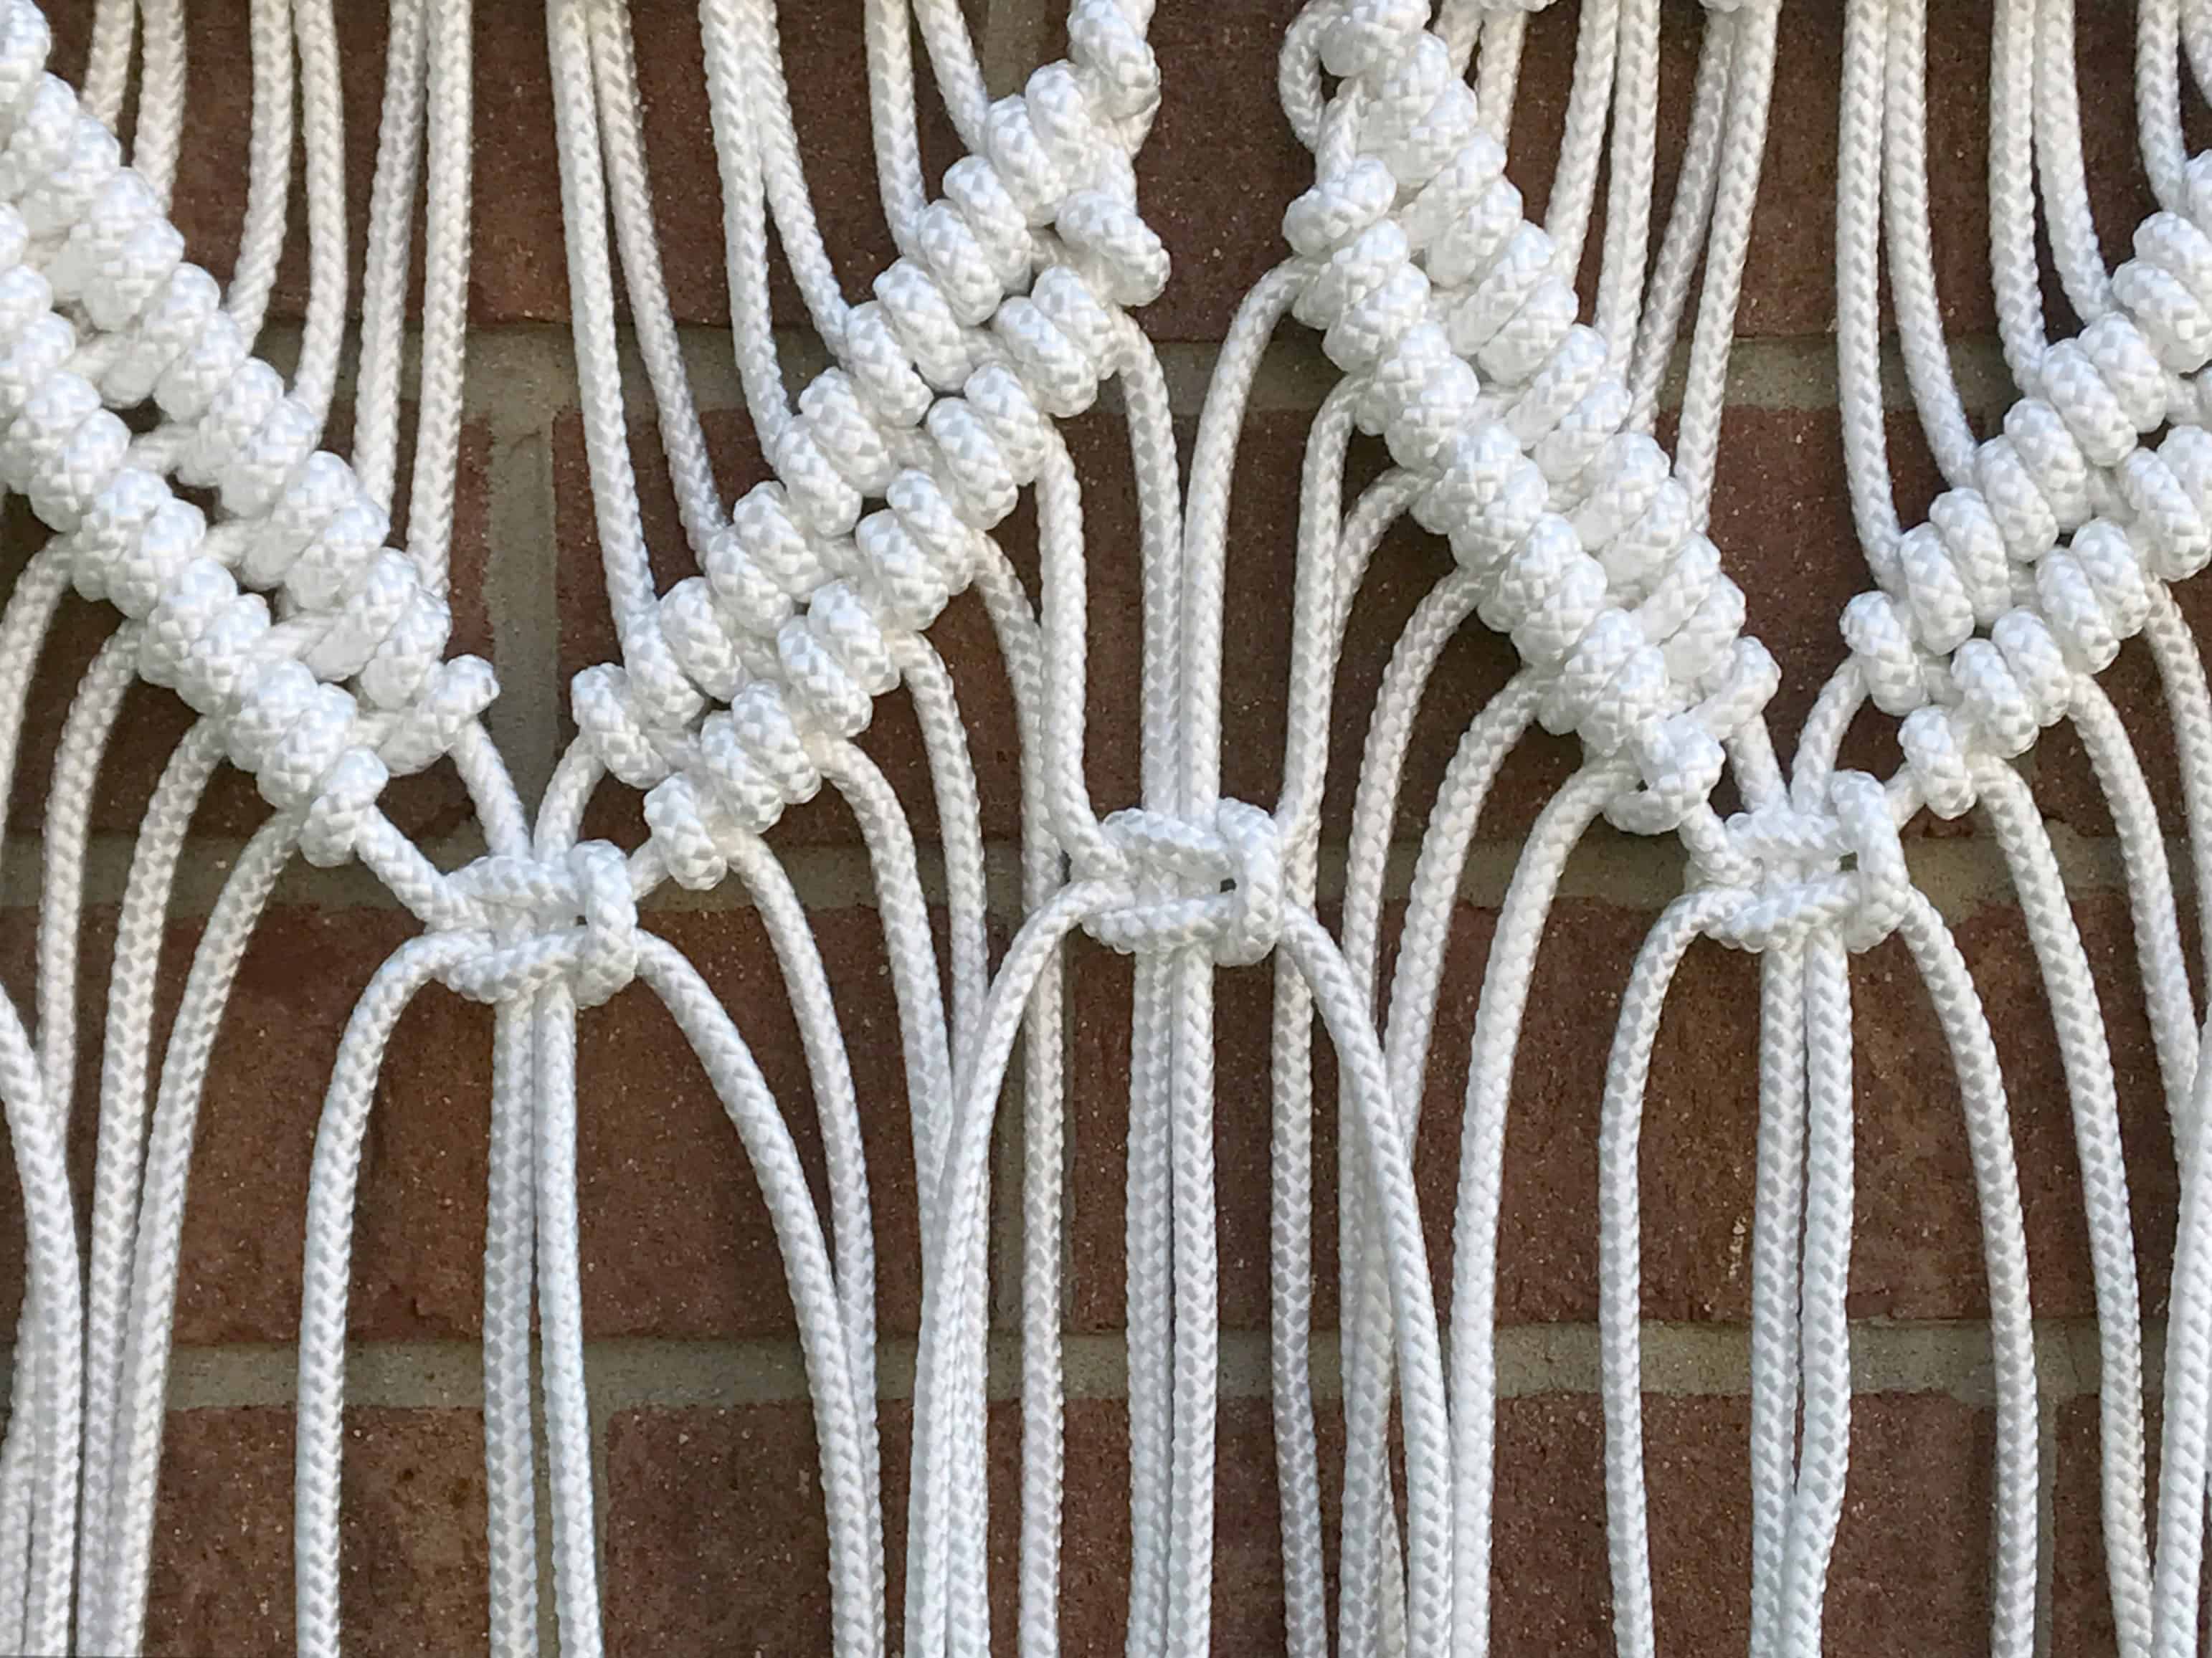
Repeat a second row of “V” shaped Half Hitch Knots for all 4 sections.

Then tie a Square Knot at the bottom center of each of the 4 Vs.
step 4
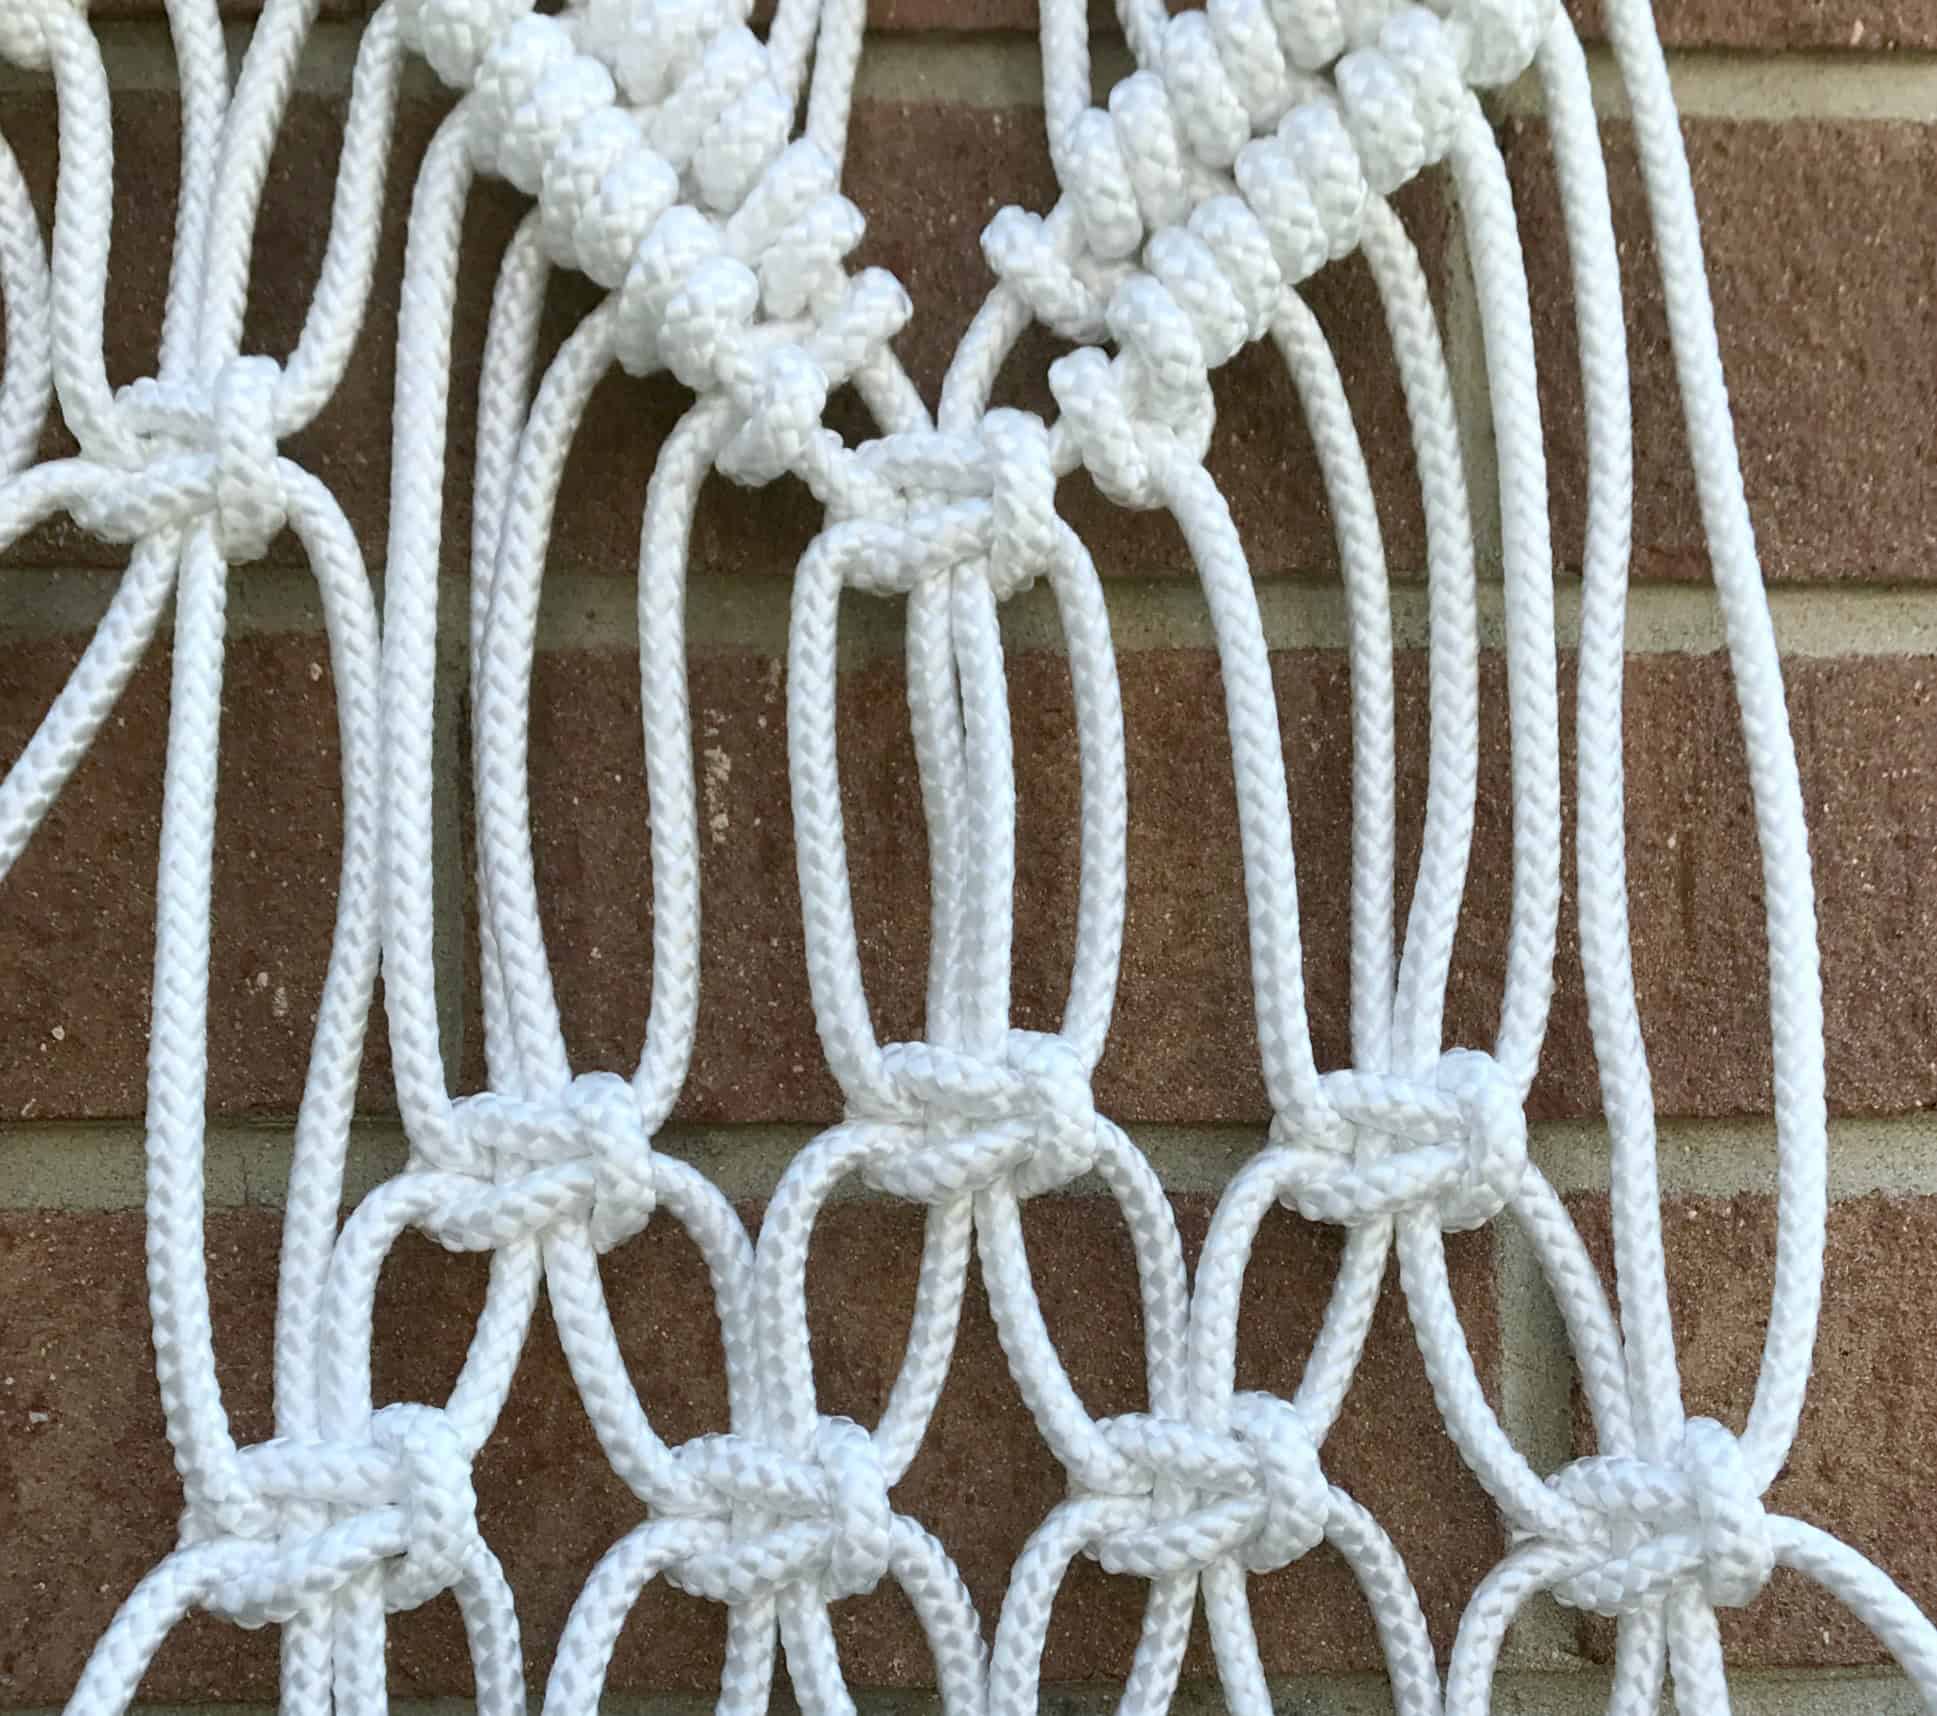
In the 3 spaces between the Vs, tie another Square Knot (3 in total as shown).

step 5
Beginning with the 16 individual cords on the far-right side, about 4 inches down from center V knot, make a row of 3 Square Knots. Let the 2 individual cords on each end hang loose.

step 6
Now about 2.5 inches beneath that row, make a second row of 4 Alternating Square Knots.
step 7
About 2.5 inches down from the second row, make a third row of 3 Alternating Square Knots.

step 8
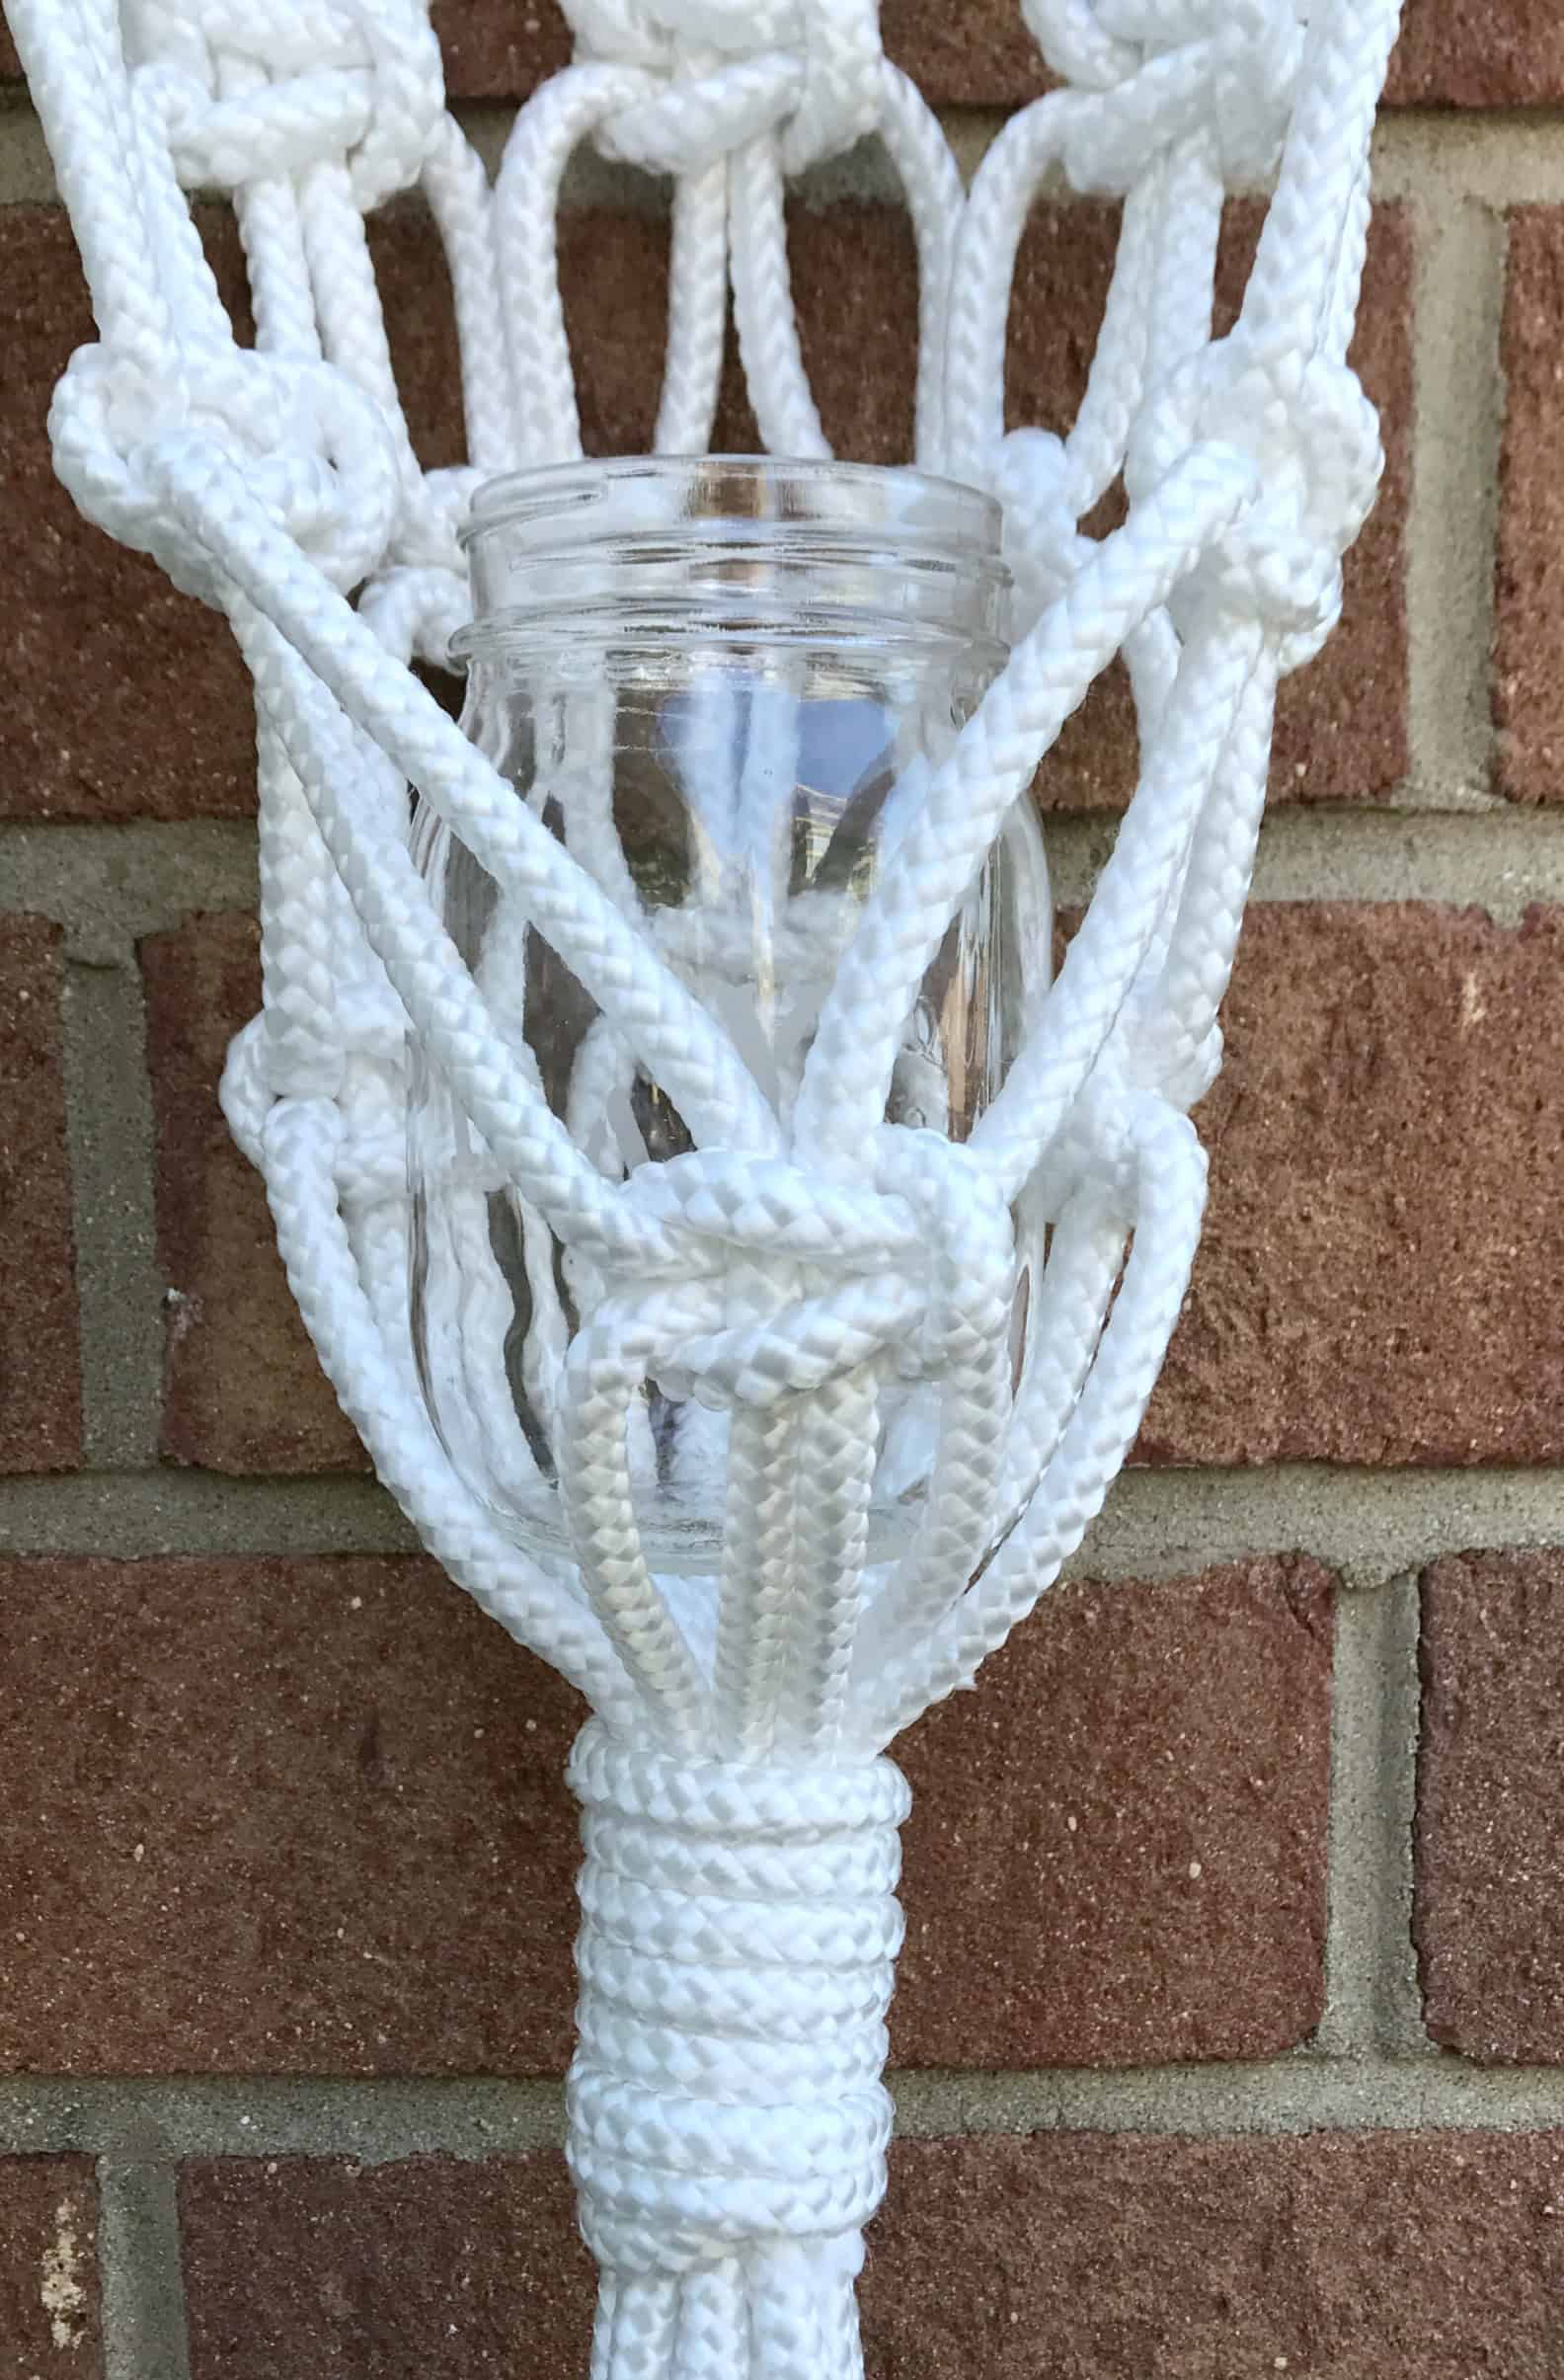
To create the “pocket” for a flowerpot or mason jar, using the 2 loose cords on each end of the last row, make a fourth Square Knot. Bring the 2 cords from each end around to the front; using those 4 cords, make the Square Knot. This creates a circular shape to this section of the wall hanging.
step 9
Now you are ready to finish the pocket with a Wrapped Knot. About 3 inches down from the last row of Square Knots, tie a Wrapped Knot. Then cut the rope ends to your desired length.
step 10
Now you have created a pocket for your first flowerpot, using the 16 cords on the far right of your wall hanging (the 4th section). Repeat steps 5 through 8 for the 16 cords on the far left of your wall hanging (1st section).
step 11
For the second set of 16 cords, follow steps 5 through 8. Now about 2.5 inches down from the third row of Square Knots (which has taken on a circular shape), make another row of Alternating Square Knots.
Then, about 2 inches down tie a Wrapped Knot. You now have 3 sections done!

step 12
You should have pockets for 3 flowerpots done (sections 1,2 and 4). For the remaining third section of 16 cords, follow steps 5 through 7. Then make a fourth row of 4 Alternating Square Knots. Again, make a fifth row of 3 Alternating Square Knots, and using the 2 loose cords on the ends, make another Square Knot in the front to create a circular feel for the pocket (see step 8).
Not quite done! Now make a sixth and final row of 3 Alternating Square Knots. Then make a Wrapped Knot to finish it off.

step 13
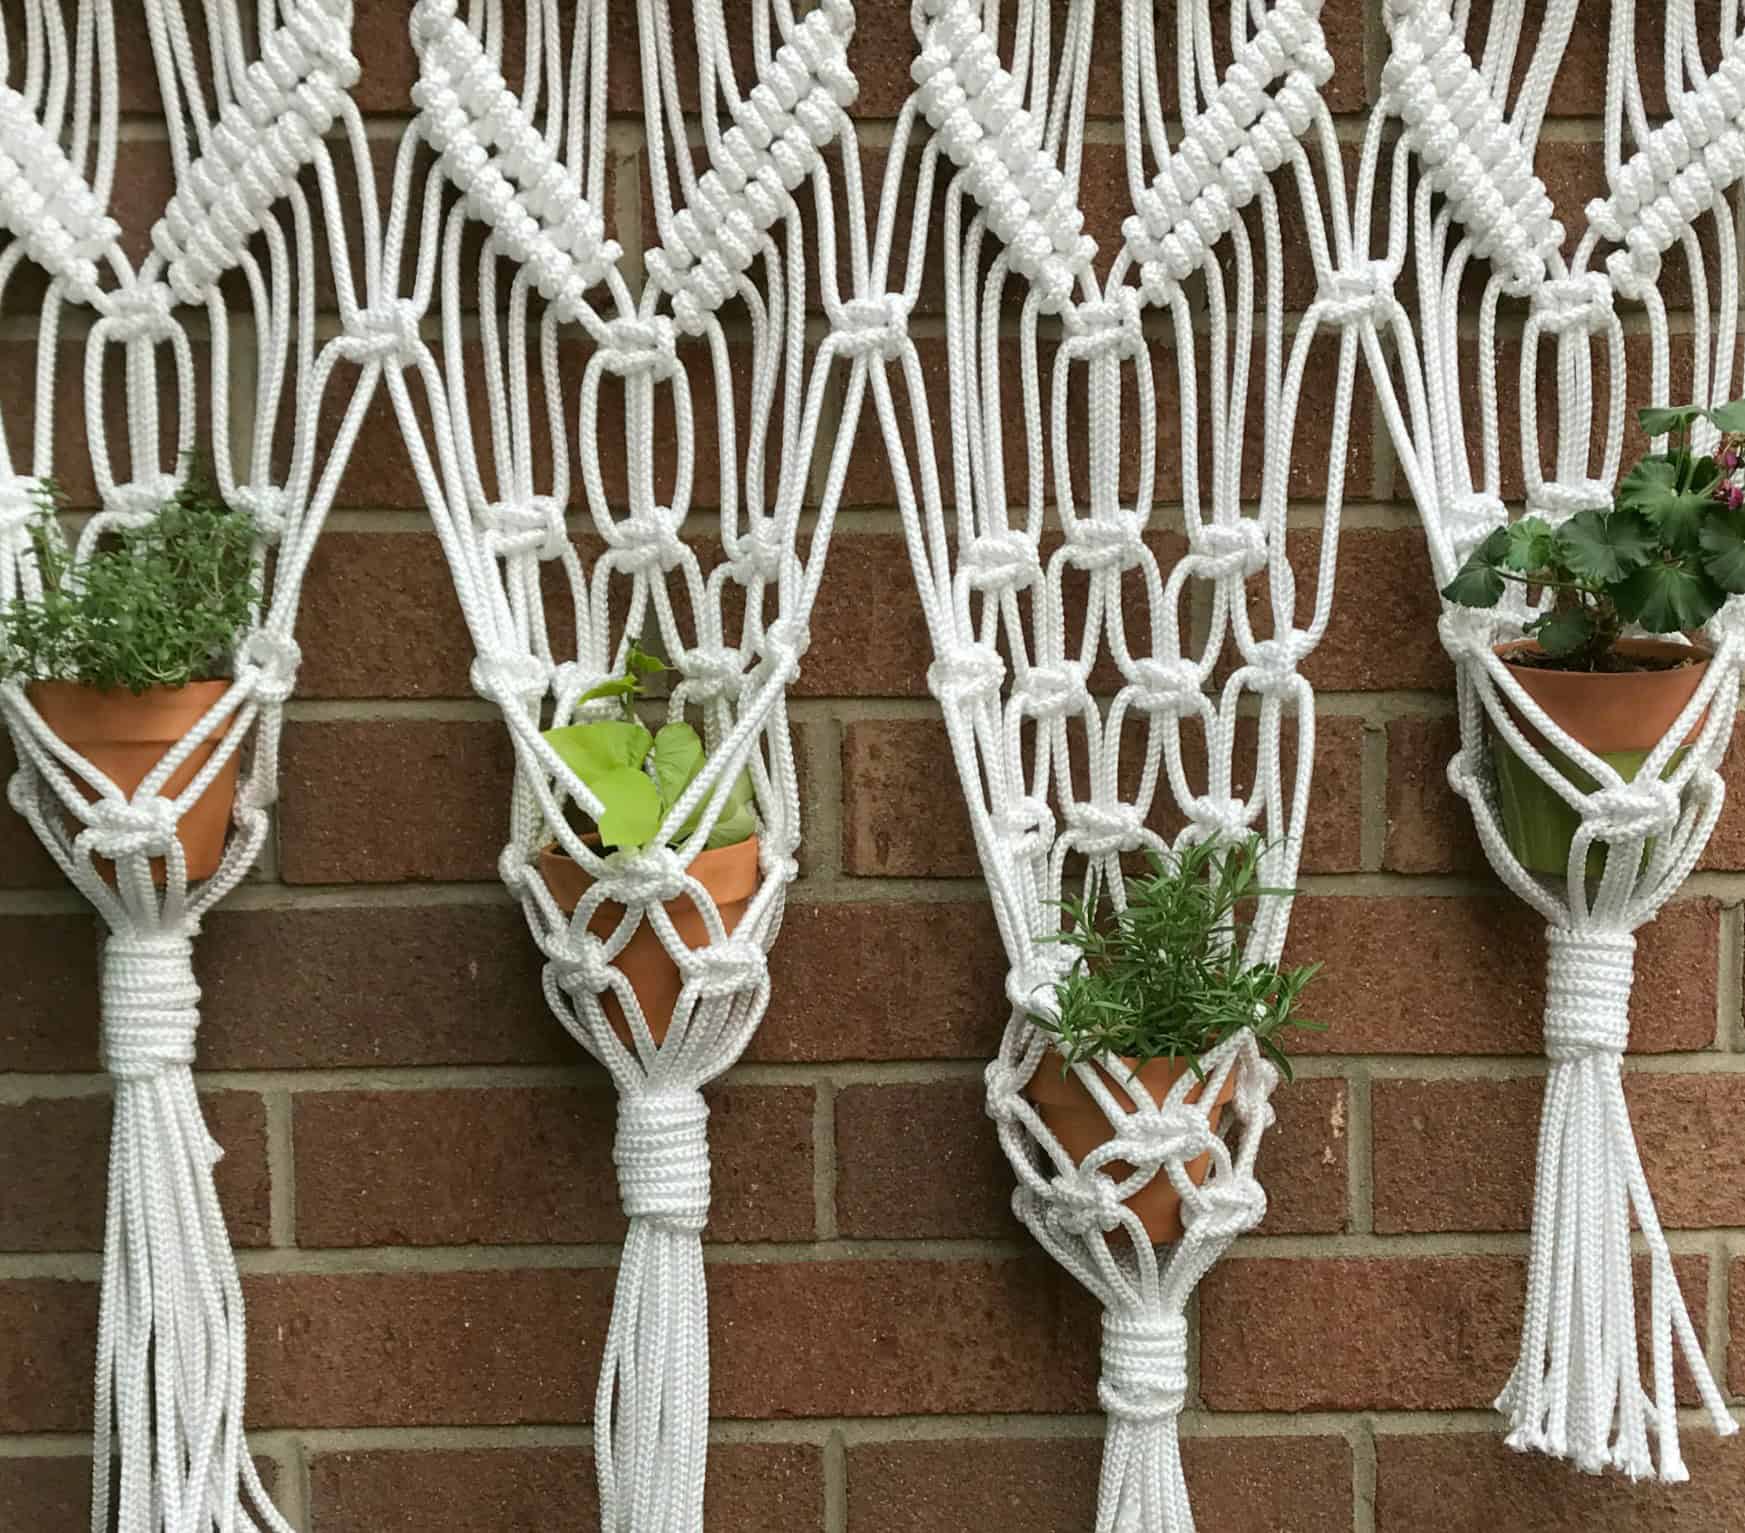
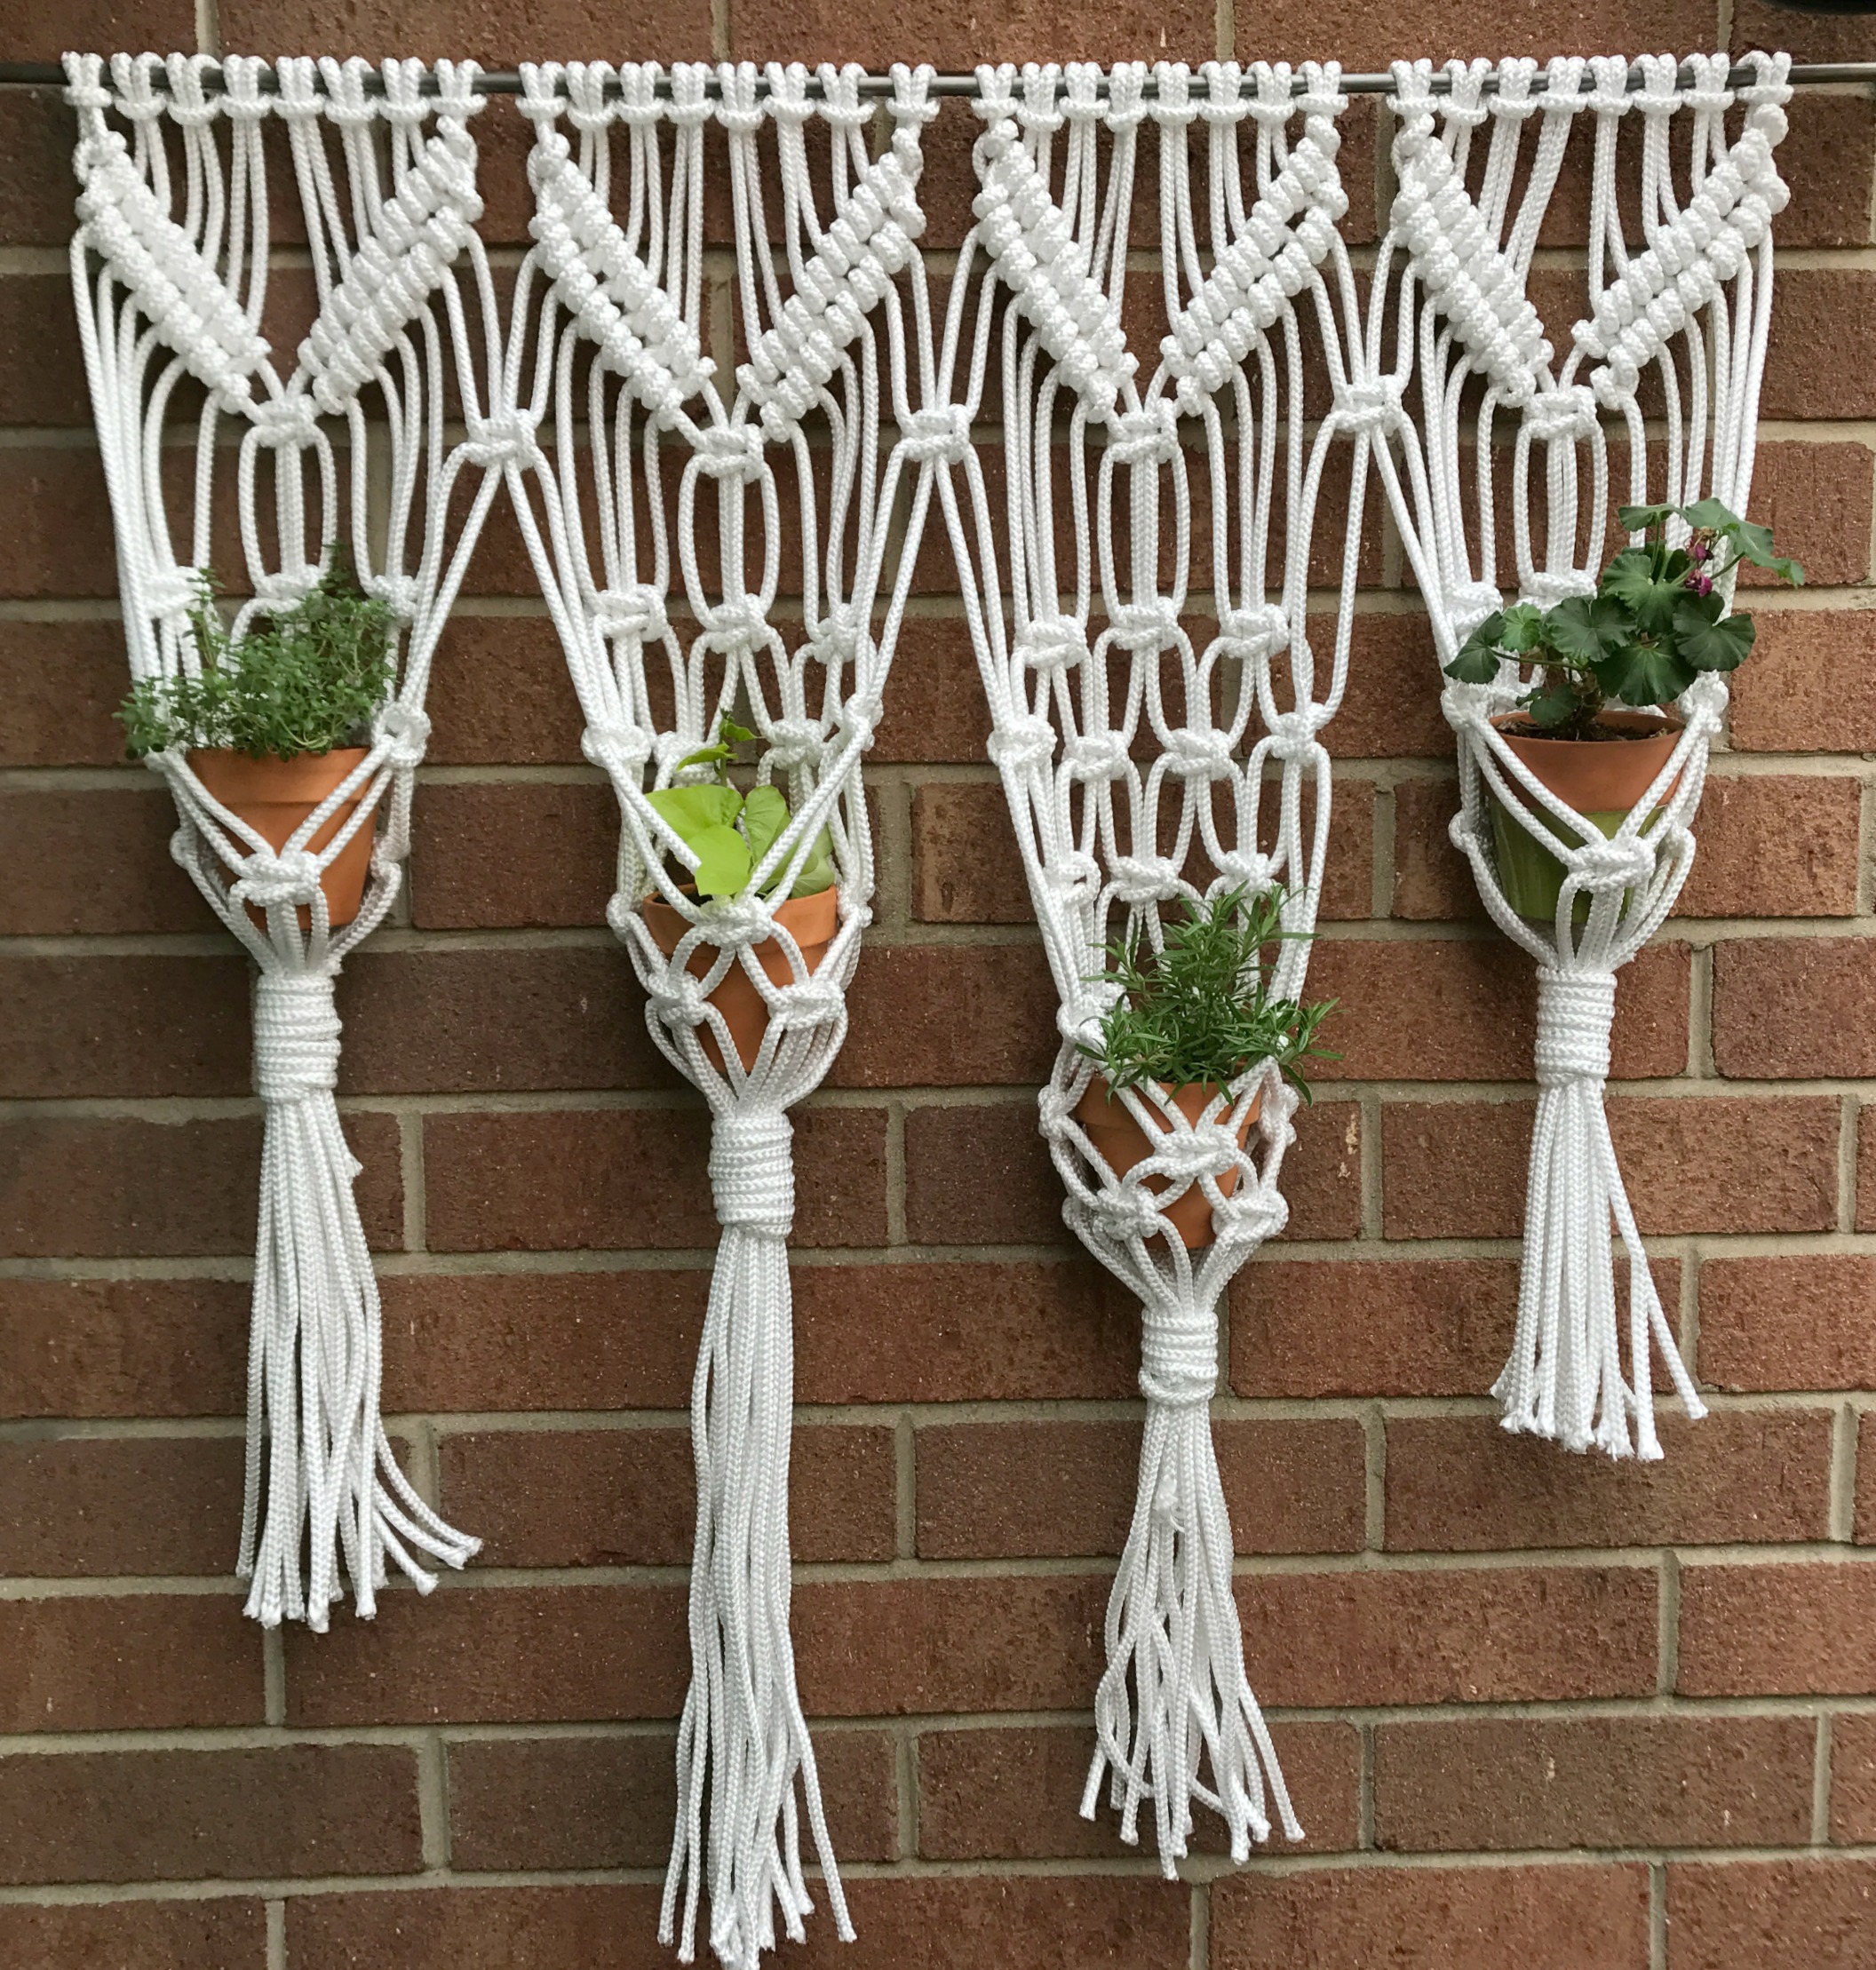
Your macrame hanging herb garden should now have 4 completed sections with pockets for flowerpots or mason jars. You can cut the tassels to any desired length. I like a staggered effect.
I used small ceramic pots that measured 2.5 inches bottom diameter and 4.5 inches top diameter. Fill them with dirt and your favorite herbs, then place them in the pockets. If you don’t want the maintenance of daily watering, use succulents planted in pretty containers instead. Better yet, even faux succulents would look beautiful (especially if you are displaying the wall hanging indoors.) This sweet macrame hanging herb garden was worth the work.
The biggest compliment is a little share – pin the photo below!
![]()
If you love macrame, check out these posts:
- an easy tutorial for a macrame wall hanging for beginners!
- make this macrame and terra cotta planter
- or try your hand at this sweet macrame and mason jar planter
I am always in AWE of your macrame creations, Wendy! This herb garden is just lovely. Thank you for sharing at Creatively Crafty. Creatively, Beth
Awe…thanks so much Beth!
Your macrame projects are always so lovely Wendy.
Thank you for sharing this at Create, Bake, Grow & Gather this week. I’m delighted to be featuring your projects at tonight’s party and pinning too.
Thanks Kerryanne!
This is so cool! I can barely lace my shoes, much less make something like this! 😉 Amazing!
thank you so much!
Pretty and functional! I stand in awe of your talent. Featuring when my link party opens.
Thanks Carol! You are so sweet.
This is absolutely beautiful! Just stunning. I’ll be featuring this post at Thursday Favorite Things today. 🙂
Thansk so much Pam.
Wow, this is so beautiful. I can’t wait to try this. My daughter would love it.
Congratulations, you are being featured on TFT. I hope you stop by. https://eclecticredbarn.blogspot.com/2025/05/awesome-diy-projects-on-tft.html
Hugs,
Bev
I LOVE THIS! I started macrame a few years ago and recently found all my supplies. I might give something like this a go!
Great! I’ve really enjoyed mine. Good luck!
Hi there, this is stunning and I’m definitely going to give it a go, please could you advise me on width of the cord in mm? Very excited to try!!
I love this pattern and the outcome. Really beautiful and perfect for small herb pots. Thanks for sharing.
This is fabulous! What are the finished dimensions, please, based on your length of cord used? Thank you!
Love this plant hanger !
Would like to make it but only using two plants, think the pattern will work out out if I just halve it? Start with 16 cords instead of 32?
Yes I do! Have fun with it! Would love to see pics!
Great I’ll give it a try ! Thanks
Mornin’, Wendy. I don’t do macrame (one of the few things I haven’t tried.) But I would love to try to make this. It is soooo lovely! However, knowing myself, it would never be finished, because I don’t have enough years left on this earth! (Not kidding – I’m 83.) Although I have finished a lot of sewing and craft projects, my house is crowded with WIPs and materials. Just wanted to let you know how beautiful your works are. I’m not a blogger, but I’ve just subscribed to yours and am looking forward to enjoying more of ’em!
Thank you for such kind words! So happy you are following my blog!
This is a lovely use of macrame. I love it when I was a kid back in the 70’s and am so happy it has had a revival. It’s great to see new and innovative ways of using it.
Thanks Julie! It’s kind of addicting!
Hi Wendy, just to let you know your lovely planter is one of the features at this weeks Handmade Monday 🙂
Thanks so much Julie!!
Beautiful! I have never tried macrame, and I have read and re-read your directions, and feel like I am at a loss. I think I need to just take the plunge, bring the cording home and follow along step by step! I love that this is a macrame piece with a purpose (holding the pots) instead of just a wall hanging! Thanks so much for sharing at Celebrate Your Story!
I’m sure you can get the hang of macrame, as talented as you are😊
Your wall garden looks fantastic, I love the different heights of the pots. I really must start Macrame.
Thanks Claire! I think I’m becoming addicted!
A lovely, well explained project. Thank you for your generosity in sharing ideas
Glad you stopped by Carla!
I love the way this turned out! Thanks for sharing!
Thank you Valerie!
Summer is coming to an end, but you can relive it all year long with this indoor hanging herb garden. (Hello, pasta with fresh pesto in December!) Plus, your project combines fashionable material in a super easy step-by-step guide. Thanks 🙂
Thank you!